
How to Bulk Generate and Send Personalized Invitations from a CSV File Using Bannerbear and WhatsApp Cloud API (Node.js)
Contents
When it comes to sending invitations for personal events, WhatsApp beats email hands down. Email feels formal and can easily get lost in a busy inbox, while WhatsApp is where people chat daily with family and friends (WhatsApp’s open rate is over 90%, compared to just around 20% for emails!). It’s also more casual and instant. Guests can reply and confirm attendance straight from the chat, or ask questions if they have any.
If you’re building applications like wedding planners, event organizers, or invitation platforms, integrating this kind of feature can add a warm, personal touch while keeping things automated:
- The user uploads a CSV file with guest names and phone numbers.
- Your app automatically generates personalized invitation messages with images for each guest.
- Then, it sends the invites directly to guests via WhatsApp.
Example
In this tutorial, we’ll walk you through how to build this feature. We’ll use Bannerbear for generating the invitation images and the WhatsApp Cloud API to send them out.
🐻 Bear Tip: We’ll use a wedding invitation as the example, but you can easily adapt the same setup for customers’ birthdays, company events, or even promotional messages.
What is Bannerbear
Bannerbear is an API that lets you automatically generate custom images, videos, and more from templates. It provides SDKs for Node.js, Ruby, and PHP, making it easy to integrate automated image generation into any project, including this one.
To generate images automatically, you need to create a design template that serves as a blueprint for creating the images in Bannerbear. A design template can consist of:
- Static objects - These remain the same in every generated image (e.g., a logo)
- Dynamic objects - These change based on data you provide (e.g., names, images)
Here’s an example of a Bannerbear design template:

By passing different data to the API, you can alter the values of the dynamic objects and automatically generate personalized images for each guest, showing their name on the invitation.
Pre-requisites
For this tutorial, you’ll need:
- Node.js and npm/yarn installed
- A Meta business account (with access to WhatsApp Manager)
- A Meta developer account
- A Bannerbear account (you can sign up here for 30 free API credits)
How to Bulk Generate and Send Personalized Invitations from a CSV File
Step 1. Create a Meta App
Go to the Meta Developer Apps dashboard and create a new app:
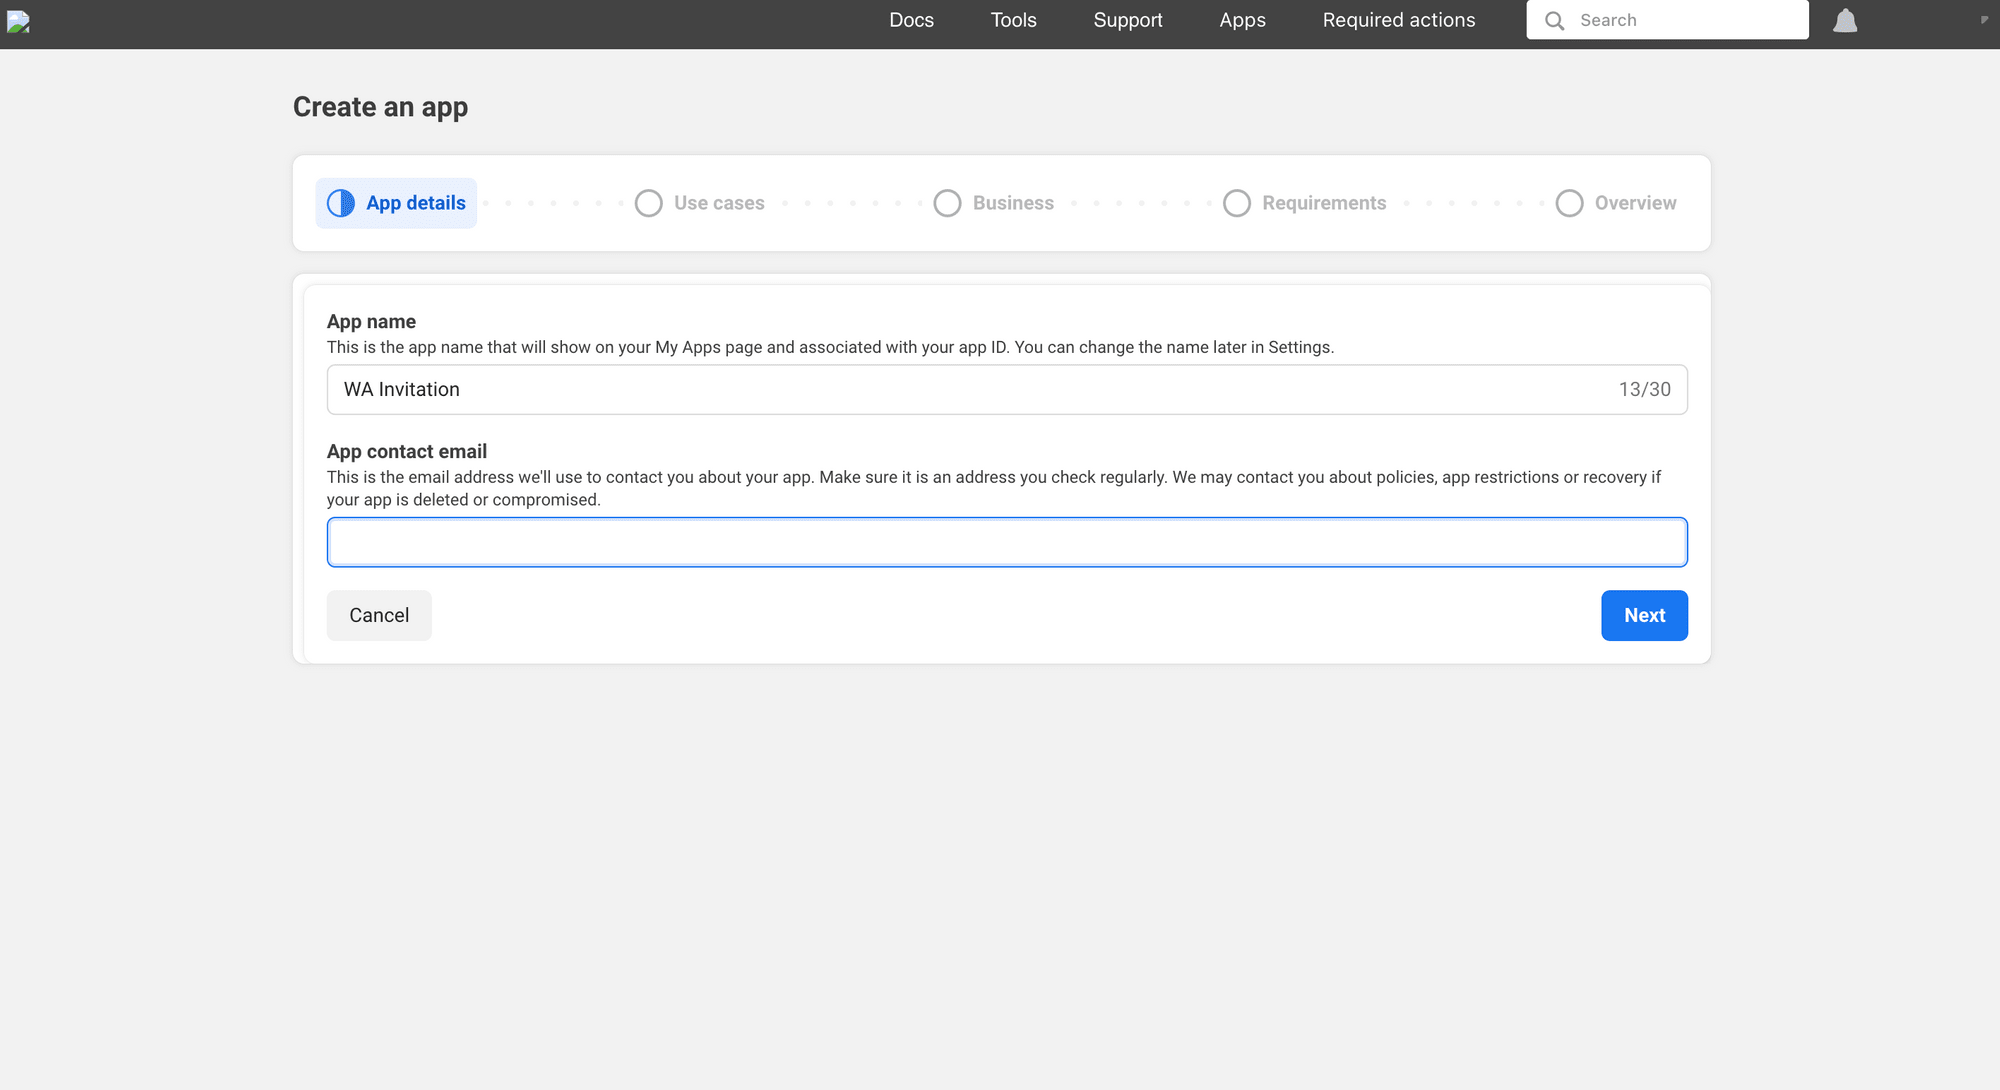
Fill in the information needed for your app:
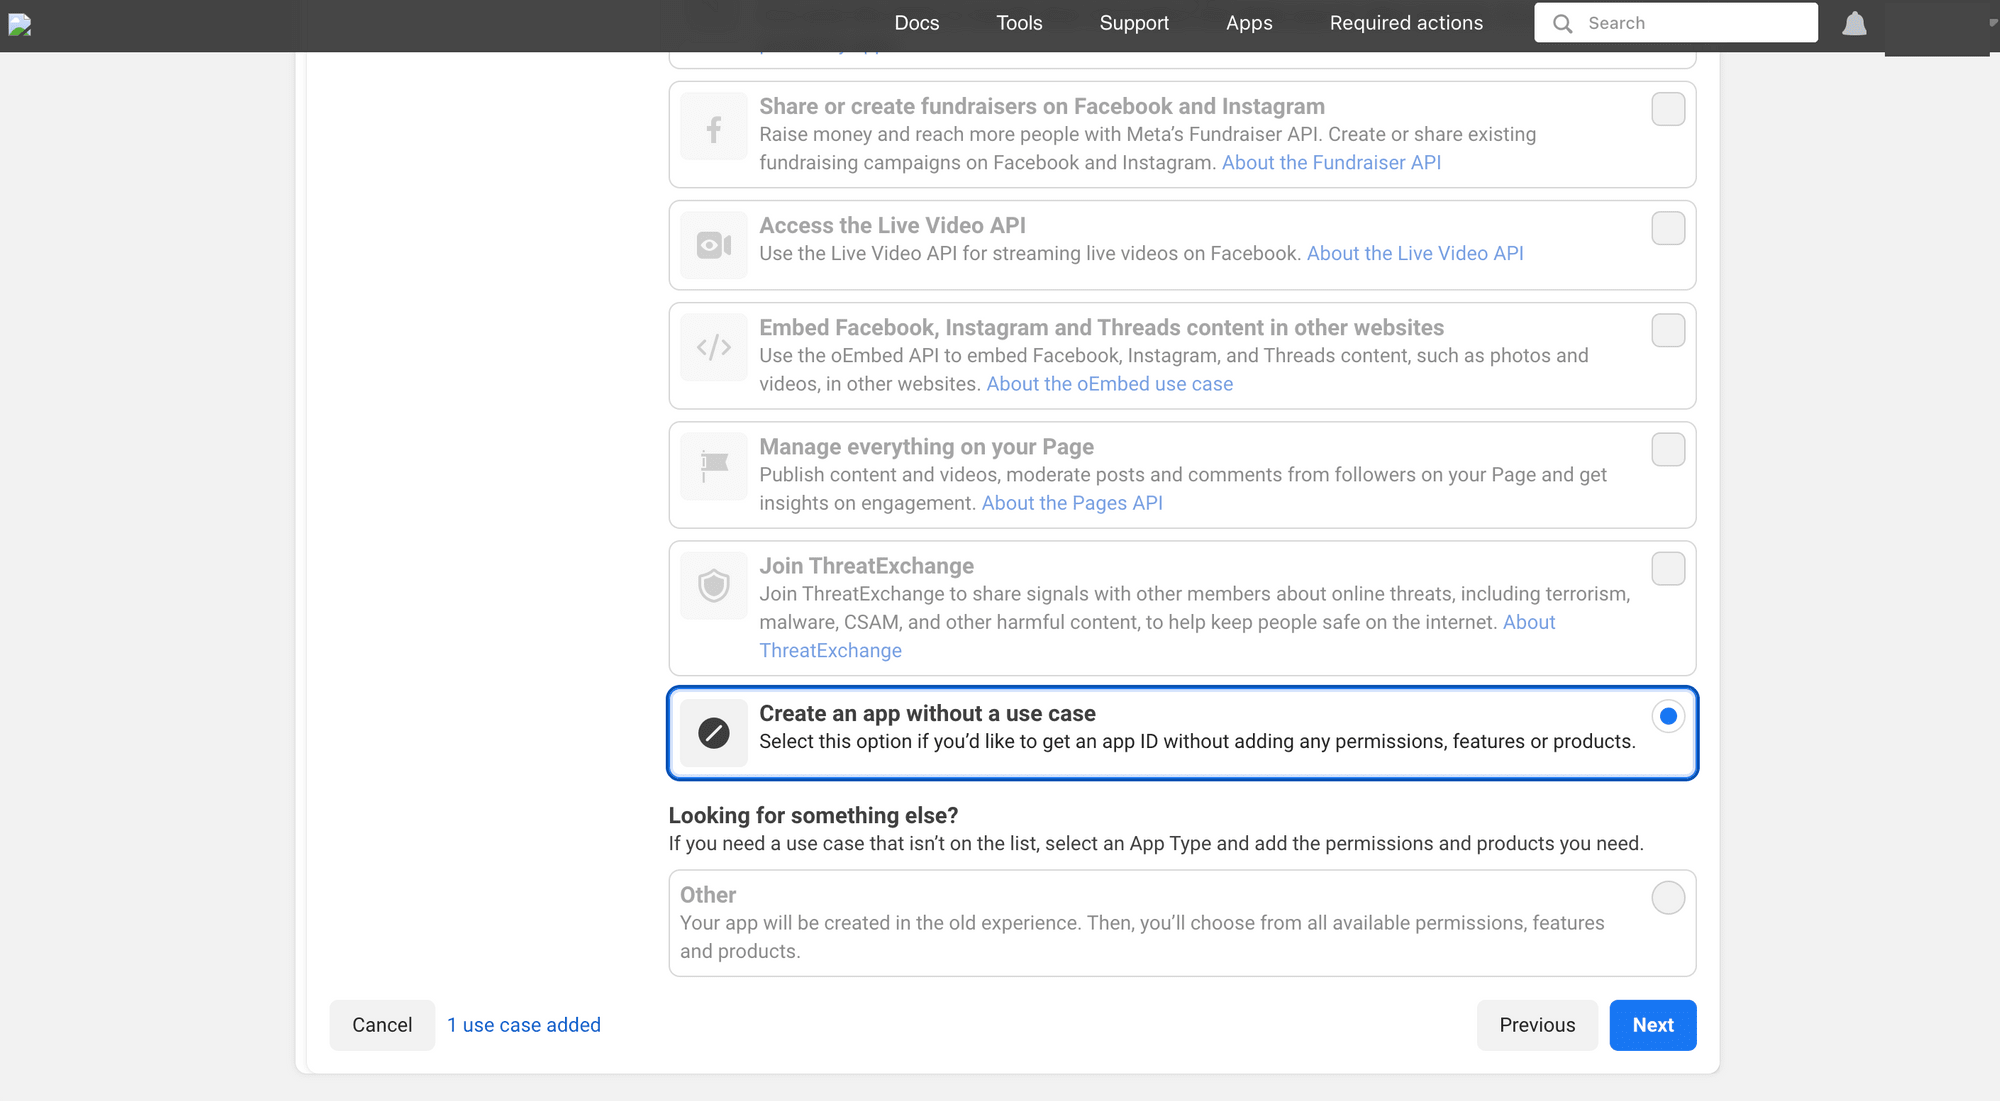
When asked to select a use case for the app, choose “Create an app without a use case” :
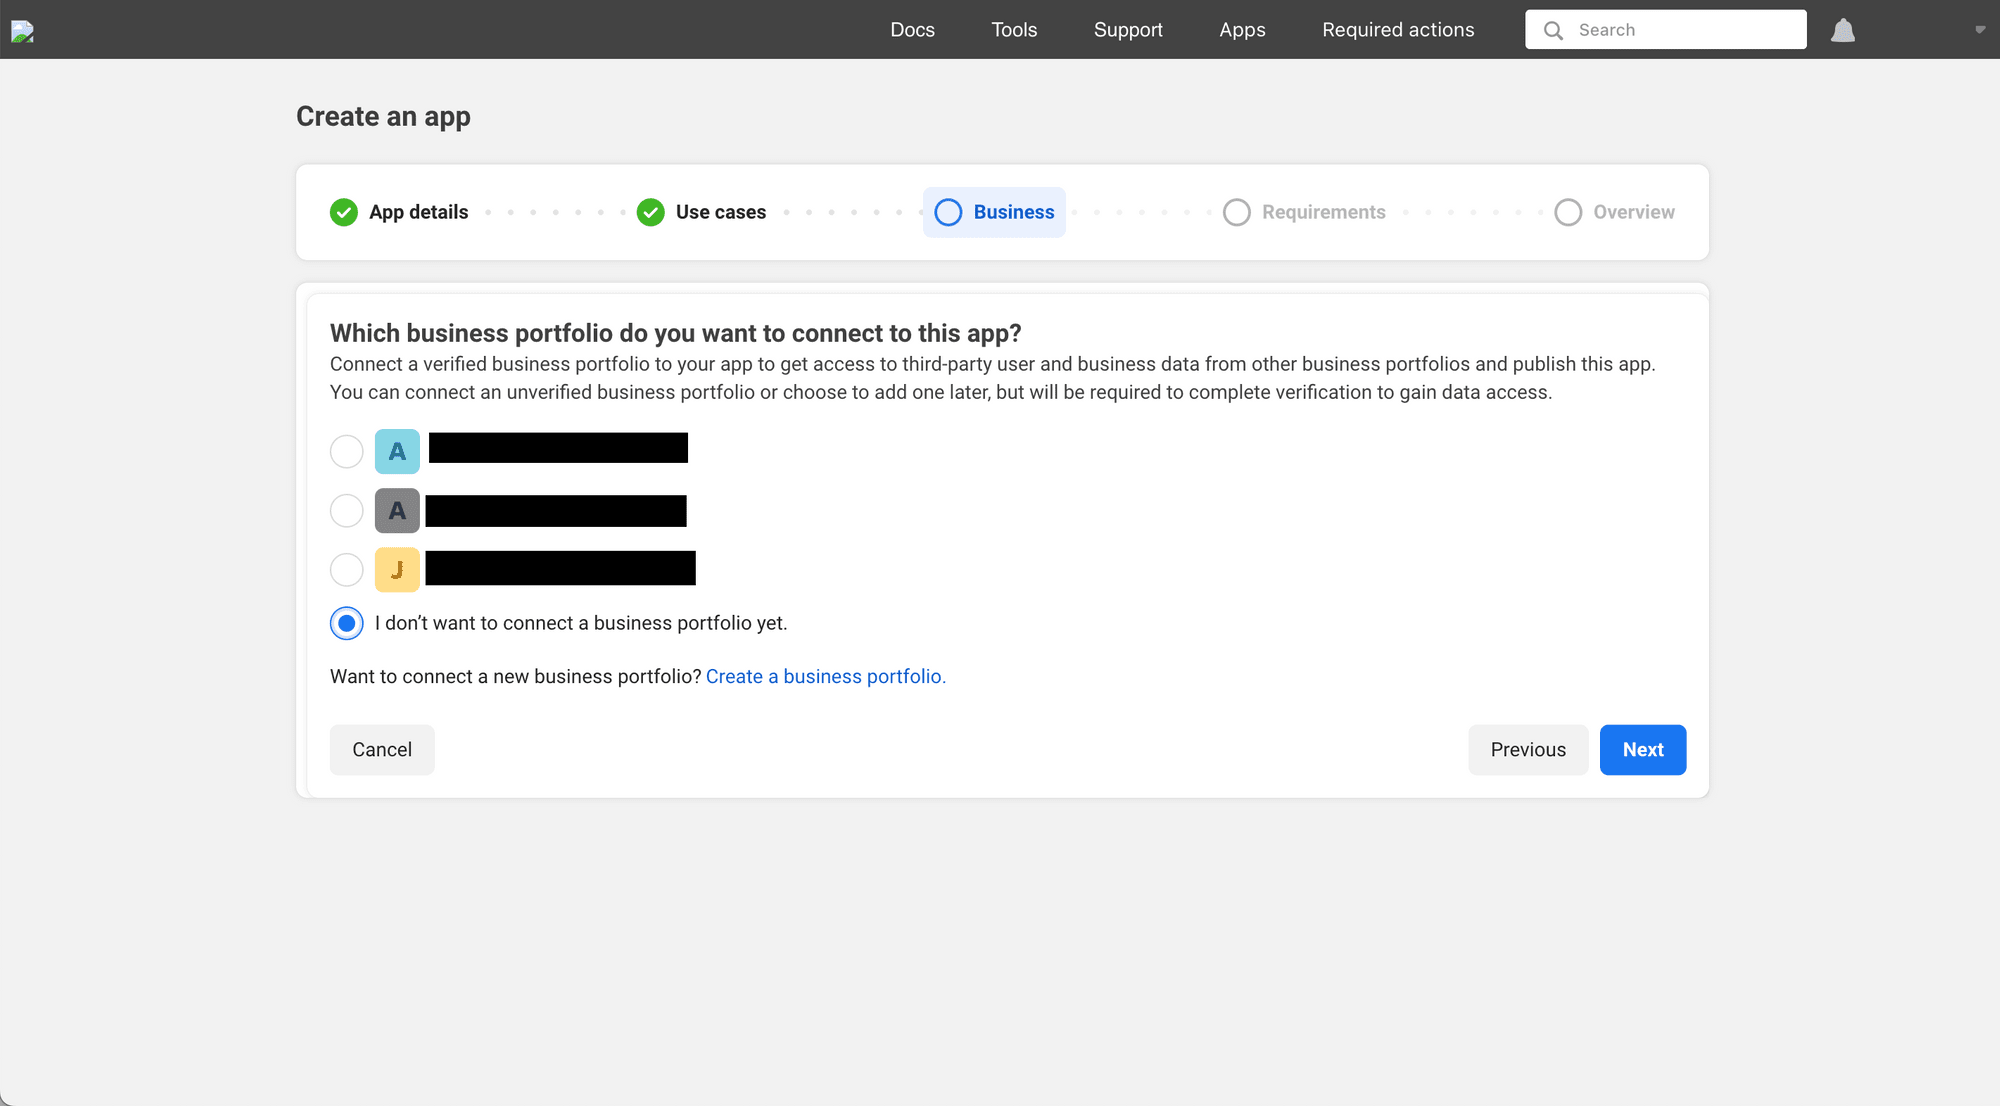
For the business portfolio, select “I don’t want to connect a business portfolio yet” :
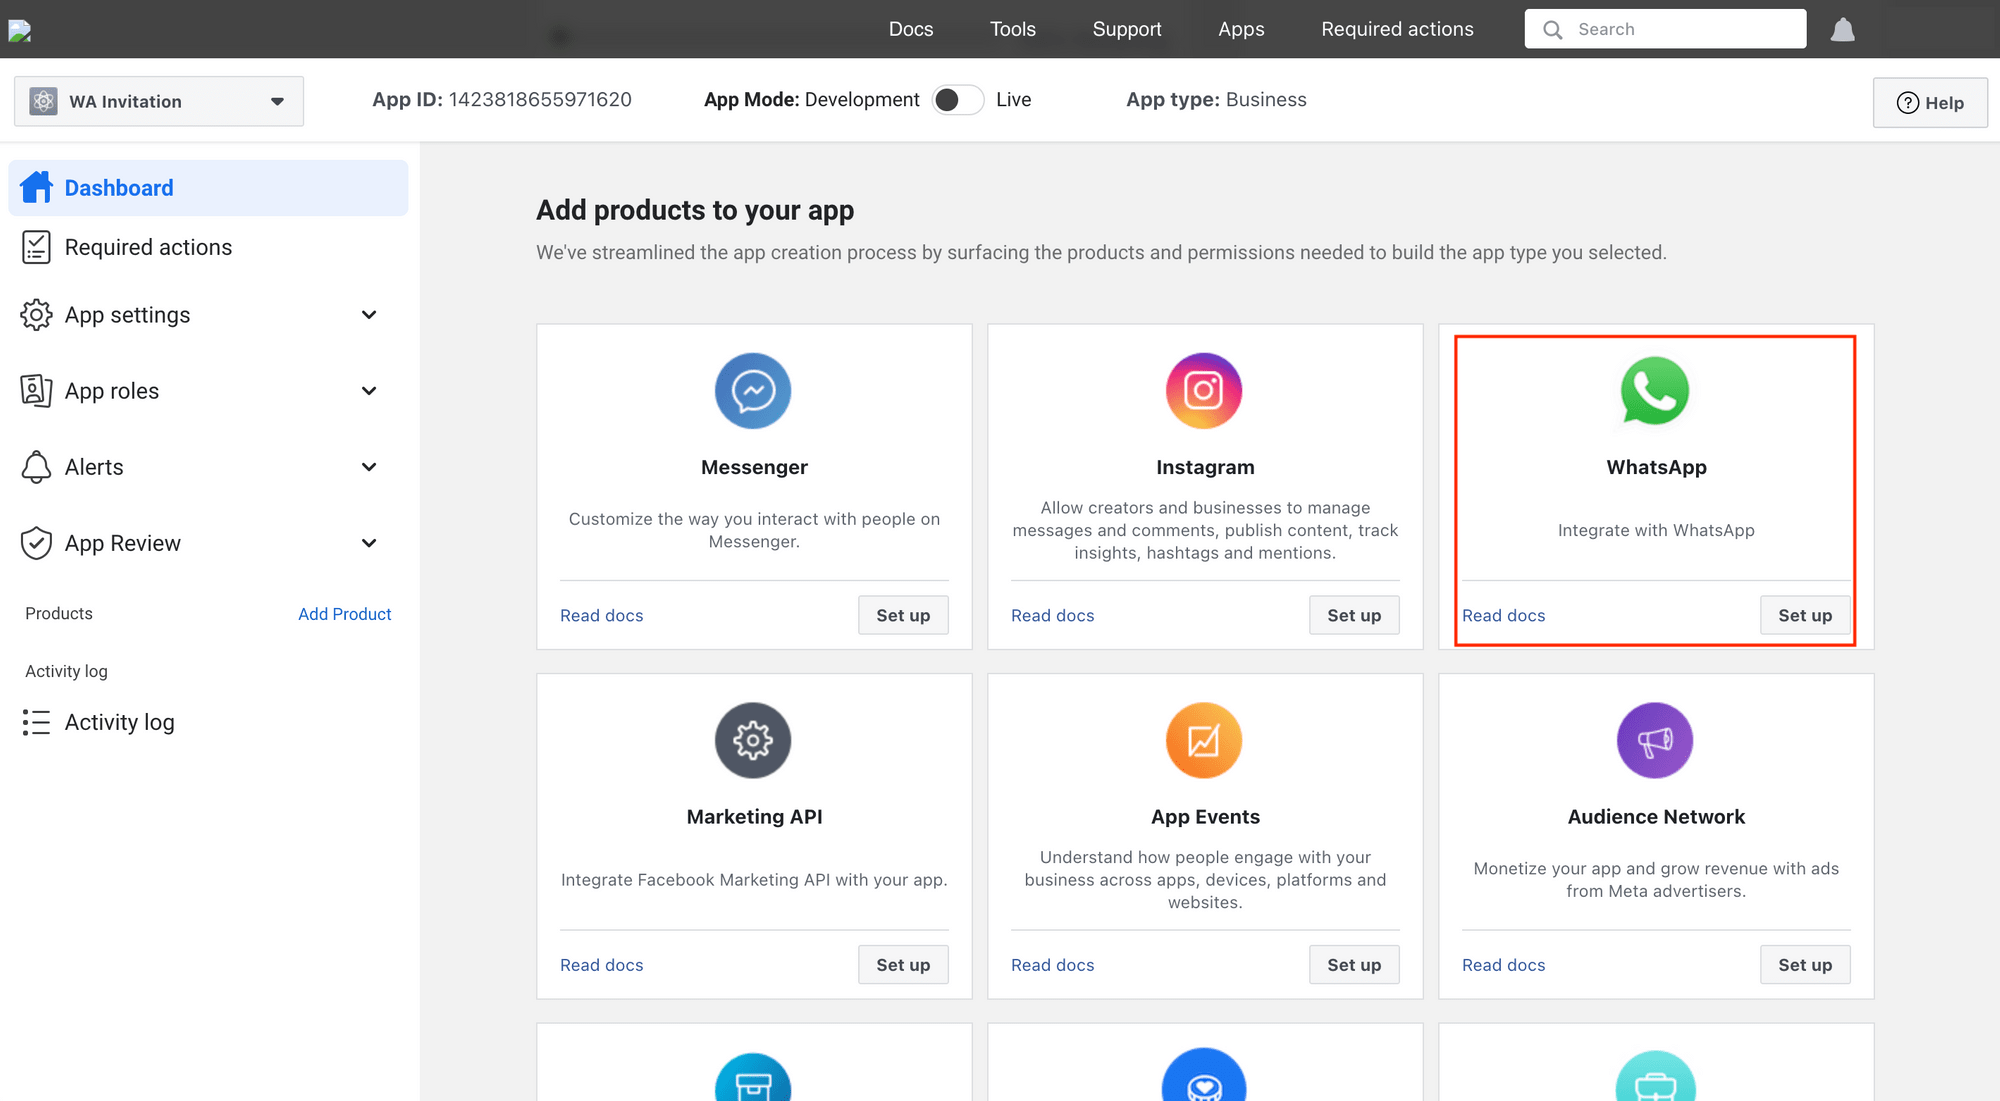
After completing the app creation, click on the app on your Apps Dashboard and add the WhatsApp product to your app:
From the side panel, go to WhatsApp → API Setup and generate an access token:
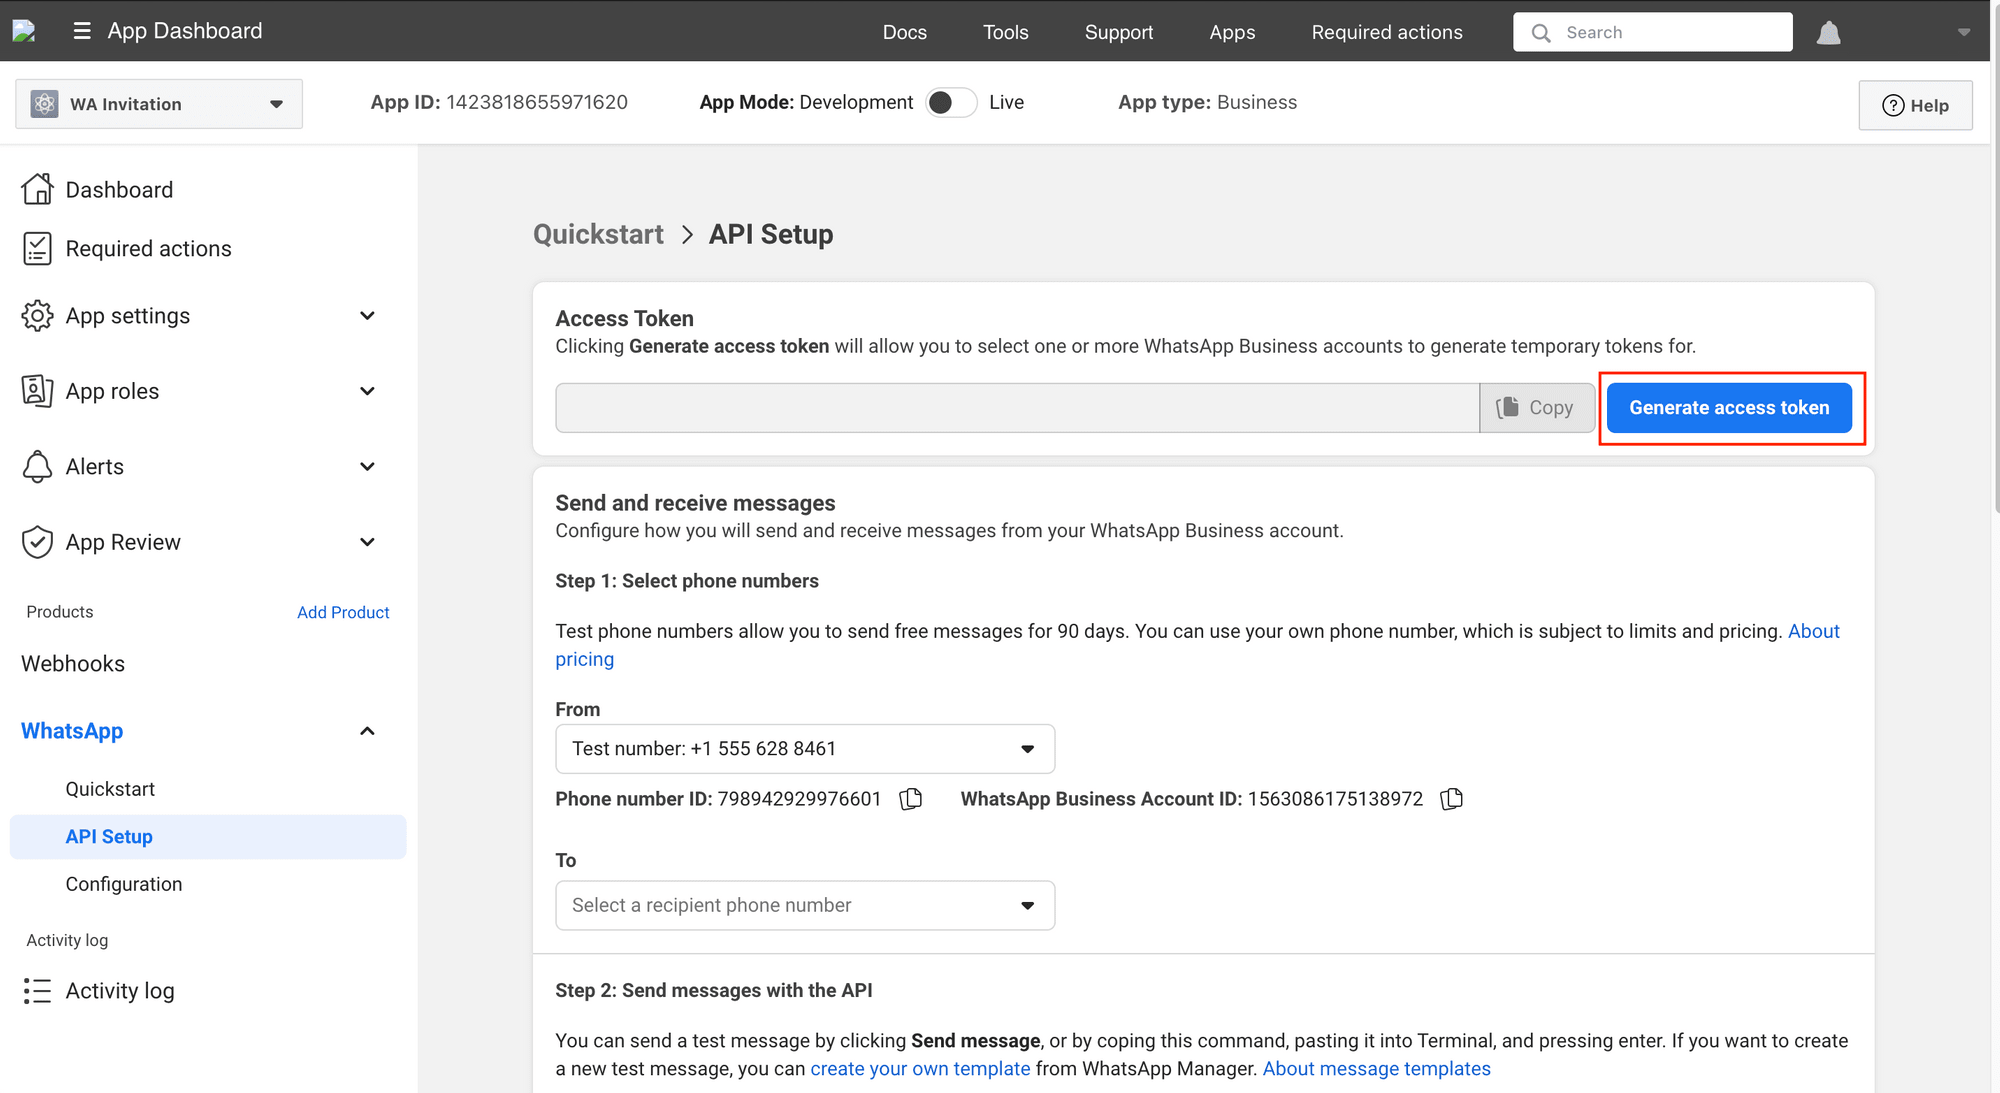
Copy the access token and your phone number ID somewhere safe. We will need it in the code later.
🐻 Bear Tip: A test number will be automatically created. You can use it to send a test message to your phone number to test the API.
Step 2. Create a WhatsApp Message Template (with Header Image + RSVP Button)
To send a message to the guests, we need to use an approved message template. Go to WhatsApp Manager → Message templates → Manage templates and create a new message template:

Choose “Default” for your template category and click “Next” to continue:

Then, fill in the information needed, including the message body and variables:
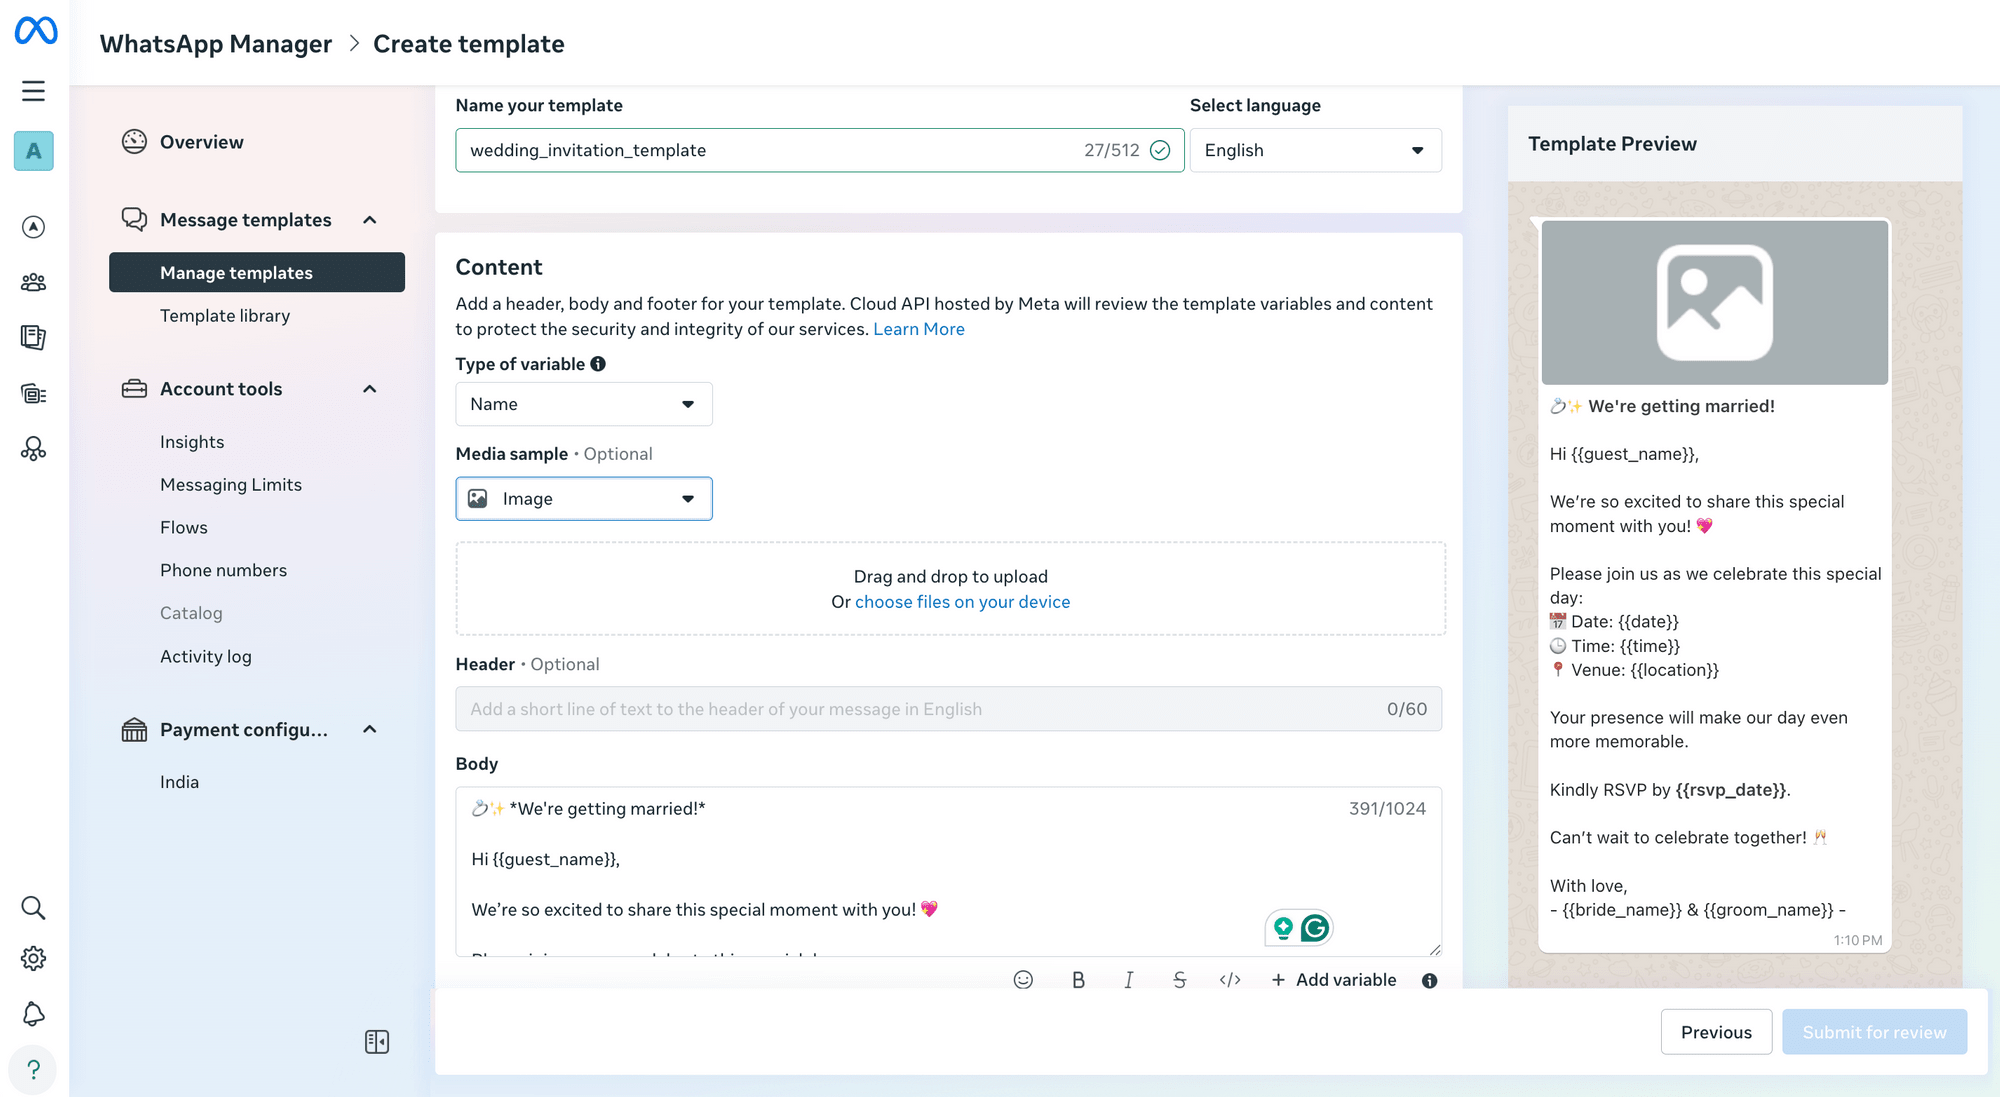
To allow guests to RSVP to the invitation, add a button with an appropriate URL:

Finally, submit the template for review.
🐻 Bear Tip: Before you can use the template, you’ll need to wait for it to be reviewed and for its status to be updated to “Active”.
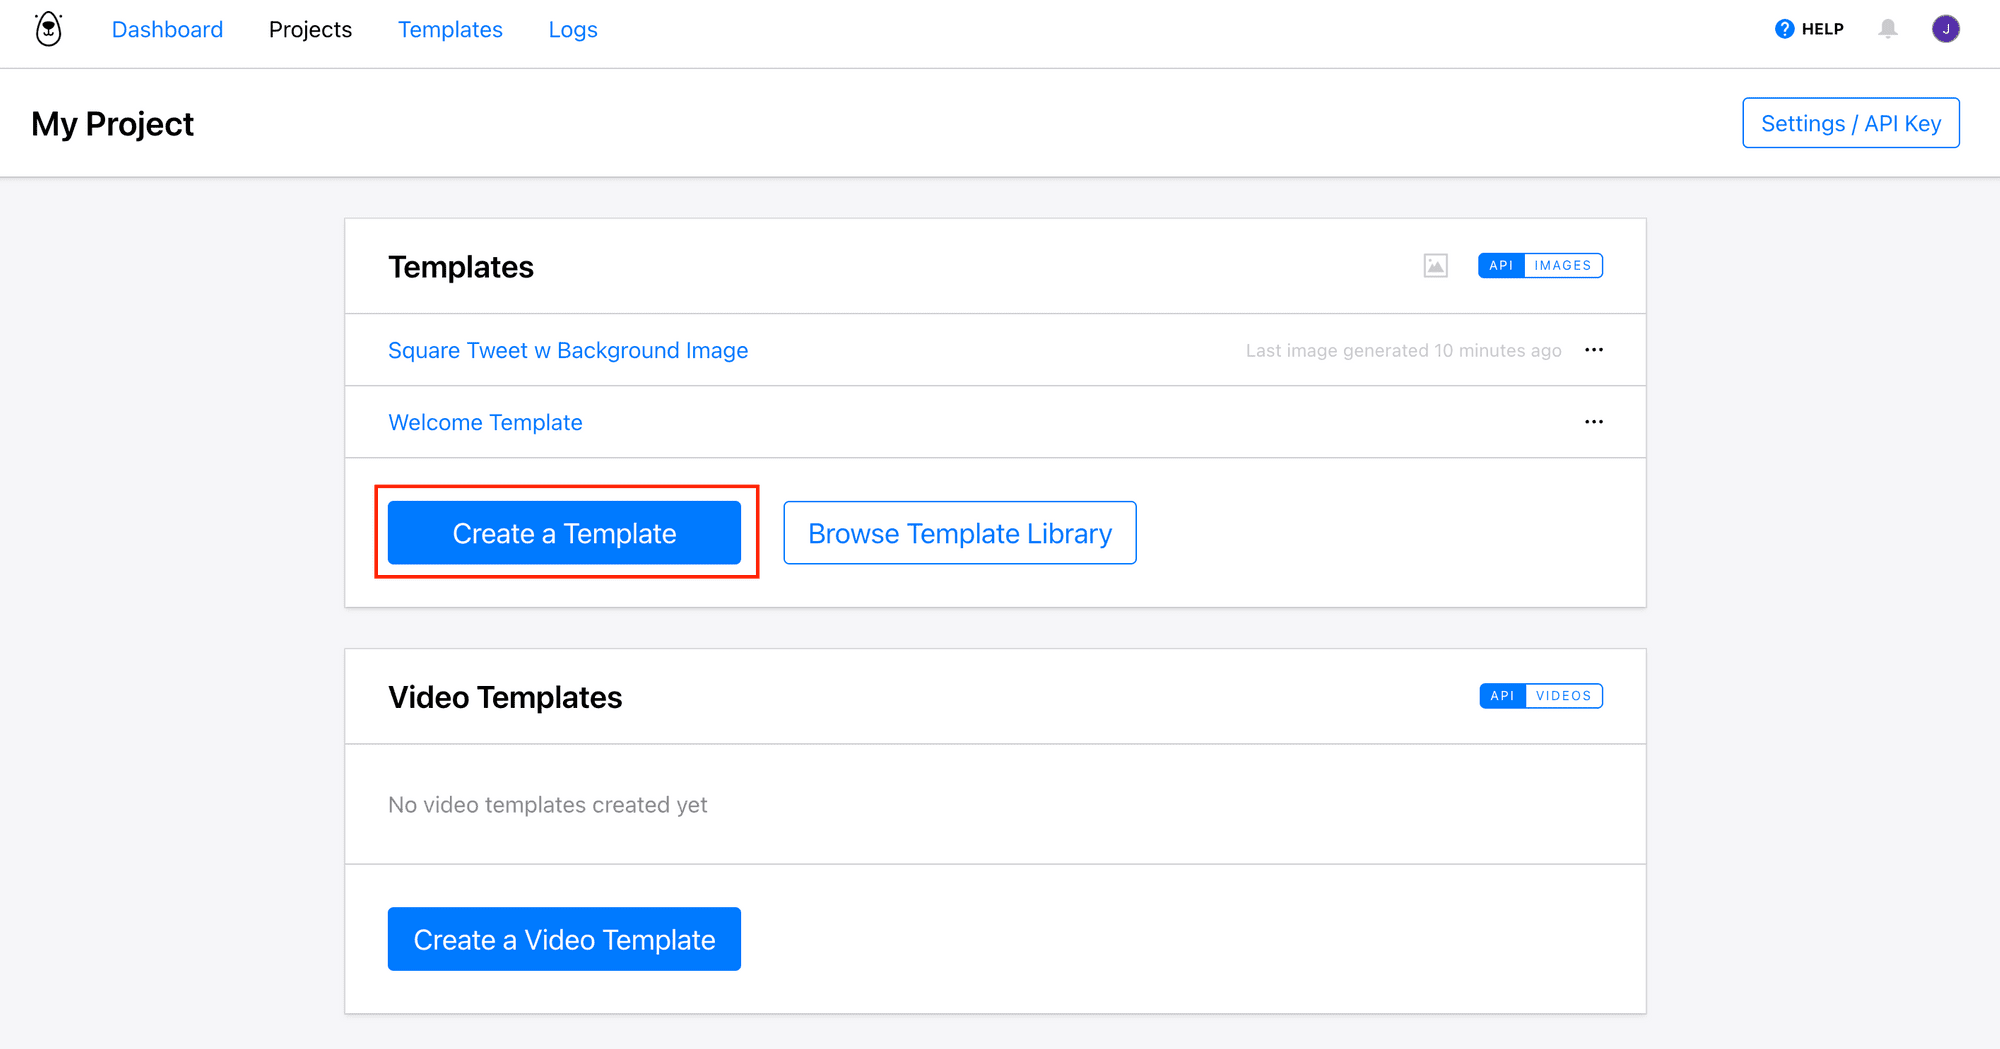
Step 3. Create a Bannerbear Template
Head to your Bannerbear dashboard and create a new template. You can create one from scratch by clicking “Create a Template” from your project page:
…or use a pre-made template from Bannerbear’s Template Library, like this one (click on it to duplicate to your project):

The template contains dynamic objects like recipient_name, time_date, location, etc.:
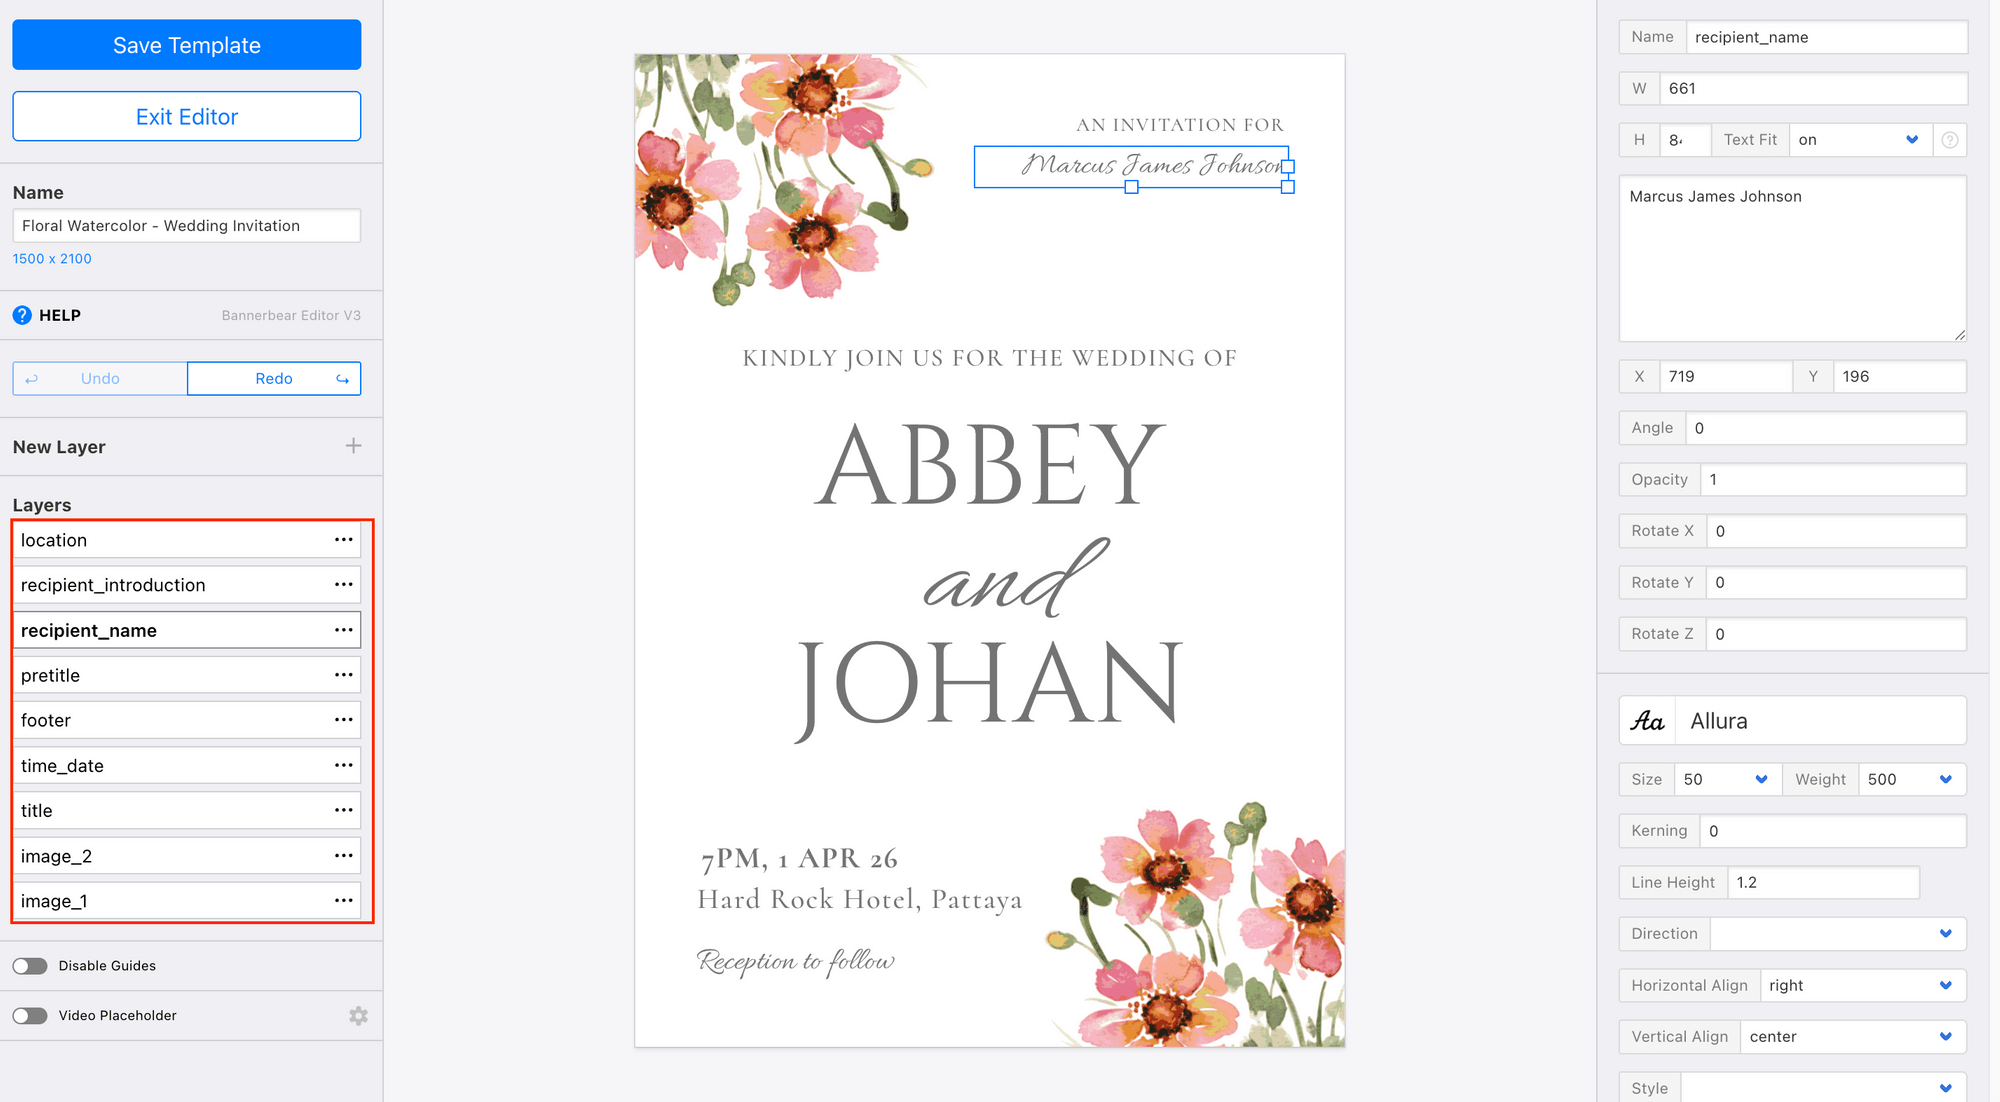
The values of these objects can be changed using Bannerbear’s API to generate different images.
Once you’ve created your template, click on the three dots at the top right corner to see your template ID:
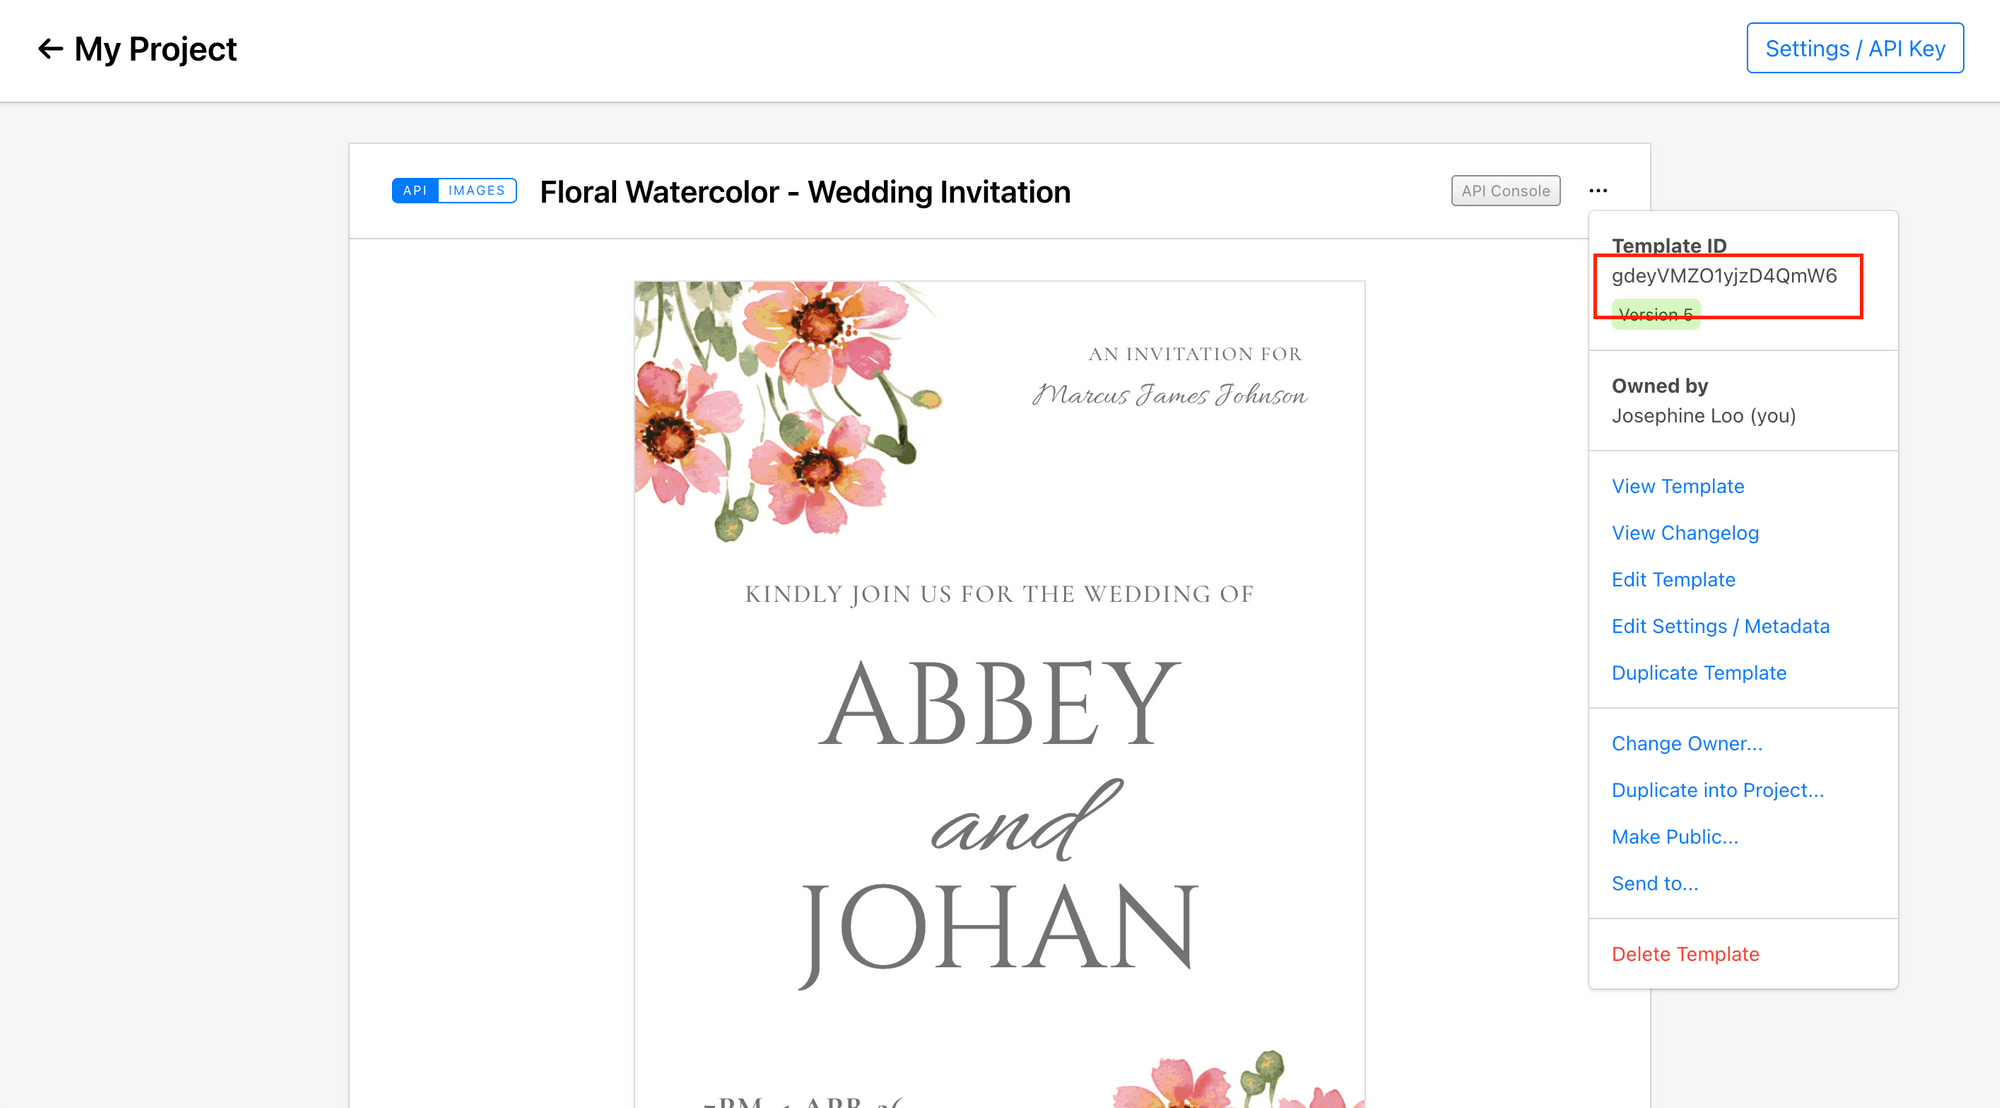
Copy and keep it somewhere safe.
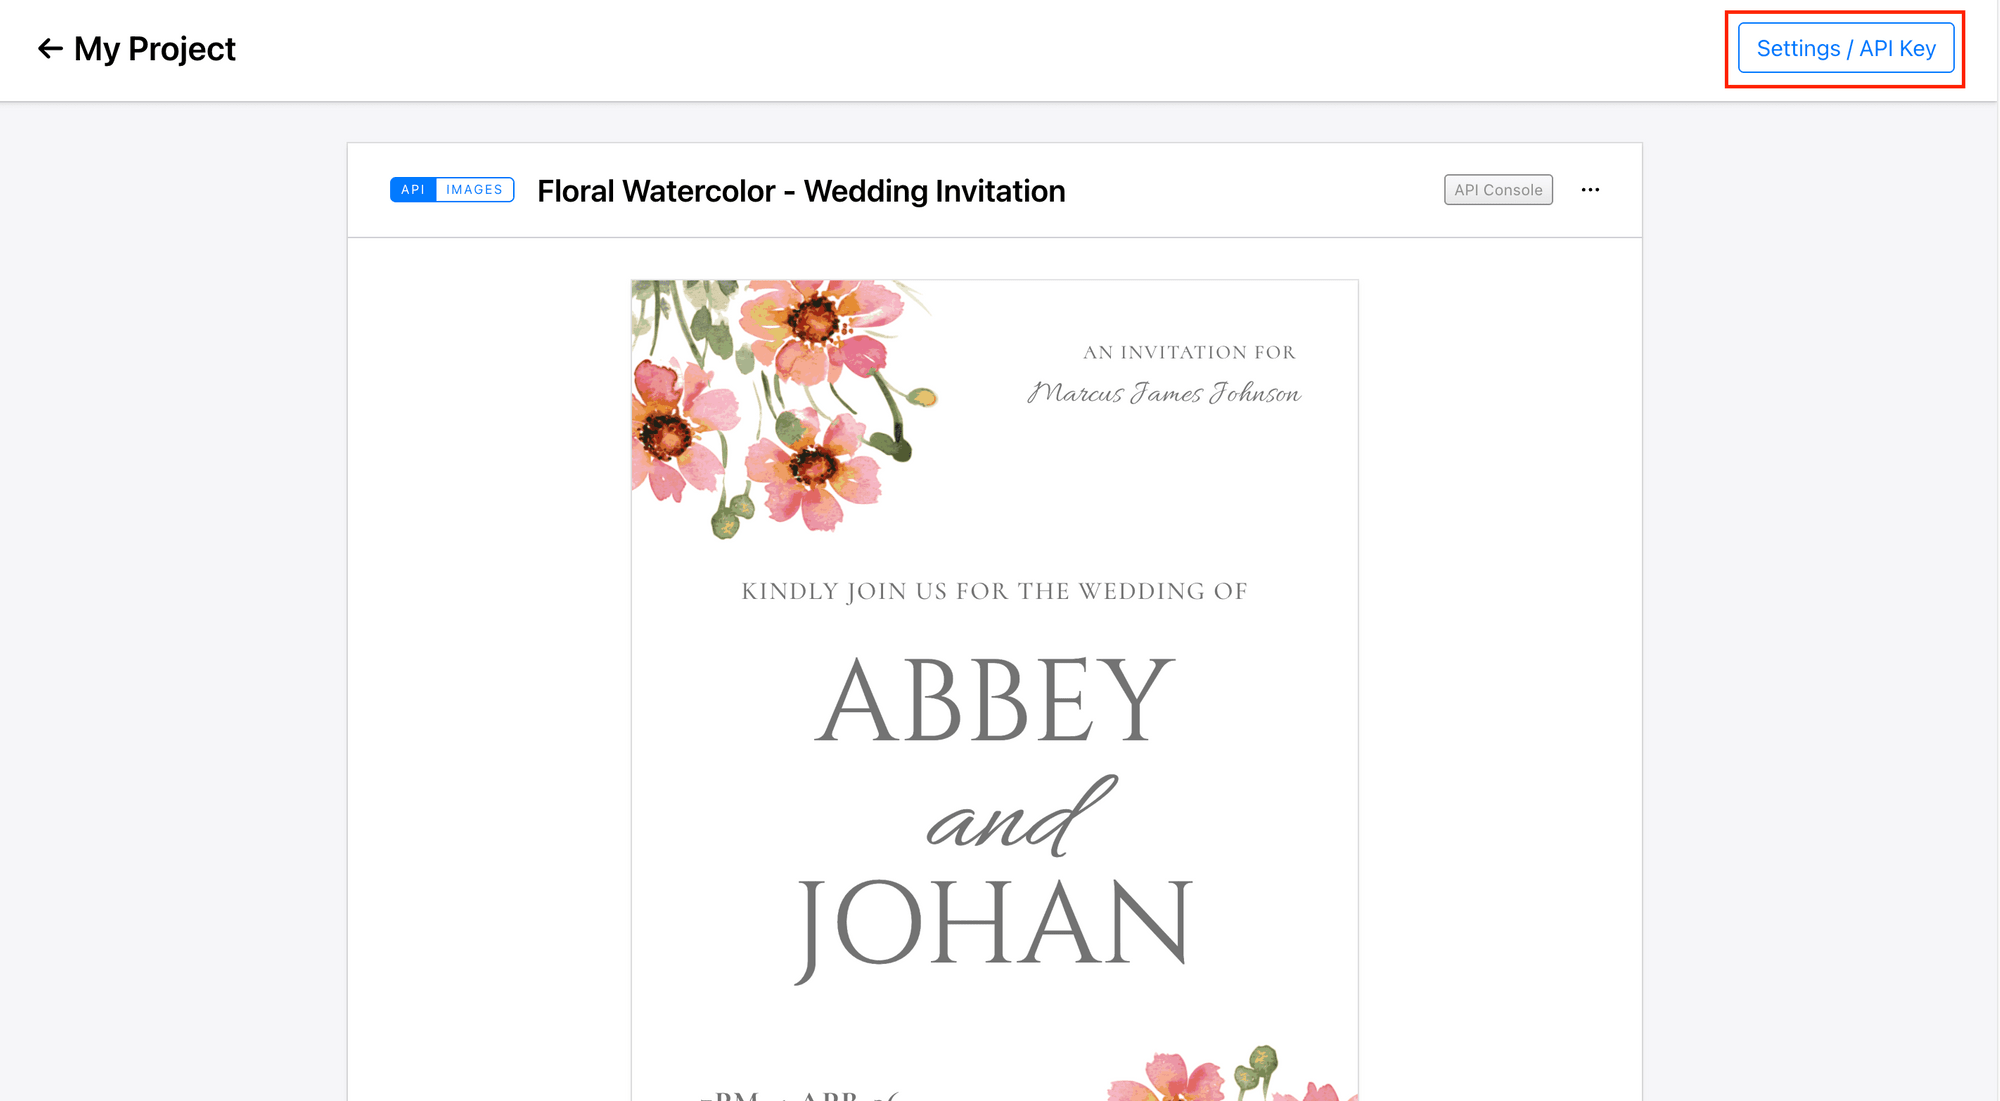
Do the same for your API key:
Step 4. Write the Code
In your terminal/command prompt, run the commands below to create a new project and initialize a new Node.js project in it:
mkdir whatsapp-invites
cd whatsapp-invites
npm init
🐻 Bear Tip: If you already have an existing project, skip this step and only add the relevant code to your codebase.
Then, run the command below to install the packages needed:
npm install bannerbear csv-parser
To demonstrate how the flow works, we’ll create a script that reads guest data from a CSV file, sends the details to Bannerbear to generate personalized images, and then delivers those images along with a personalized message to each guest listed in the CSV.
Create an .env file and store your Bannerbear and WhatsApp credentials there:
BANNERBEAR_API_KEY=your_bannerbear_api_key
BANNERBEAR_TEMPLATE_ID=your_bannerbear_template_id
WHATSAPP_TOKEN=your_whatsapp_token
WHATSAPP_PHONE_NUMBER_ID=your_whatsapp_phone_number_id
Then, create a file named index.js and add the code below:
readGuestsFromCSV()
require('dotenv').config();
const fs = require('fs');
const csv = require('csv-parser');

function readGuestsFromCSV(filePath) {
  return new Promise((resolve, reject) => {
    const guests = [];
    fs.createReadStream(filePath)
      .pipe(csv())
      .on('data', (row) => {
        if (row.name && row.phone) { // Expected CSV columns: name, phone
          guests.push({
            name: row.name.trim(),
            phone: row.phone.trim(),
          });
        }
      })
      .on('end', () => {
        console.log(`Loaded ${guests.length} guests from CSV`);
        resolve(guests);
      })
      .on('error', (err) => {
        reject(err);
      });
  });
}
This function reads the guests’ names and phone numbers from the CSV file with column names: name and phone, and returns them as an object.
createInviteImage()
const { Bannerbear } = require('bannerbear');
...
async function createInviteImage(guestName) {
  const bb = new Bannerbear(process.env.BANNERBEAR_API_KEY);
  const image = await bb.create_image(
    process.env.BANNERBEAR_TEMPLATE_ID,
    {
      modifications: [
        {
          name: 'recipient_name',
          text: guestName,
        },
      ],
    },
    true
  );

  console.log(`Image created for ${guestName}:`, image.image_url);
  return image.image_url;
}
This function creates personalized images for the guests with their names on them using Bannerbear and returns the image URL.
sendTemplateWithImageURL()
async function sendTemplateWithImageURL(imageUrl, guestName, guestPhone) {
  const WHATSAPP_TOKEN = process.env.WHATSAPP_TOKEN;
  const PHONE_NUMBER_ID = process.env.WHATSAPP_PHONE_NUMBER_ID;
  const url = `https://graph.facebook.com/v20.0/${PHONE_NUMBER_ID}/messages`;

  const payload = {
    messaging_product: 'whatsapp',
    to: guestPhone,
    type: 'template',
    template: {
      name: 'wedding_invitation',
      language: { code: 'en' },
      components: [
        {
          type: 'header',
          parameters: [
            {
              type: 'image',
              image: { link: imageUrl },
            },
          ],
        },
        {
          type: 'body',
          parameters: [
            { parameter_name: 'guest_name', type: 'text', text: guestName },
            { parameter_name: 'date', type: 'text', text: '1 Apr 26' },
            { parameter_name: 'time', type: 'text', text: '7:00pm' },
            { parameter_name: 'location', type: 'text', text: 'Hard Rock Hotel, Pattaya' },
            { parameter_name: 'rsvp_date', type: 'text', text: '1 Nov 25' },
            { parameter_name: 'bride_name', type: 'text', text: 'Abbey' },
            { parameter_name: 'groom_name', type: 'text', text: 'John' },
          ],
        },
      ],
    },
  };

  const res = await fetch(url, {
    method: 'POST',
    headers: {
      Authorization: `Bearer ${WHATSAPP_TOKEN}`,
      'Content-Type': 'application/json',
    },
    body: JSON.stringify(payload),
  });

  const data = await res.json();
  if (!res.ok) {
    console.error('❌ Send error:', data);
    throw new Error(`WhatsApp API error: ${res.status}`);
  }
  console.log(`Message sent to ${guestName}:`, data);
}
This function sends personalized invitation messages in bulk to all the guests listed in the CSV file, along with the images generated by Bannerbear.
🐻 Bear Tip: Make sure the details match what’s shown in the image!
Finally, put them together in a main function:
async function main() {
  try {
    const guests = await readGuestsFromCSV('Abbey-John Wedding Guest List.csv');

    for (const g of guests) {
      const imageUrl = await createInviteImage(g.name);
      await sendTemplateWithImageURL(imageUrl, g.name, g.phone);
      console.log(`Invitation sent to ${g.name}`);
    }
  } catch (err) {
    console.error('Error:', err);
  }
}

main();
🐻 Bear Tip: View the full code on GitHub.
Step 5. Test the Code
In your terminal, execute the command below to run the script:
node index.js
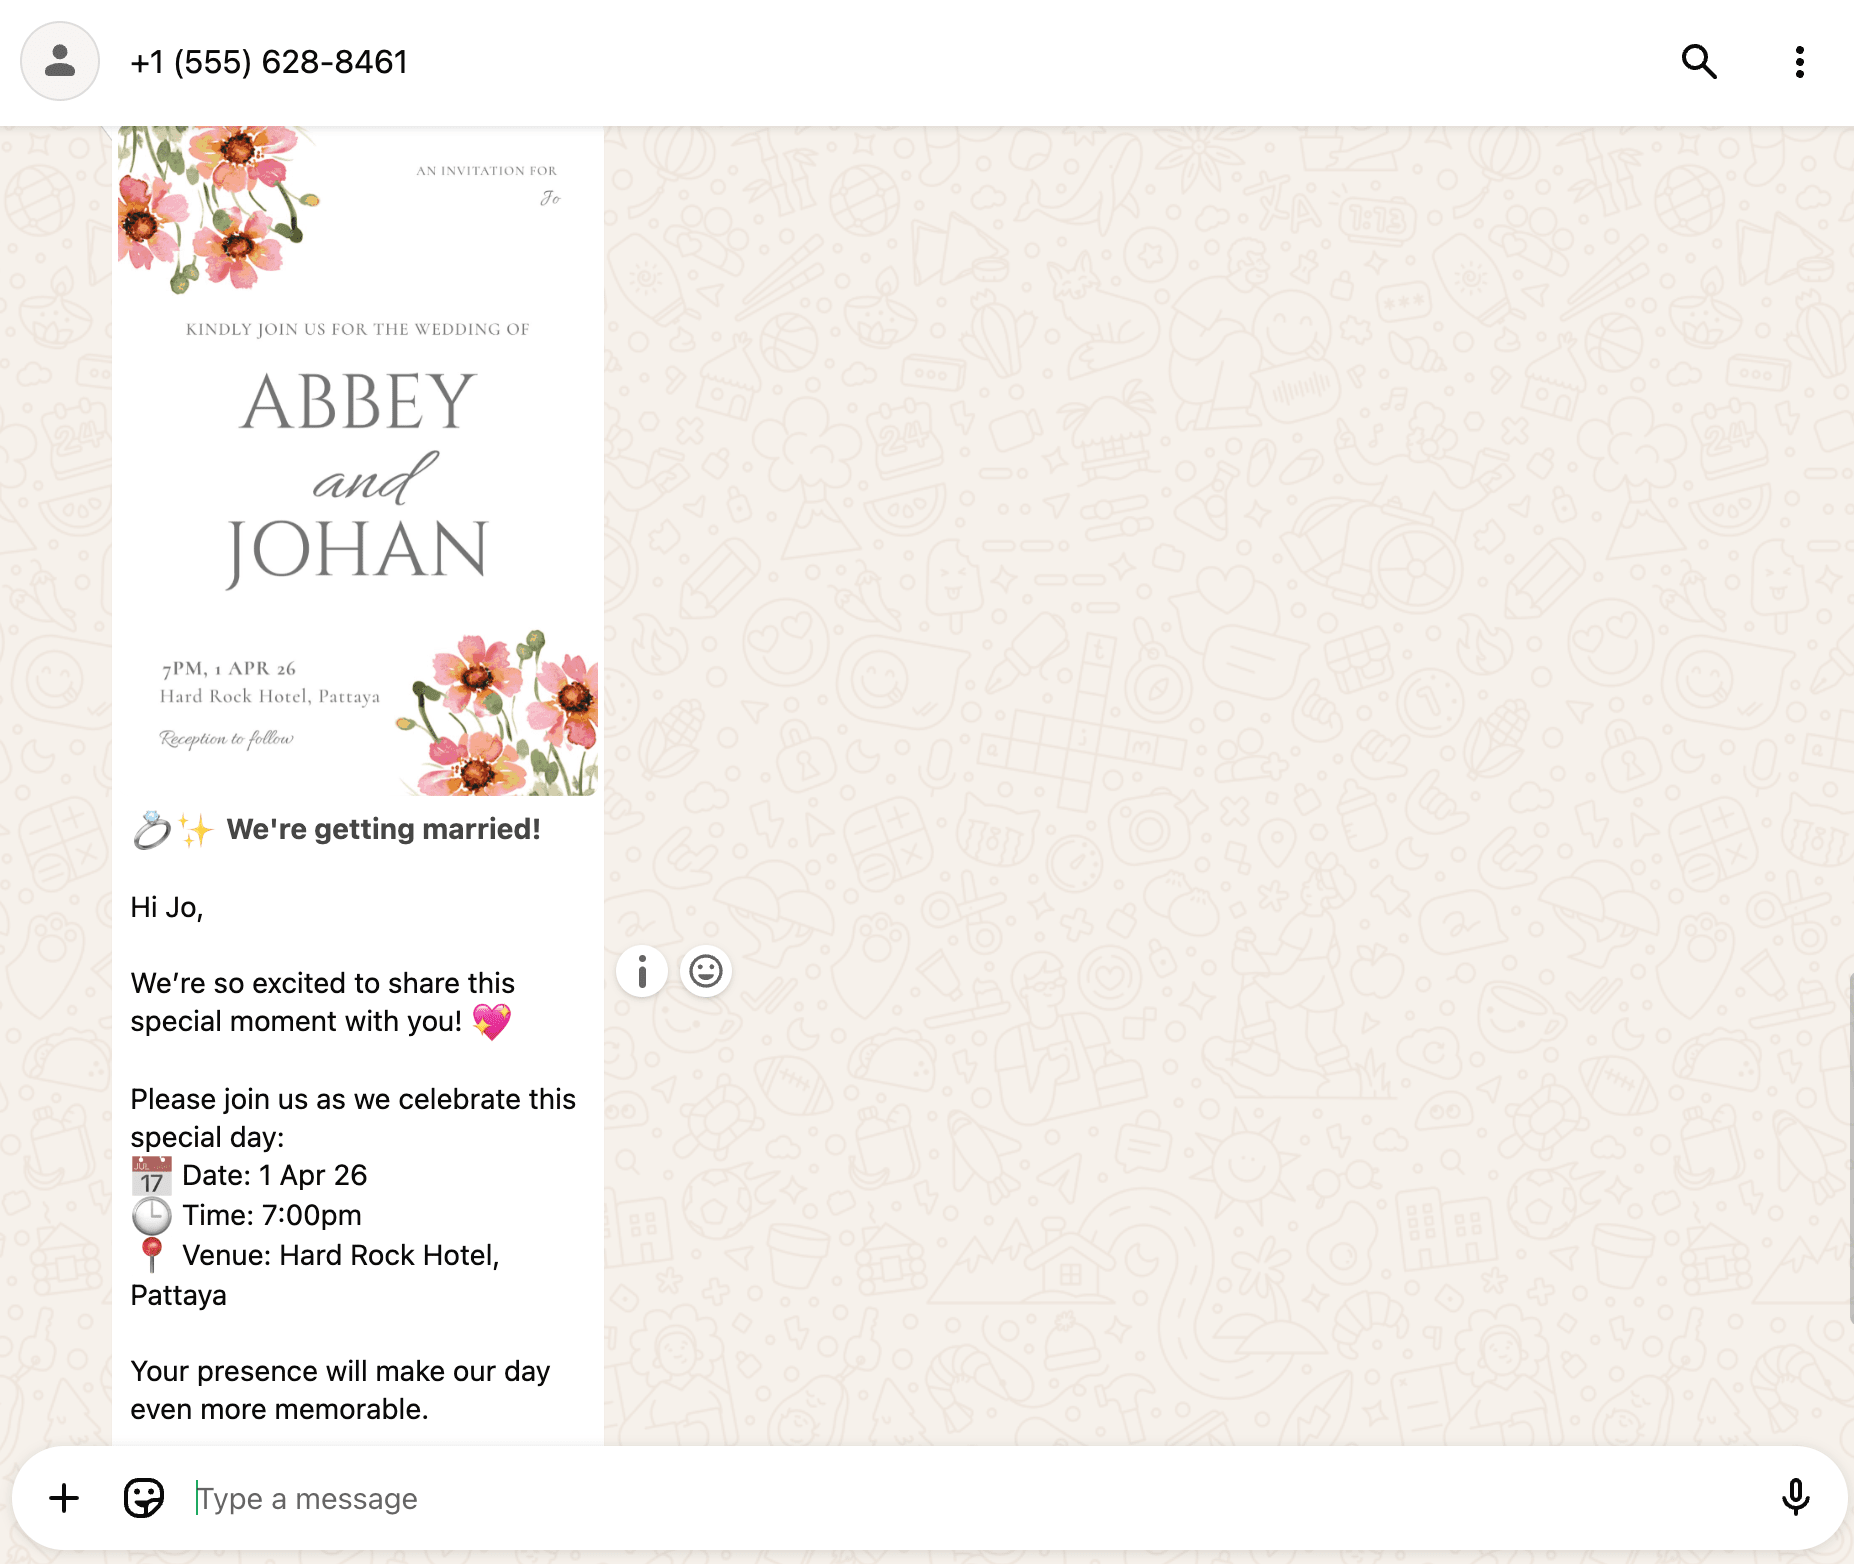
This will send a personalized invitation message, along with a customized image to each guest listed in the CSV file:

🐻 Bear Tip: Using a test number without a business name, like in this tutorial might confuse the guests. It’s best to send the messages from a verified WhatsApp Business account to keep it professional.
Conclusion
While we used a wedding invitation as an example, the same approach can easily be adapted for many other types of events and campaigns, such as:
- Birthday or anniversary invitations
- Corporate or networking event invites
- Product launch announcements
- Customer appreciation messages or VIP offers
- Conference and webinar reminders
With just a few tweaks to your Bannerbear template and CSV data, you can adapt this workflow to almost any use case that needs personalization at scale. If you haven’t already, sign up for Bannerbear and get 30 free API credits to try it out!
