
How to Build a Telegram Chatbot to Create Custom Images on Demand with Bannerbear (Node.js)
Contents
In today's digital world, automation is key to efficiency. What if you could build a chatbot that generates custom images instantly based on user requests? This tutorial will guide you through creating a Telegram bot that uses Bannerbear's API to automatically create customized images on demand.
By the end of this guide, you'll have a fully functional Telegram chatbot that:
- Listens for specific commands from the user
- Processes the user’s input text and image
- Generates professional-looking images using Bannerbear
- Delivers the finished images directly in the chat
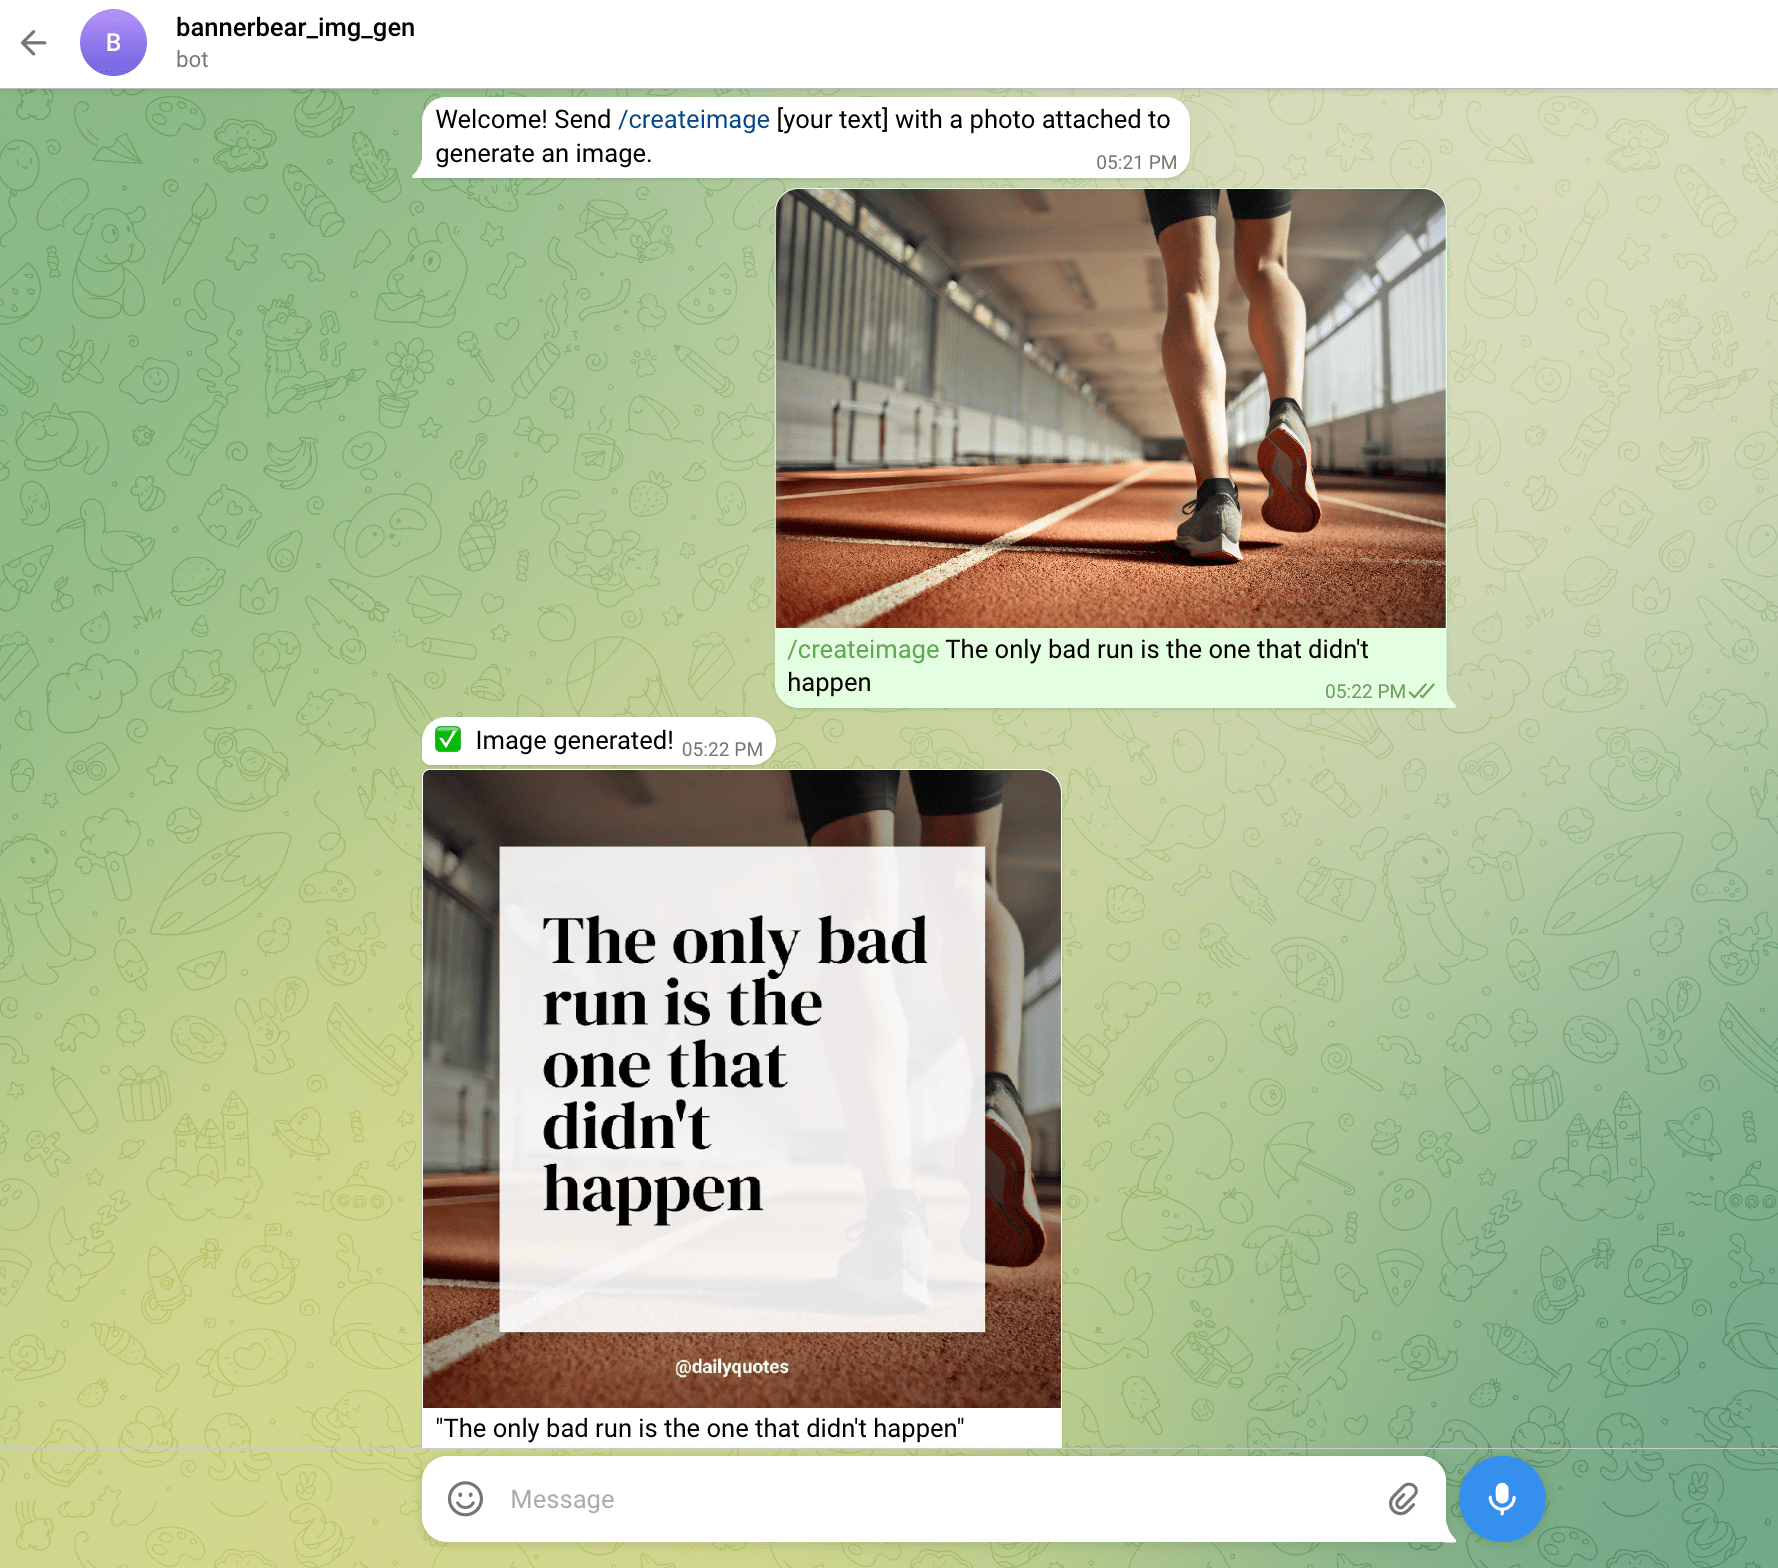
Here’s a sneak peek of how the bot works…
Let’s get started!
Pre-requisites
Before we begin, make sure you have:
- Node.js and npm installed on your machine
- A Telegram account
- A Bannerbear account (sign up for 30 free API credits here!)
What is Bannerbear
Bannerbear is an API that helps you automatically generate custom images, videos, and PDFs from templates. A template serves as a blueprint for creating the images, videos, and PDFs in Bannerbear. It consists of:
- Static objects - These remain the same in every generated image (e.g., a company logo)
- Dynamic objects - These change based on data you provide (e.g., text, images)
Here’s an example of a Bannerbear design template in the editor:
By passing different data to the API, you can alter the values of the dynamic objects and automatically create unique content based on a single template.
Building a Telegram Chatbot to Create Custom Images on Demand with Bannerbear
Step 1. Set Up Your Accounts
Create a Telegram Bot
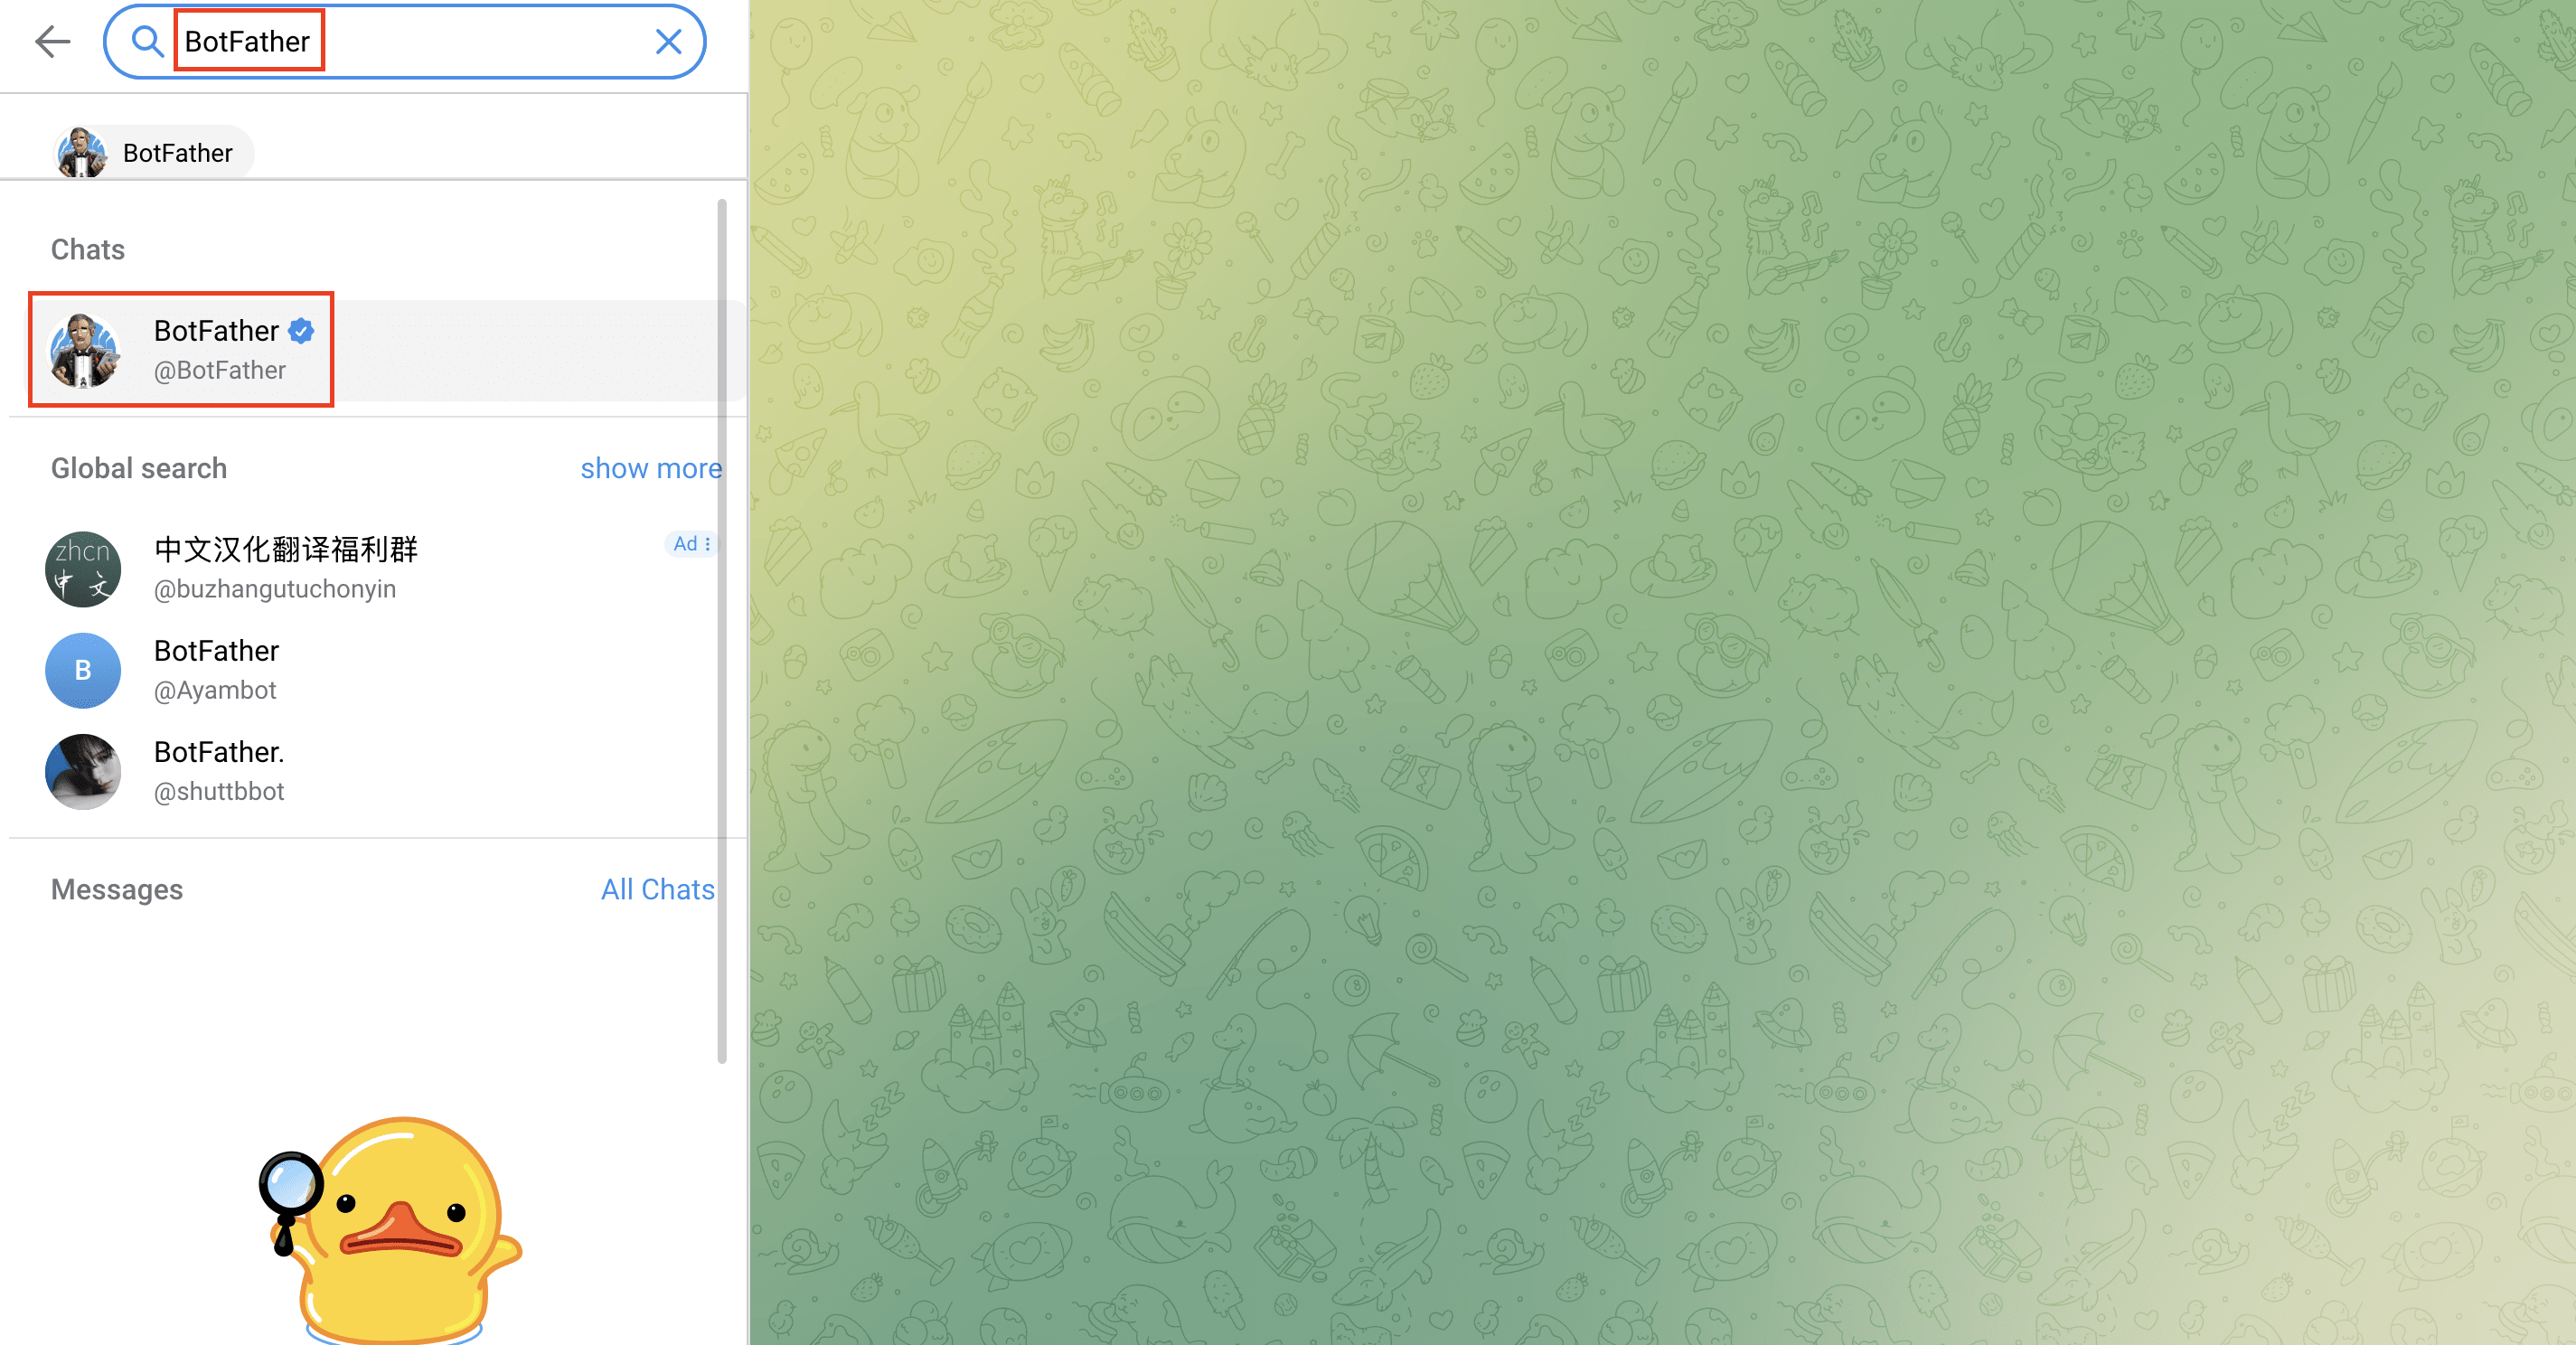
Open Telegram and search for “BotFather”:
🐻 Bear Tip: BotFather is the official Telegram bot for creating, managing, and customizing other bots in Telegram.
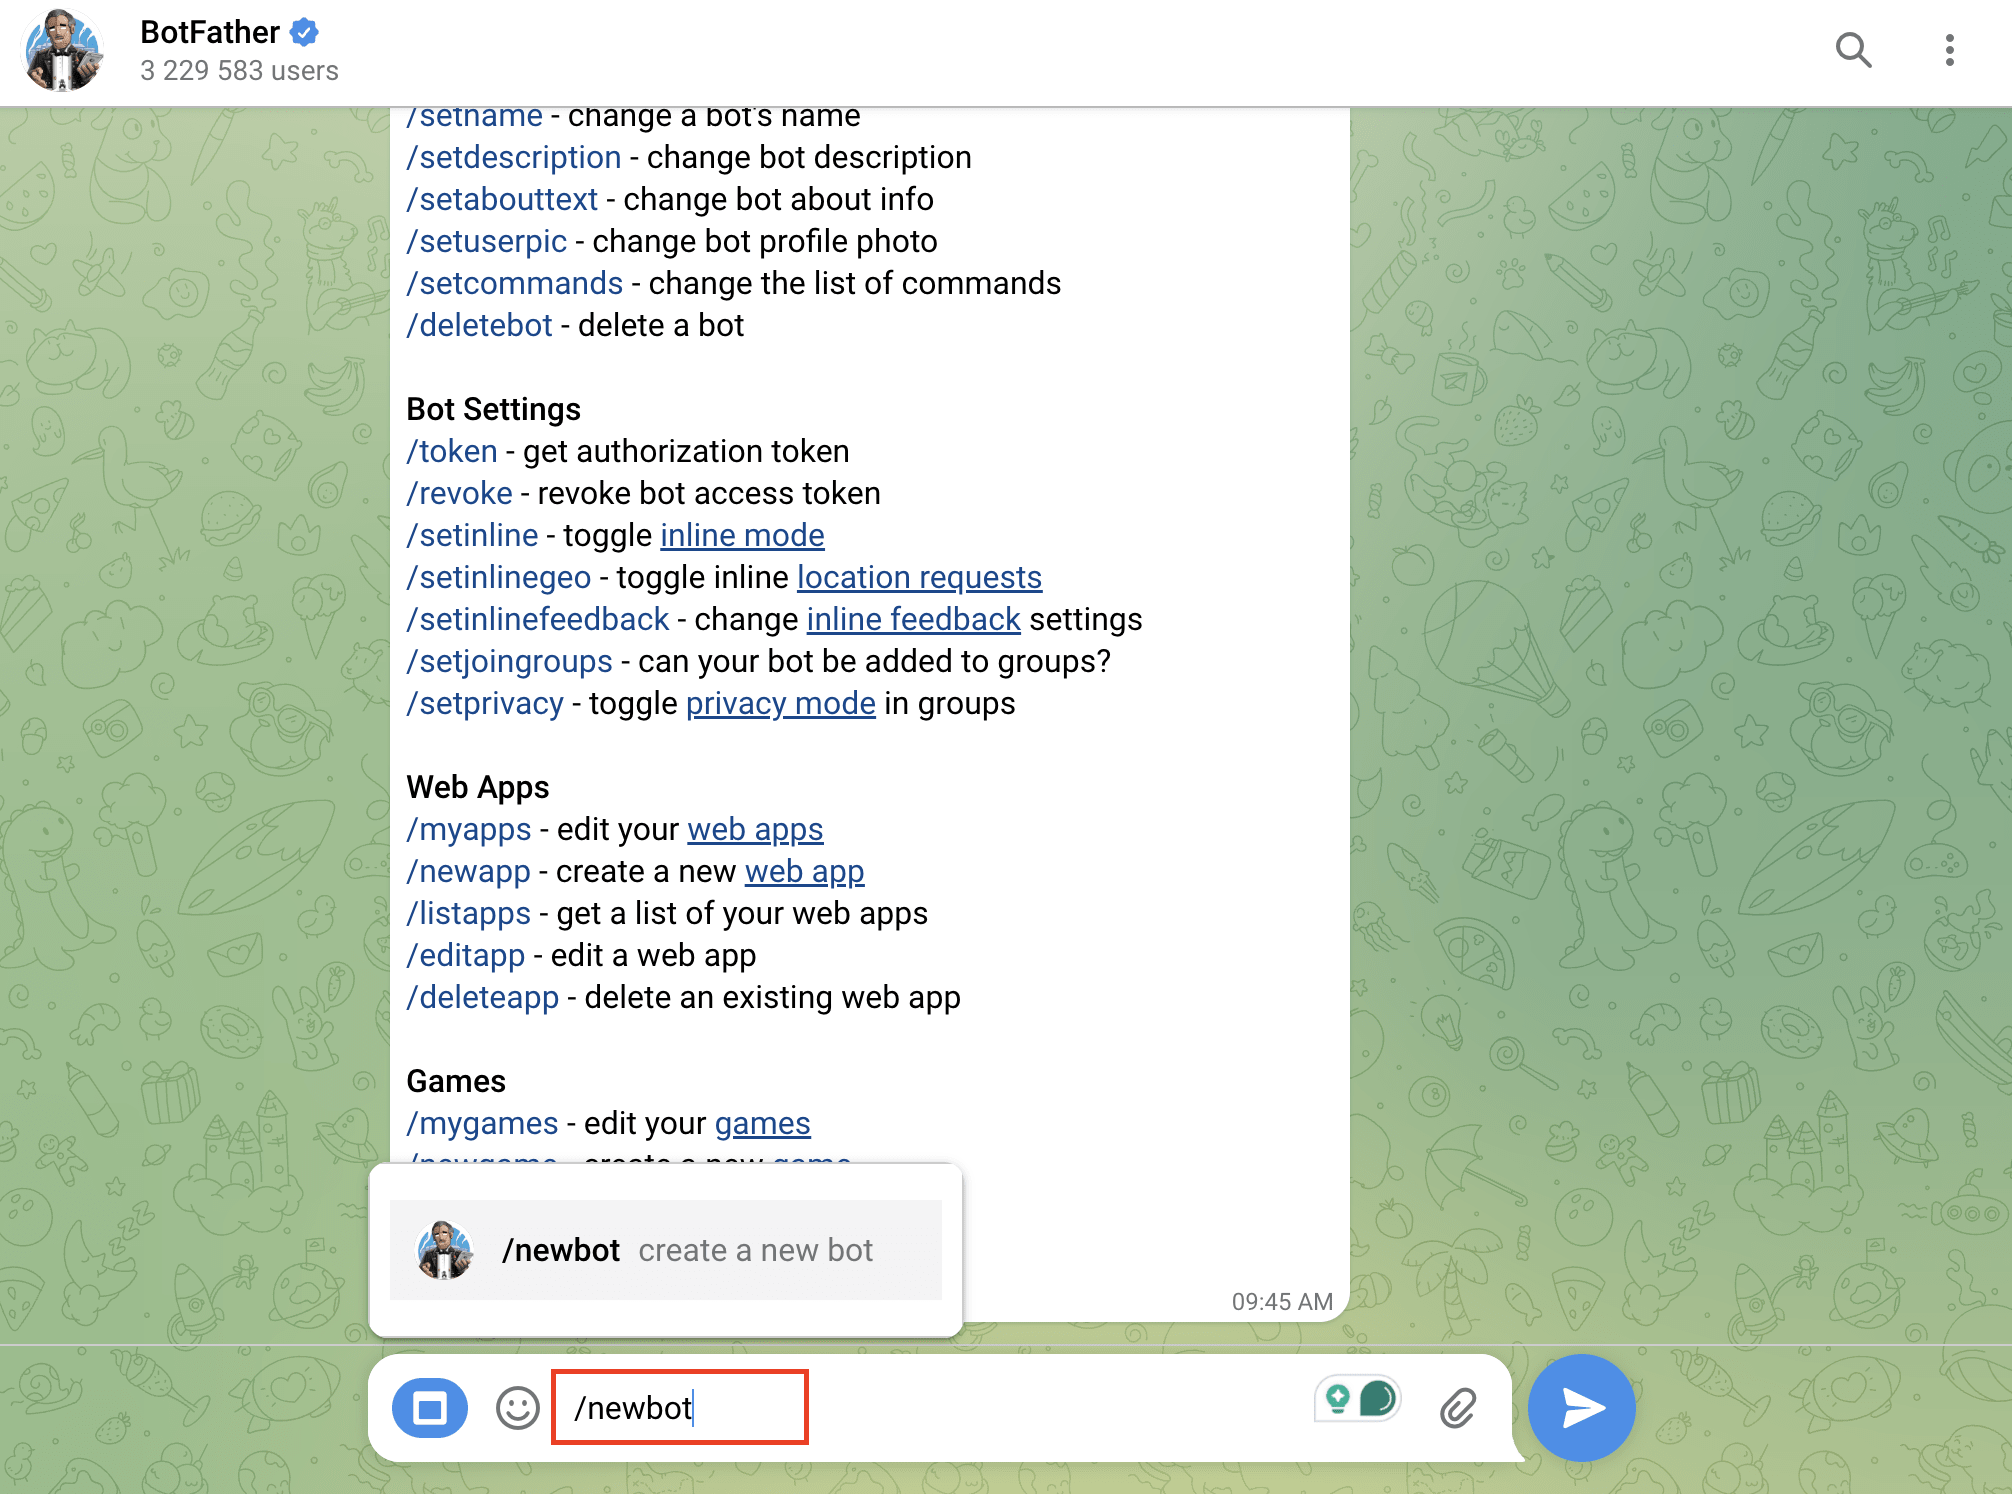
Start a chat with BotFather and send /newbot command:
Follow the prompts to name your bot and get your API token:
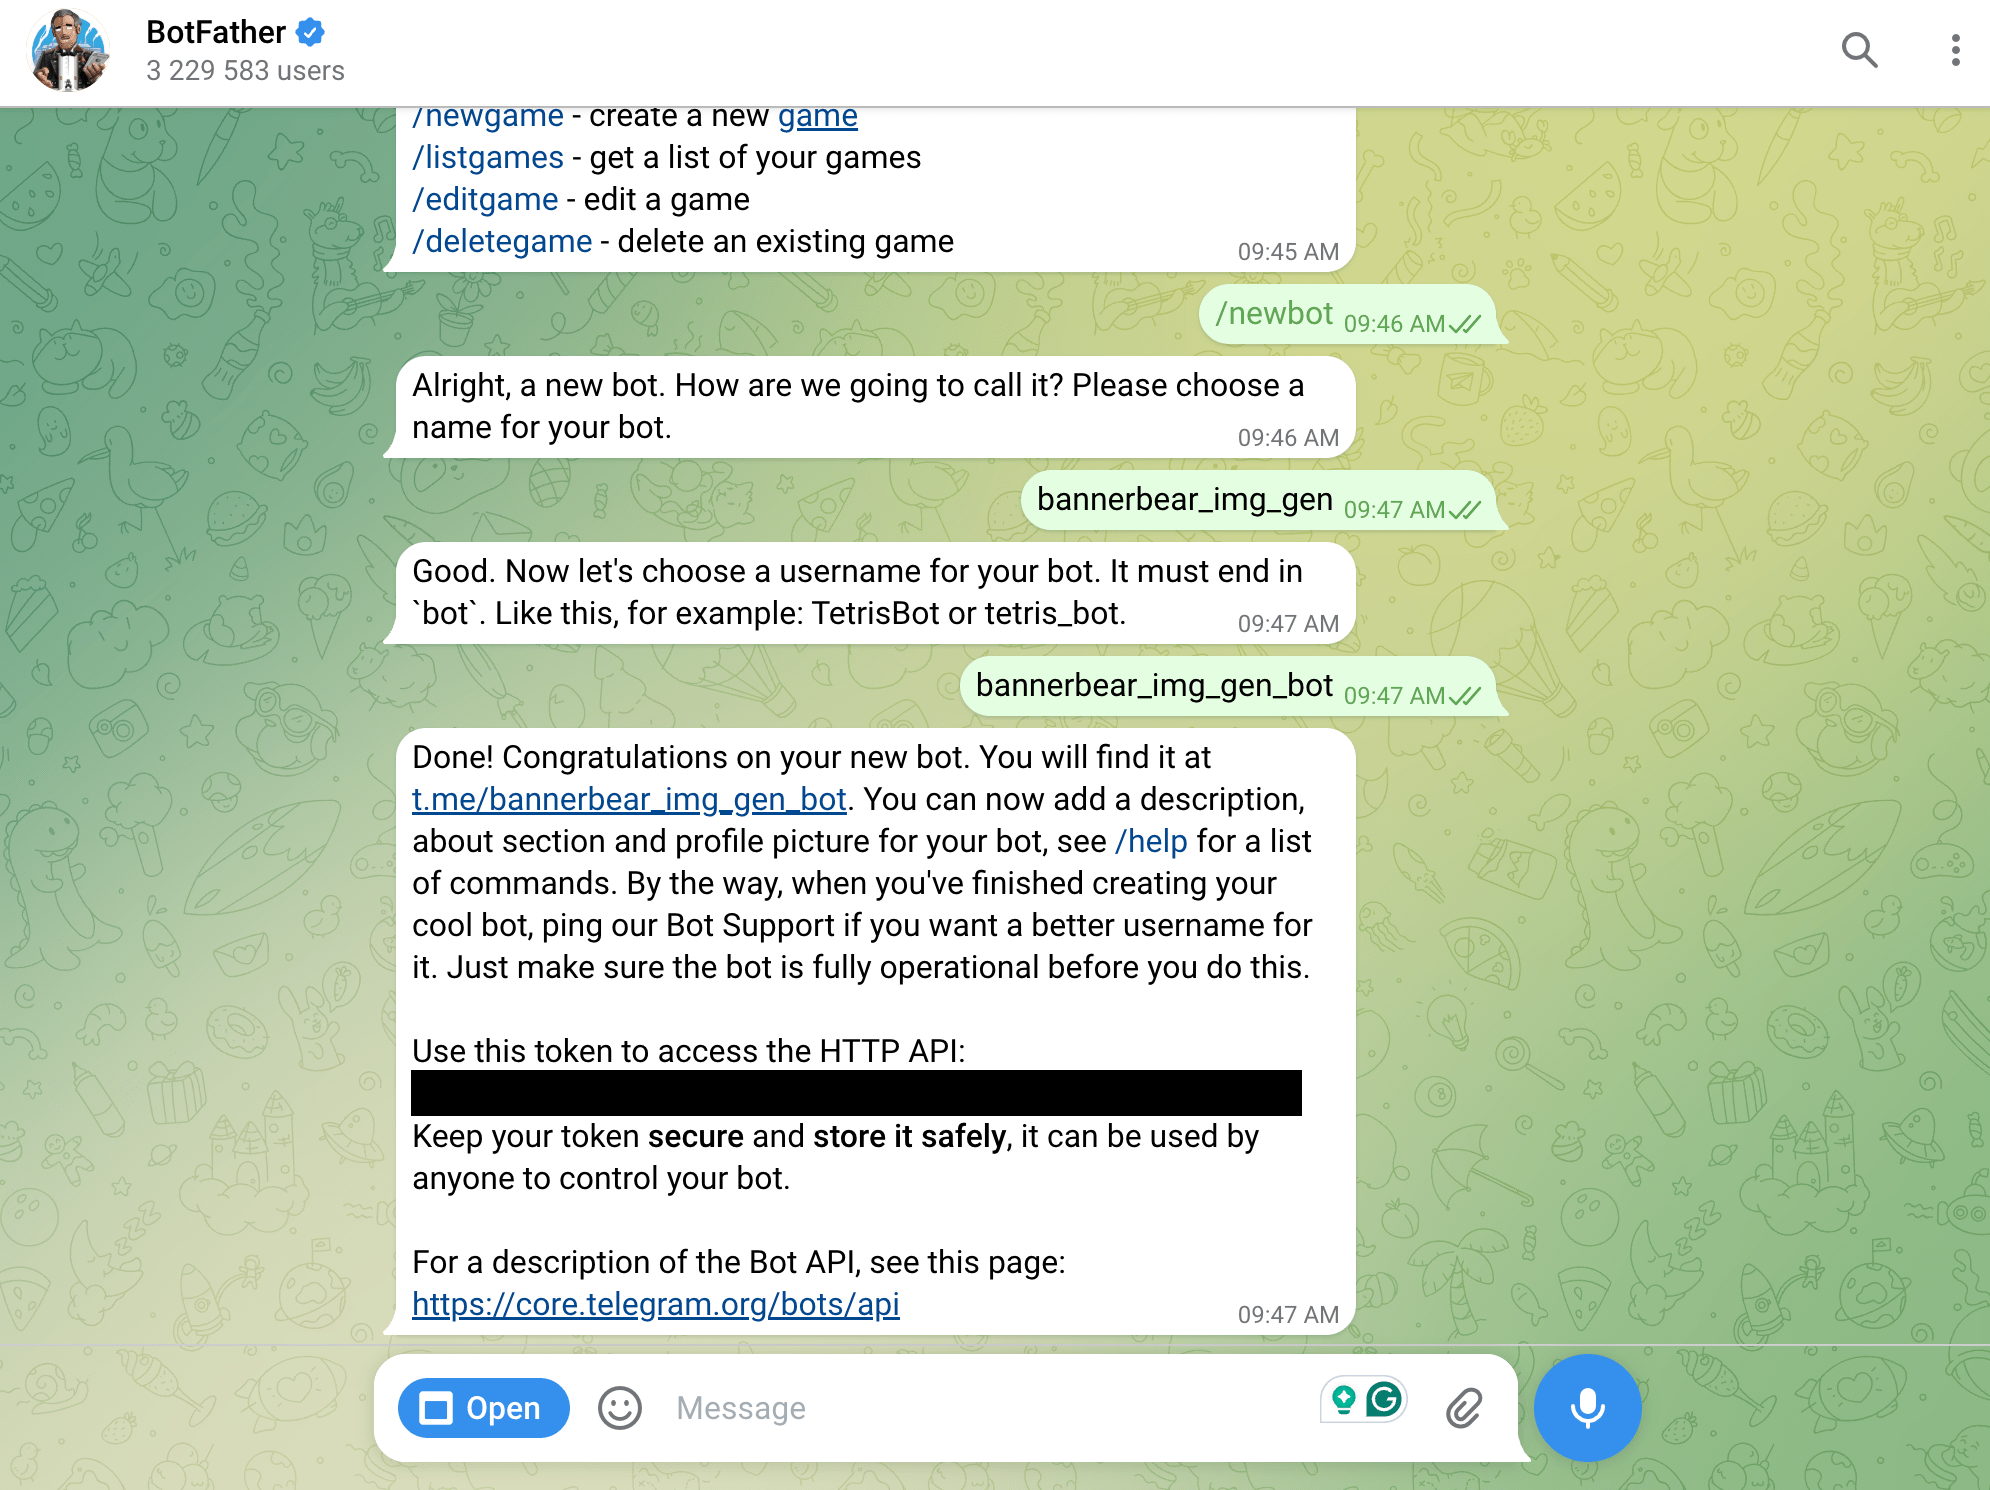
Save this token securely. We'll need it later.
Set Up Bannerbear
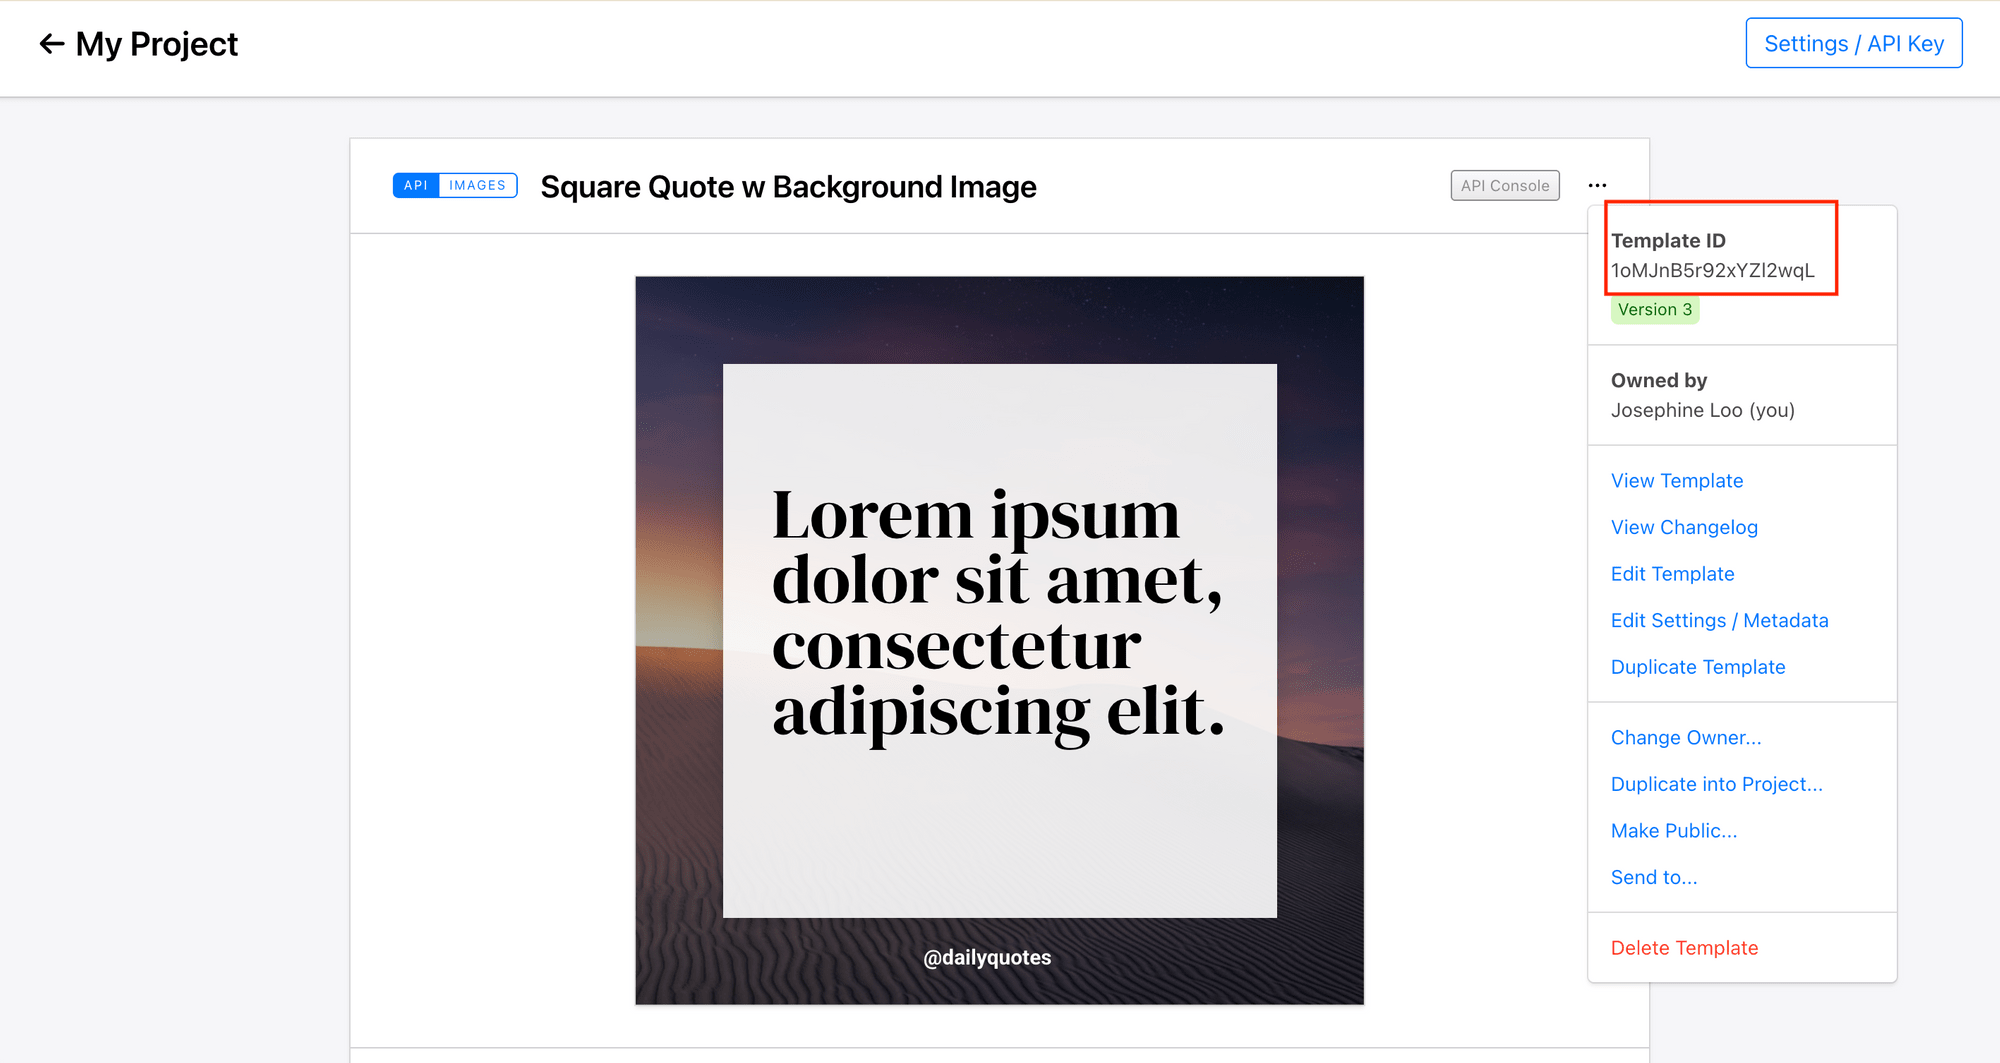
Log in to your Bannerbear account and create a new project. Go into the project page and click “Settings/API Key” on the top right corner:

From there, you will see your project API key:
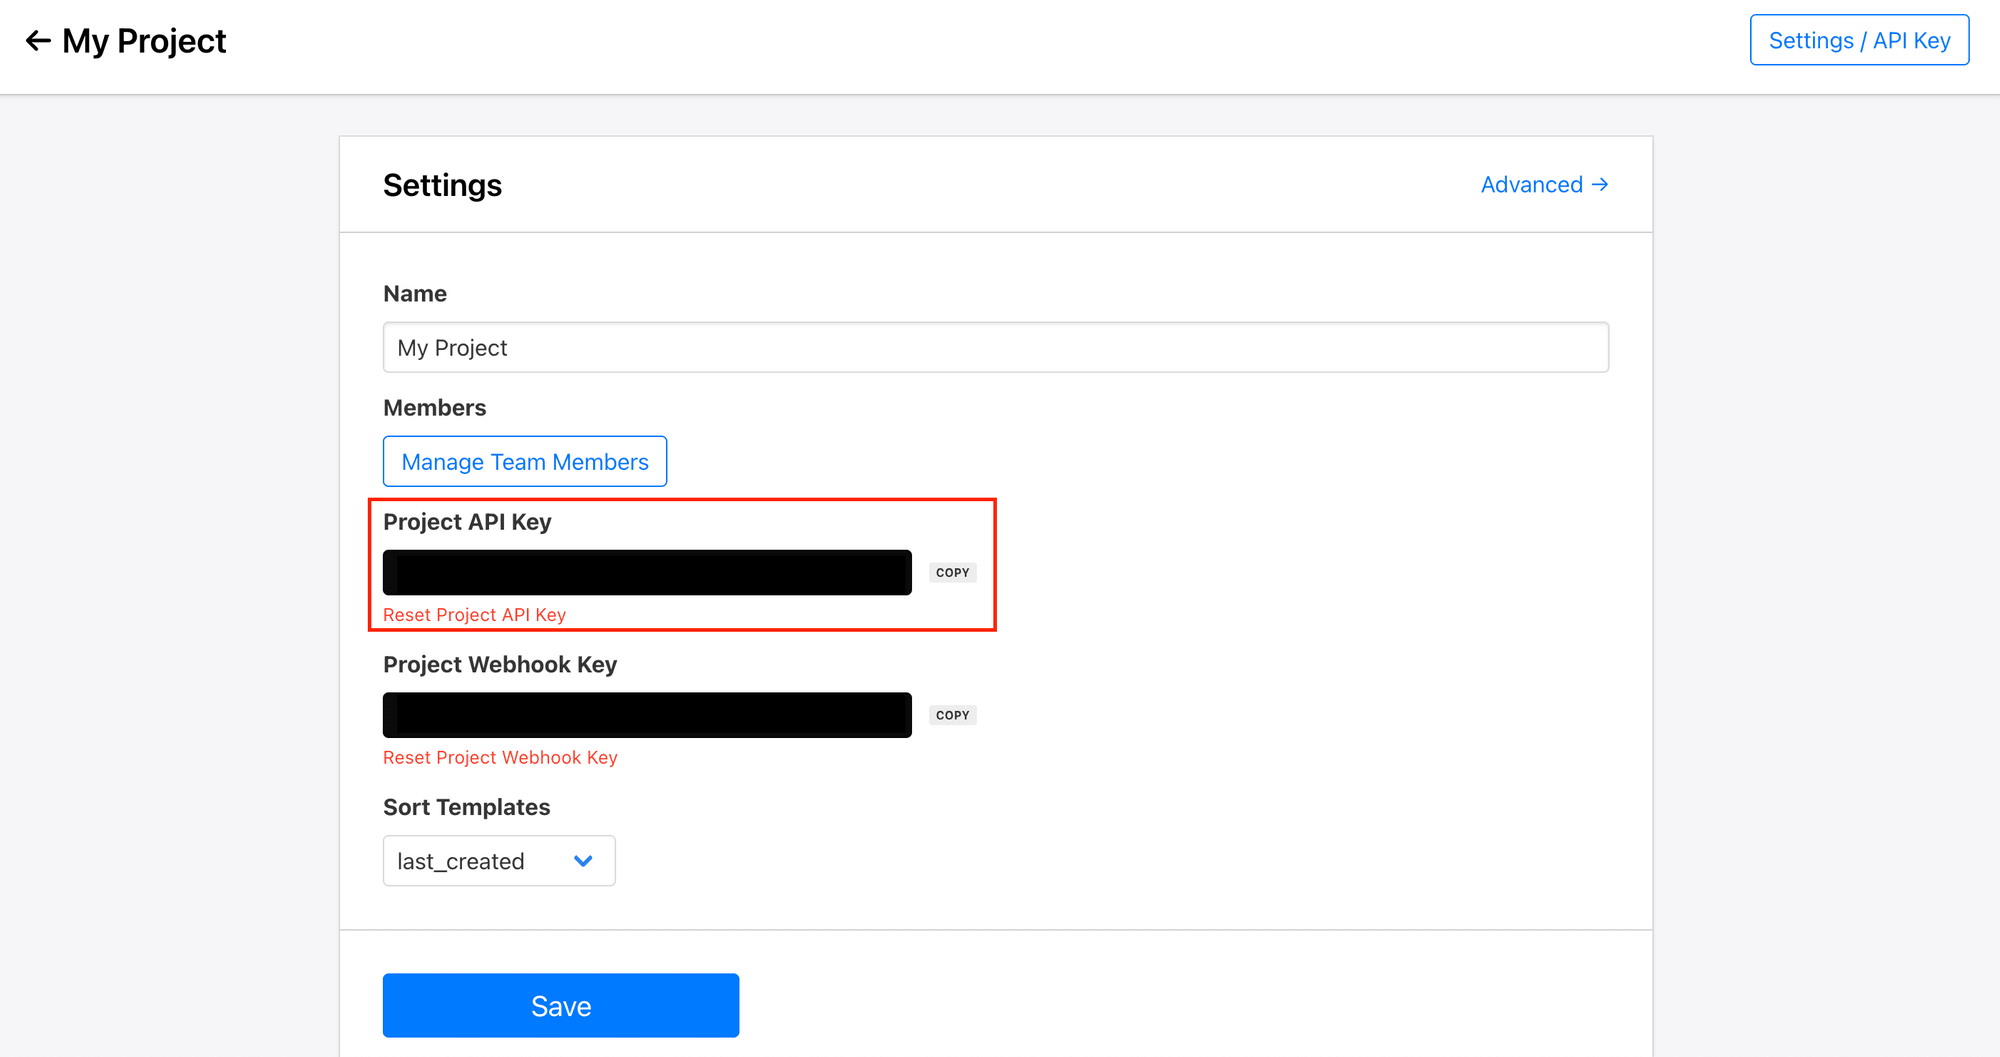
Copy and save it somewhere safe.
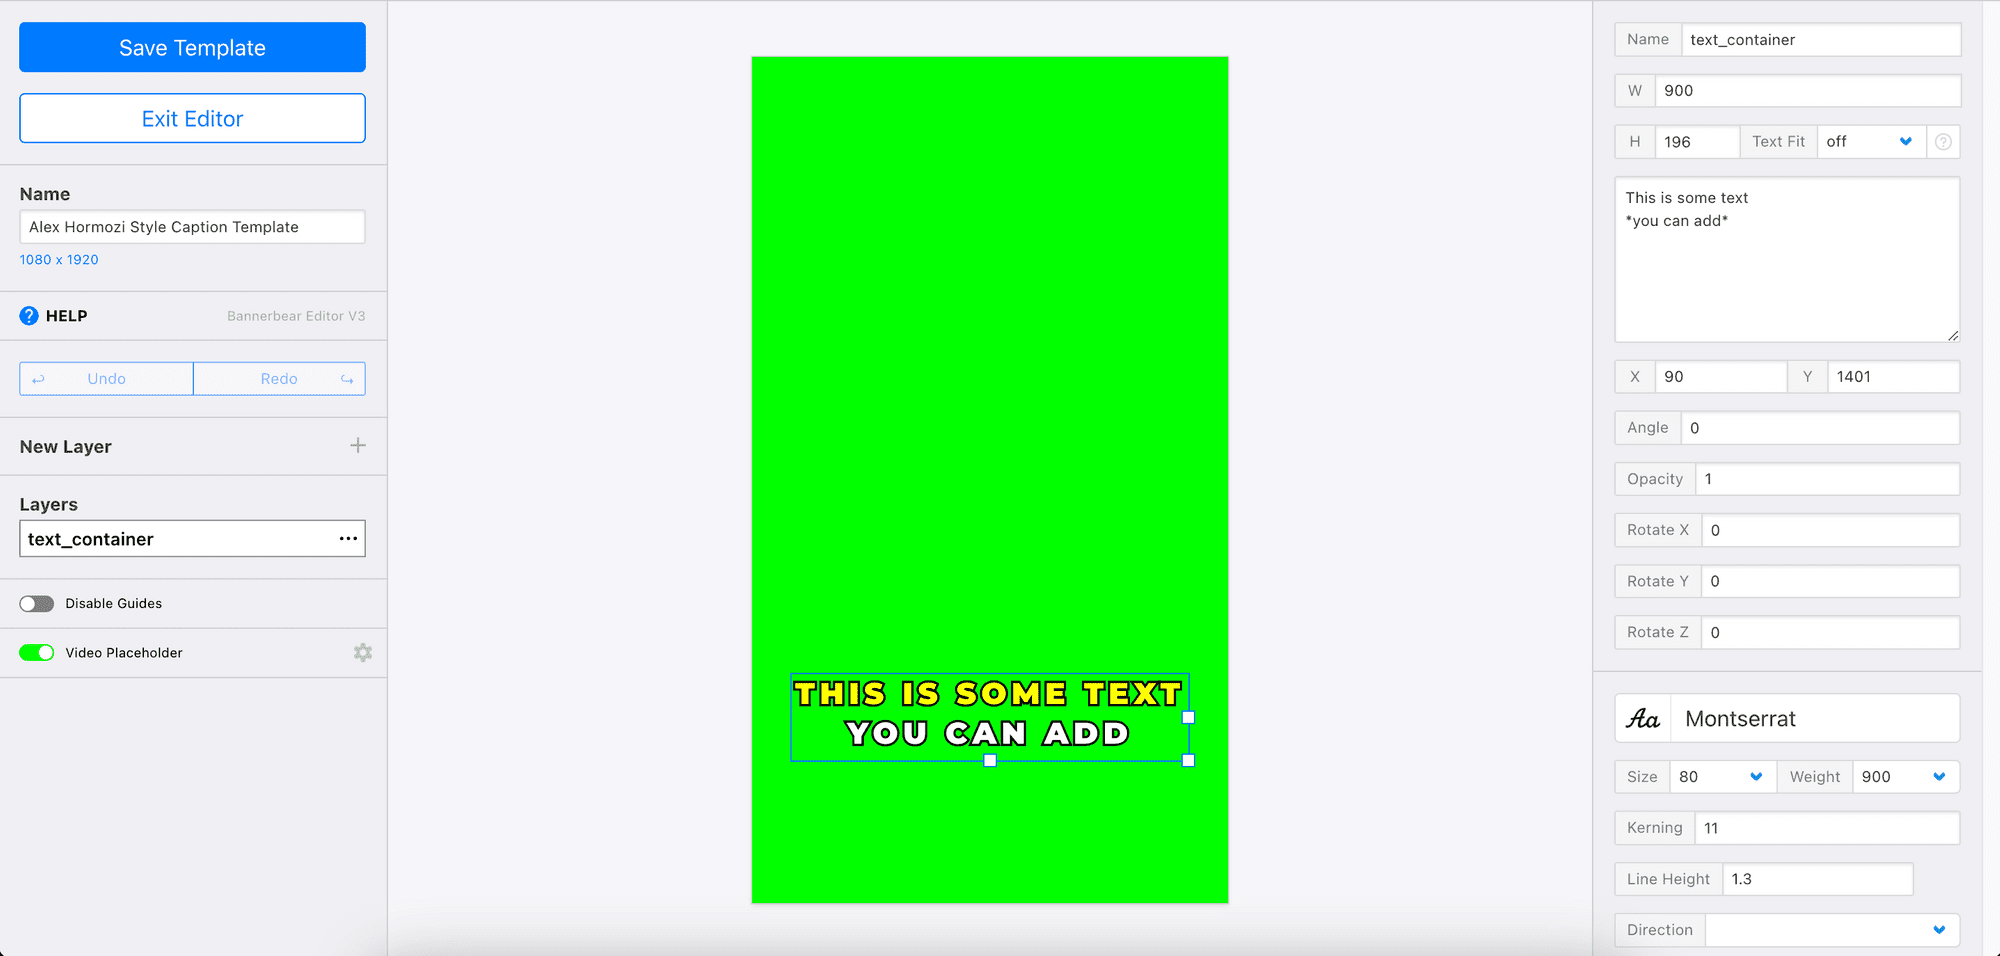
Next, create a new Bannerbear design template. You can create one from scratch by clicking “Create a Template” from your project page:
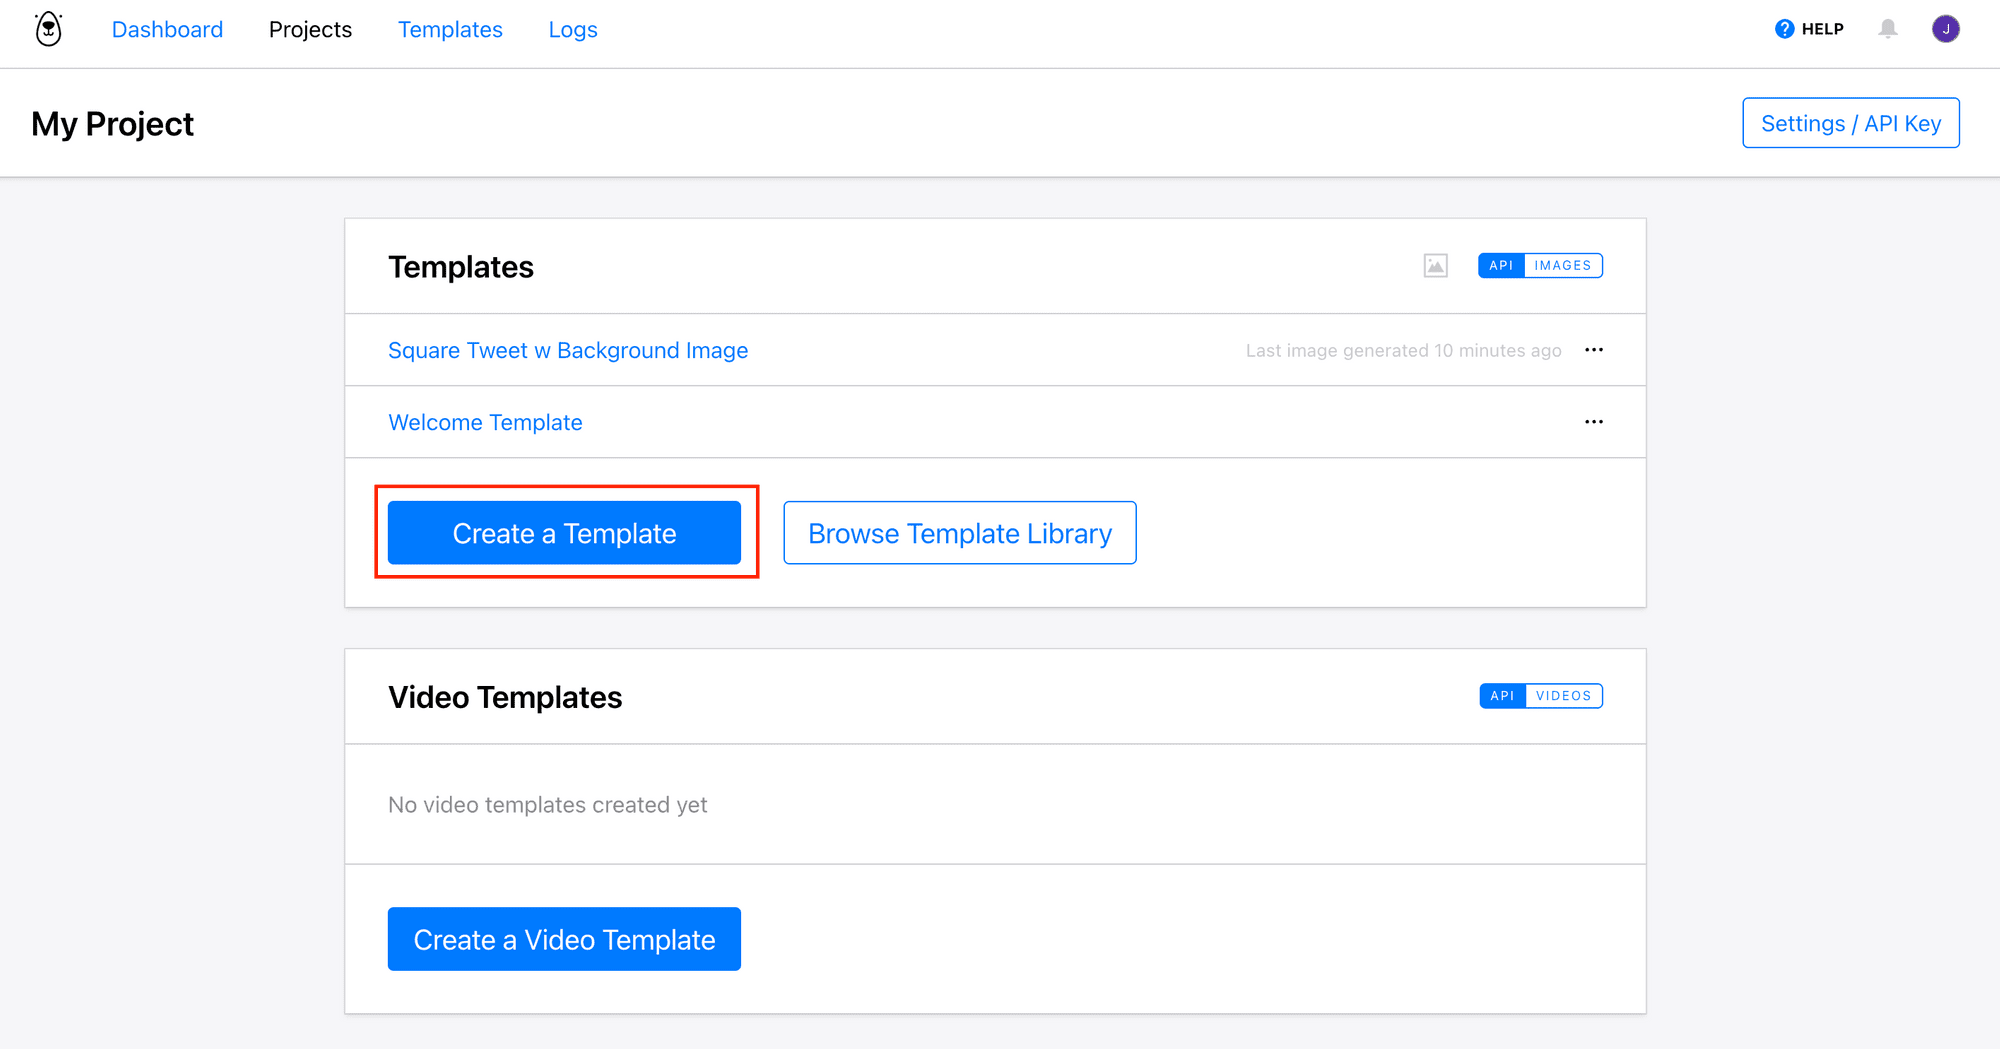
…or by duplicating a pre-made template from Bannerbear’s Template Library, like this one (click on it to duplicate):

The template contains dynamic objects like quote and background_image. The values of these objects can be changed using Bannerbear’s API to generate different quote images:
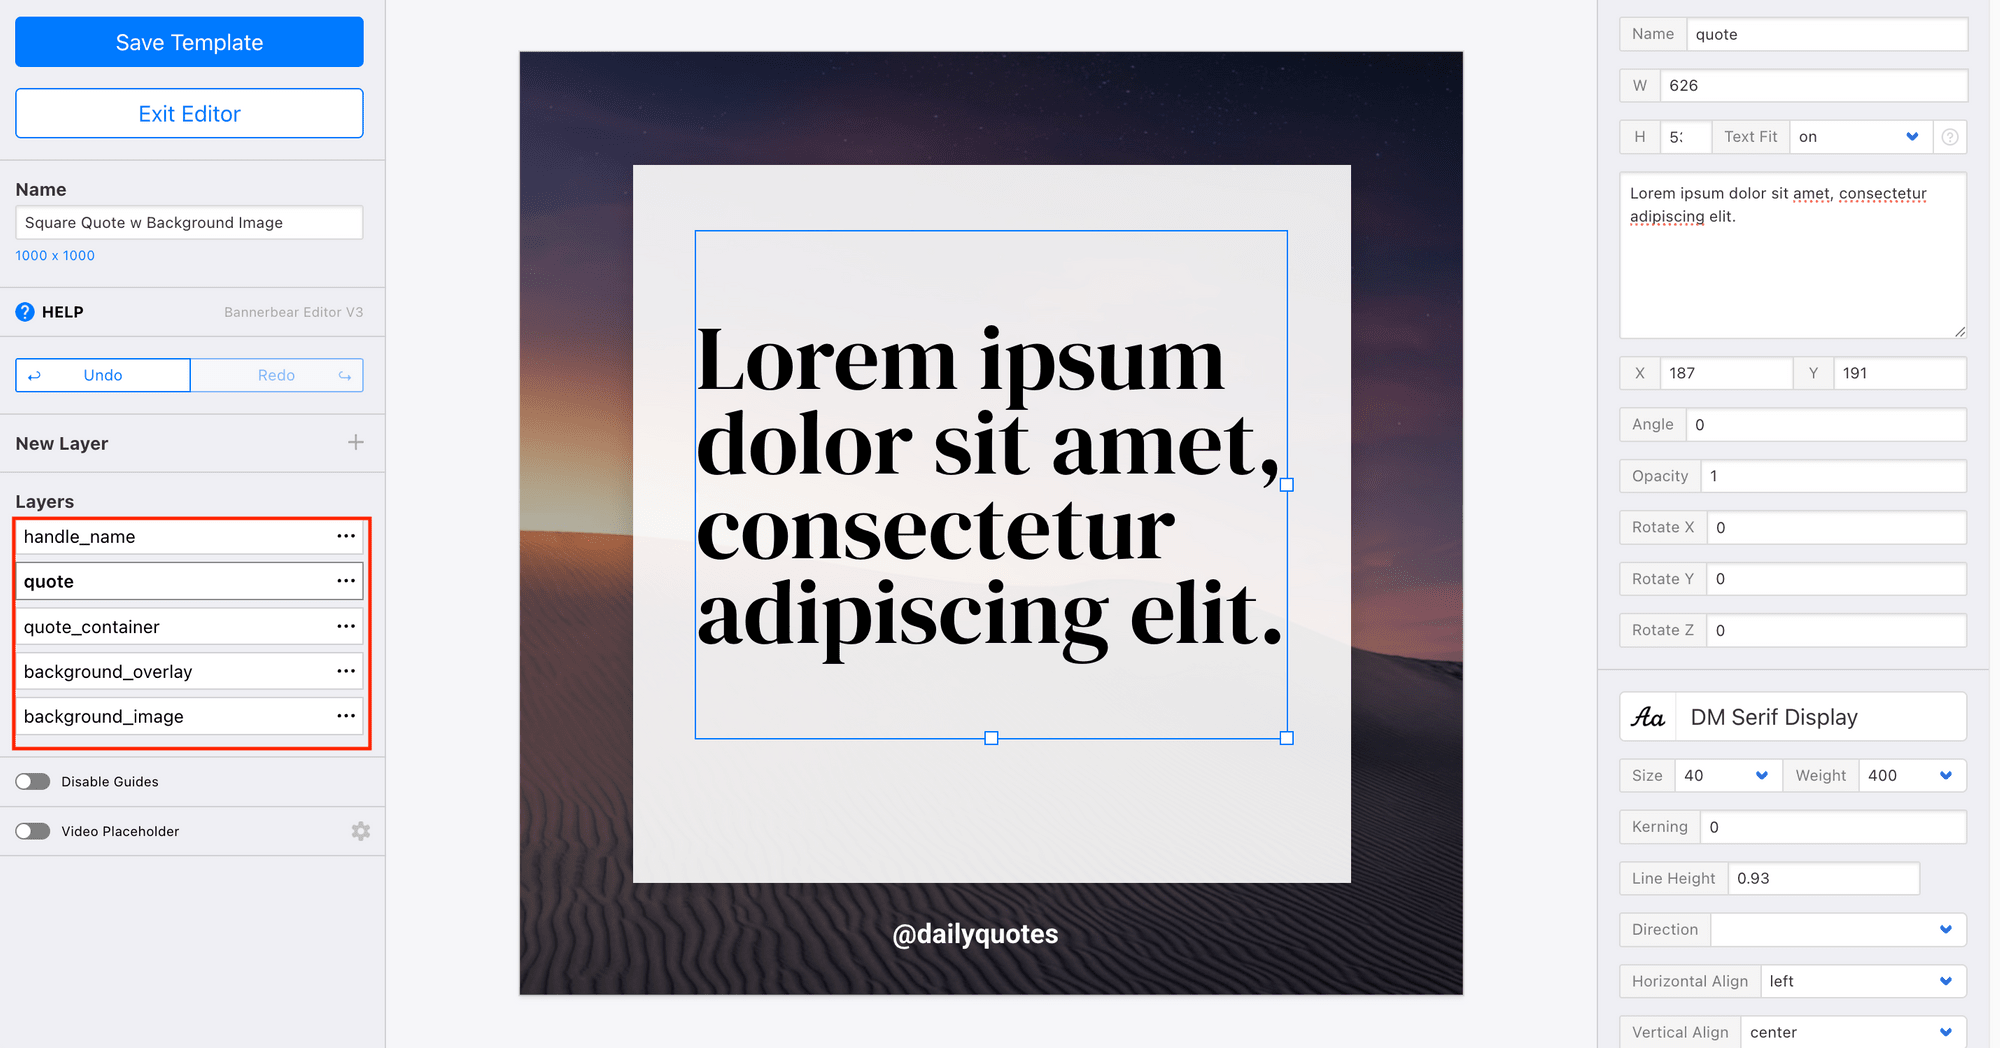
Once you’ve created your template, click on the three dots at the top right corner to see your template ID. We’ll need it in the code later.
Step 2. Project Setup
In your terminal/command line, create a new directory and initialize a Node.js project:
mkdir telegram-bannerbear-bot
cd telegram-bannerbear-bot
npm init
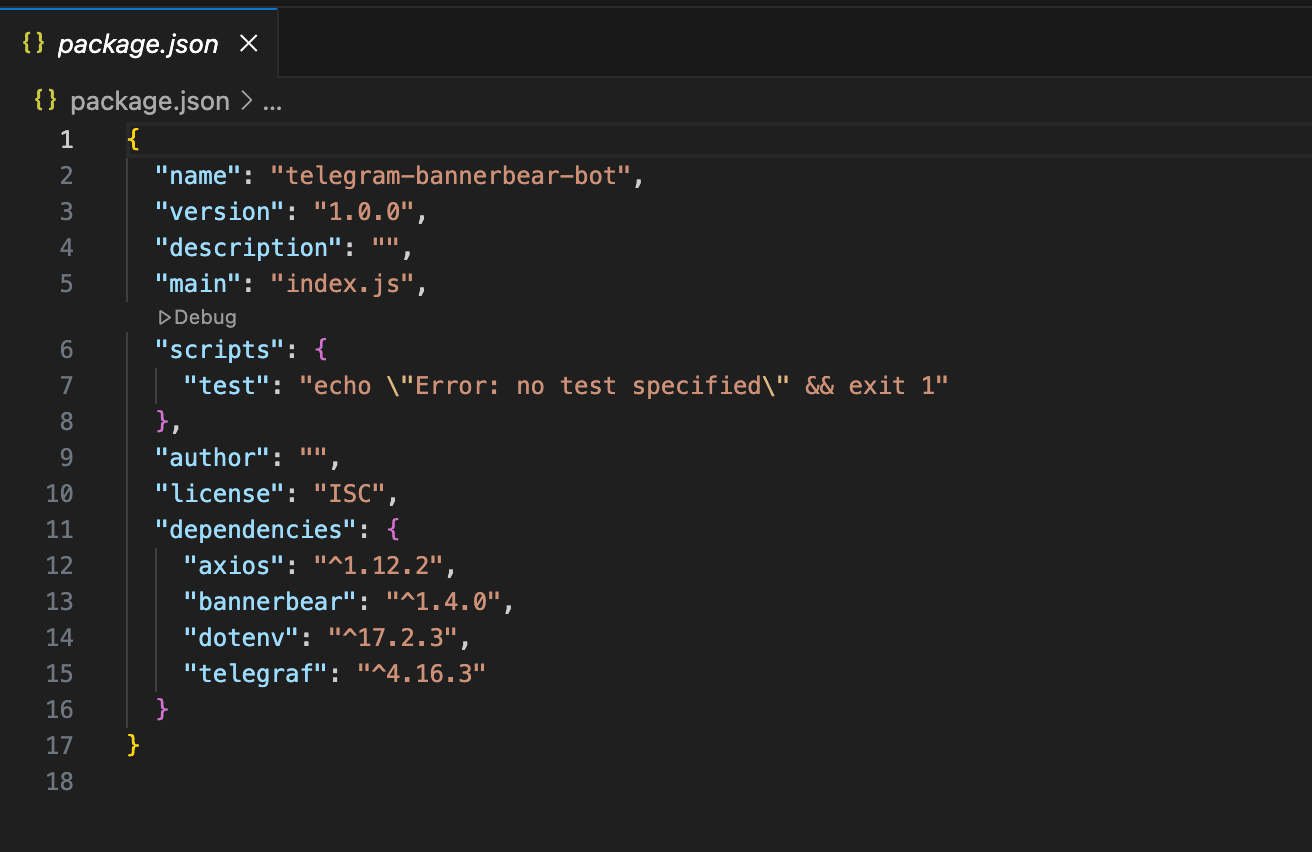
Install the required dependencies:
npm i telegraf bannerbear axios dotenv
Your package.json should look like this:
Step 3. Environment Configuration
Create a .env file to store your sensitive credentials:
TELEGRAM_BOT_TOKEN=your_telegram_bot_token_here
BANNERBEAR_API_KEY=your_bannerbear_api_key_here
BANNERBEAR_TEMPLATE_ID=your_template_id_here
🐻 Bear Tip: Never commit this file to version control! Add it to your
.gitignore.
Step 4. Building the Bot Logic
Next, create index.js for writing the code. Let's build our bot step by step:
Basic Bot Setup
require('dotenv').config();
const { Telegraf } = require('telegraf');
const axios = require('axios');
const { Bannerbear } = require('bannerbear')

// Initialize bot and Bannerbear with token from environment variables
const bot = new Telegraf(process.env.TELEGRAM_BOT_TOKEN);
const BANNERBEAR_API_KEY = process.env.BANNERBEAR_API_KEY;
const BANNERBEAR_TEMPLATE_ID = process.env.BANNERBEAR_TEMPLATE_ID;
console.log('Bot is starting...')
This sets up our basic imports and configuration. We're using:
dotenvto load environment variables from the.envfileTelegrafas our Telegram bot framework to handle commands and messagesaxiosfor making HTTP requestsbannerbearto generate images from templates
Bannerbear Service Function
Next, create a function to generate images from a template with Bannerbear:
async function generateImage(text, imageUrl) {
  const images = await bb.create_image(
    BANNERBEAR_TEMPLATE_ID,
    {
      modifications: [
        { name: 'quote', text },
        { name: 'background_image', image_url: imageUrl },
      ],
    },
    true // returns result synchronously
  );
  return images.image_url;
}
This function calls Bannerbear’s bb.create_image() method to generate an image based on the specified template. It updates the template layers with the new text and image, then returns the URL of the generated image.
🐻 Bear Tip: Make sure the names match the layer names in your Bannerbear template. Otherwise, the layers won’t update.
Basic Command Handlers: /start and /help
bot.start((ctx) => {
  ctx.reply(`Welcome! Send /createimage [your text] with a photo attached to generate an image.`);
});

bot.help((ctx) => {
  ctx.reply('Send /createimage [your text] with a photo attached to generate an image.');
});
These commands give users short instructions on how to use the bot.
Image Generation Command Handler: /createimage
bot.command('createimage', async (ctx) => {
  const msg = ctx.message;
  const raw = (msg.text || msg.caption || '').trim();
  const text = raw.replace(/^\/createimage\b/, '').trim();

  if (!text) {
    return ctx.reply('❌ Text is required. Usage: Send /createimage [your text] with a photo attached to generate an image.');
  }

  if (!msg.photo) {
    return ctx.reply('❌ Photo is required. Usage: Send /createimage [your text] with a photo attached to generate an image.');
  }
});
This is the core functionality of the bot. Here’s what it does:
- It extracts text from the user's command
- Ensures both text and photo are present. Otherwise, it replies with a clear error.
🐻 Bear Tip: This command handler mainly guards against users sending
/createimagewithout a photo. When the user attaches a photo with the command and text, it will trigger the photo handler (next section).
Photo Handler
function telegramFileUrl(filePath) {
  return `https://api.telegram.org/file/bot${TELEGRAM_BOT_TOKEN}/${filePath}`;
}

bot.on('photo', async (ctx) => {
  const msg = ctx.message;
  const caption = (msg.caption || '').trim();
  const captionText = caption.replace(/^\/createimage\b/, '').trim();

  try {
    const fileId = msg.photo[msg.photo.length - 1].file_id;
    const file = await ctx.telegram.getFile(fileId);
    const imageUrl = telegramFileUrl(file.file_path);

    if (captionText) {
      const processing = await ctx.reply('🐻 Generating your image…');
      try {
        const url = await generateImage(captionText, imageUrl);
        await ctx.telegram.editMessageText(ctx.chat.id, processing.message_id, null, '✅ Image generated!');
        return ctx.replyWithPhoto(url, { caption: `"${captionText}"` });
      } catch (err) {
        console.error(err);
        return ctx.reply('❌ Error generating your image. Please try again.');
      }
    }

    return ctx.reply(
      'Send /createimage [your text] with a photo attached to generate an image.'
    );
  } catch (error) {
    console.error('Photo handler error:', error);
    return ctx.reply('❌ Error processing your photo. Please try again.');
  }
});
This is where the real work happens, where the bot:
- Parses the user’s quote text
- Gets a direct URL for the photo
- Passes the quote text and photo URL to Bannerbear to generate an image
- Replies to the user with the generated photo
Global Error Handler and Lifecycle
bot.catch((err, ctx) => {
  console.error('Bot error:', err);
  ctx.reply('❌ An error occurred. Please try again.');
});

bot.launch().then(() => console.log('Bot is running!'));
process.once('SIGINT', () => bot.stop('SIGINT'));
process.once('SIGTERM', () => bot.stop('SIGTERM'));
Last but not least, don’t forget to add an error handler. It helps provide useful feedback to users when your bot crashes from unexpected errors.
Step 5. Testing Your Bot
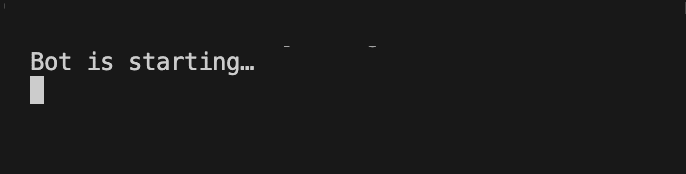
Start your bot by running the command below in your terminal/command line:
node index.js
You should see the bot running in the console :
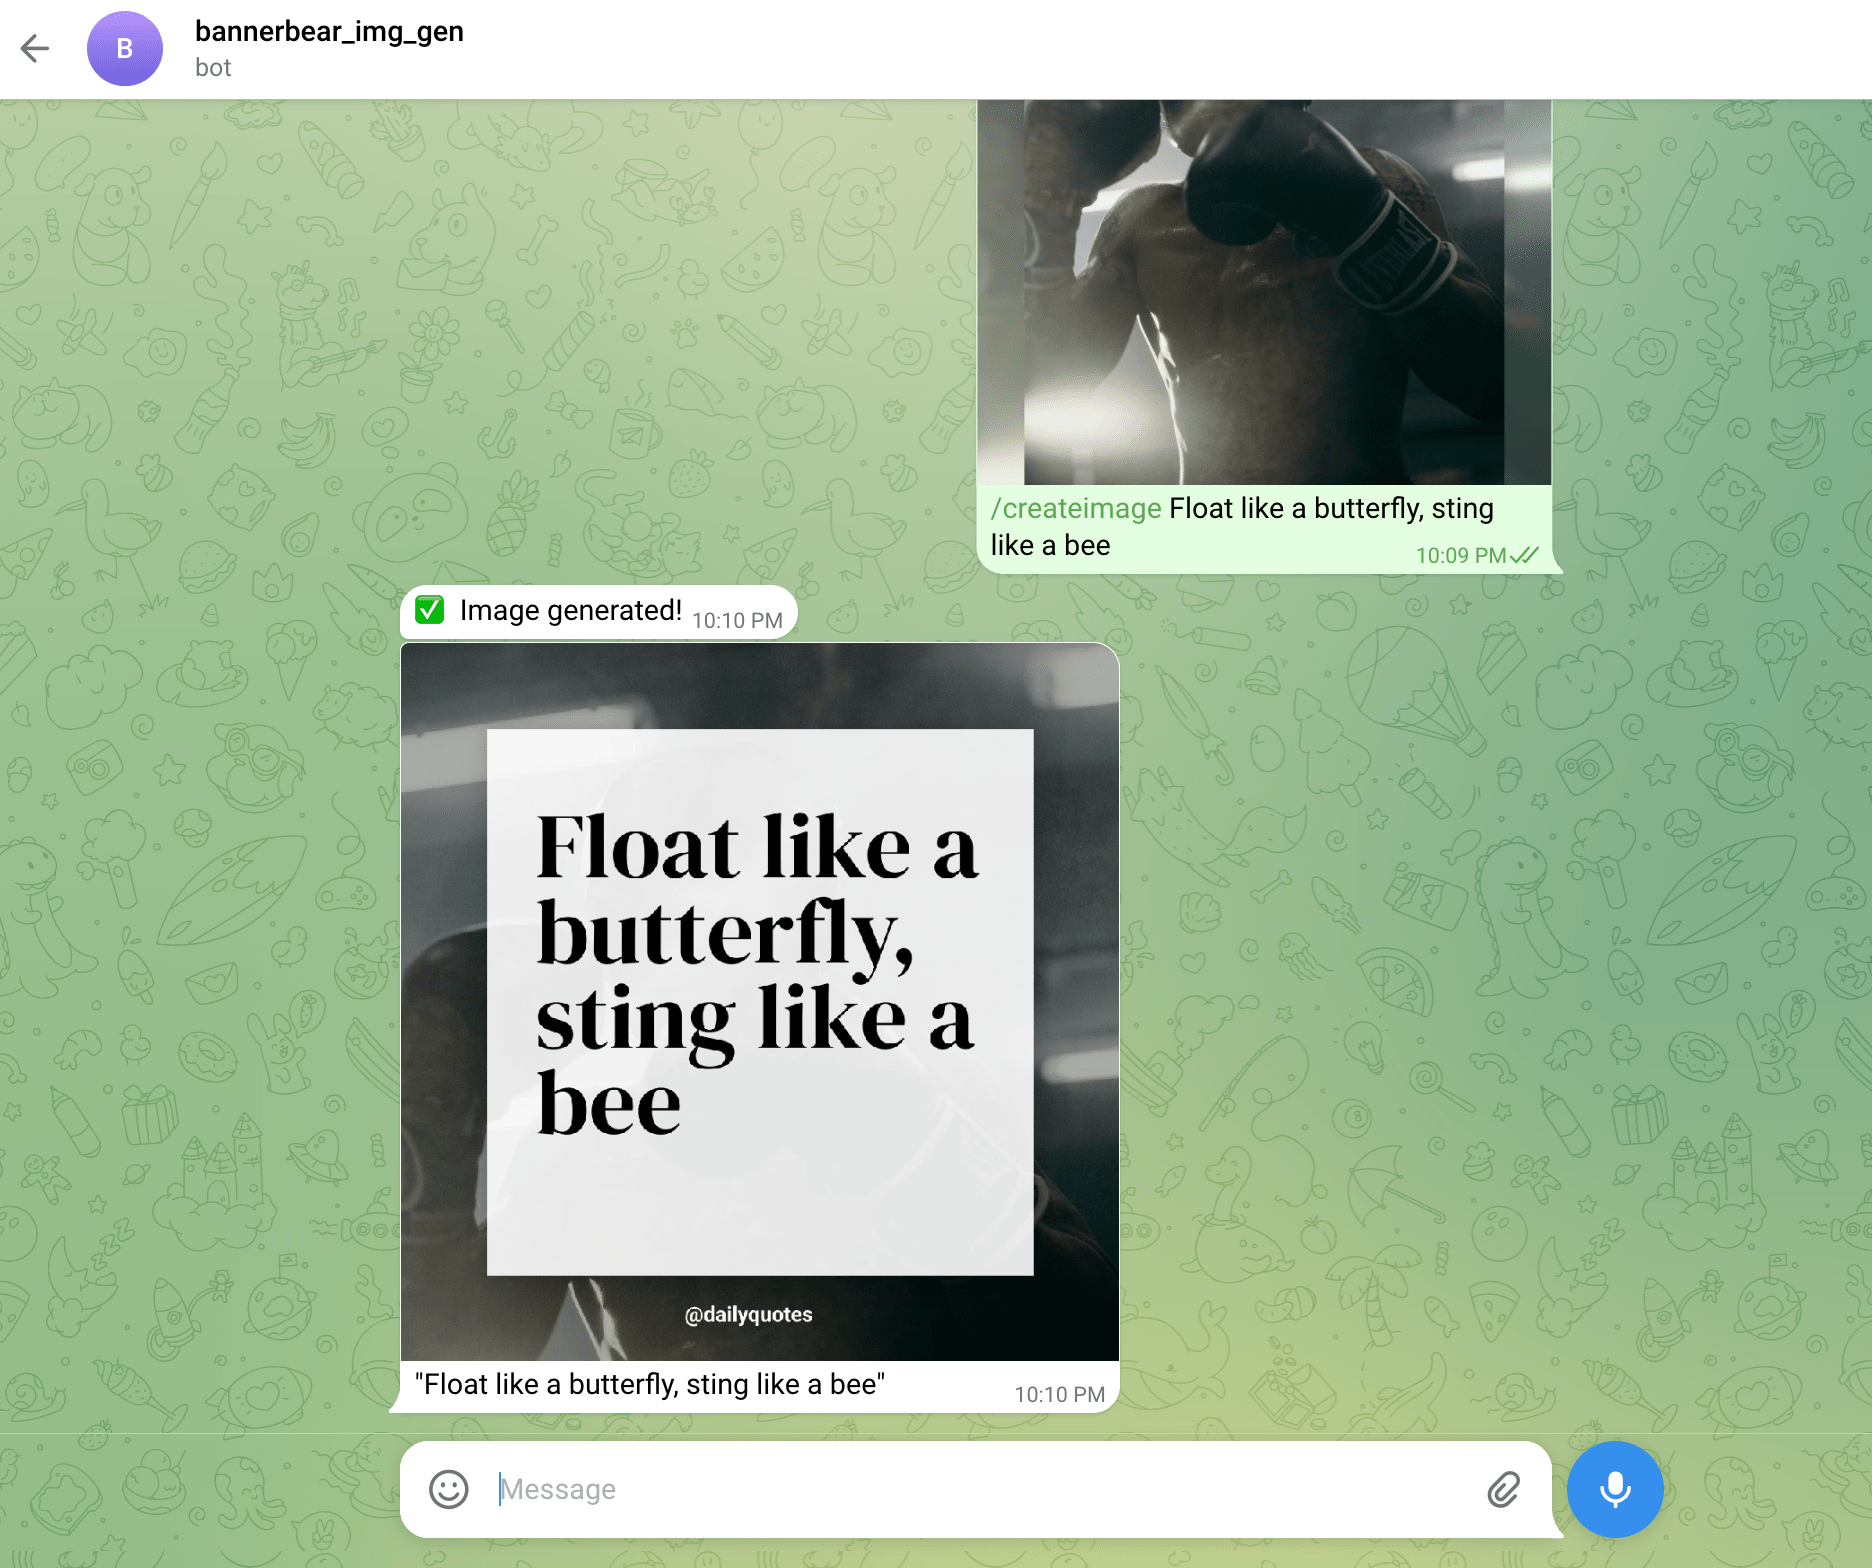
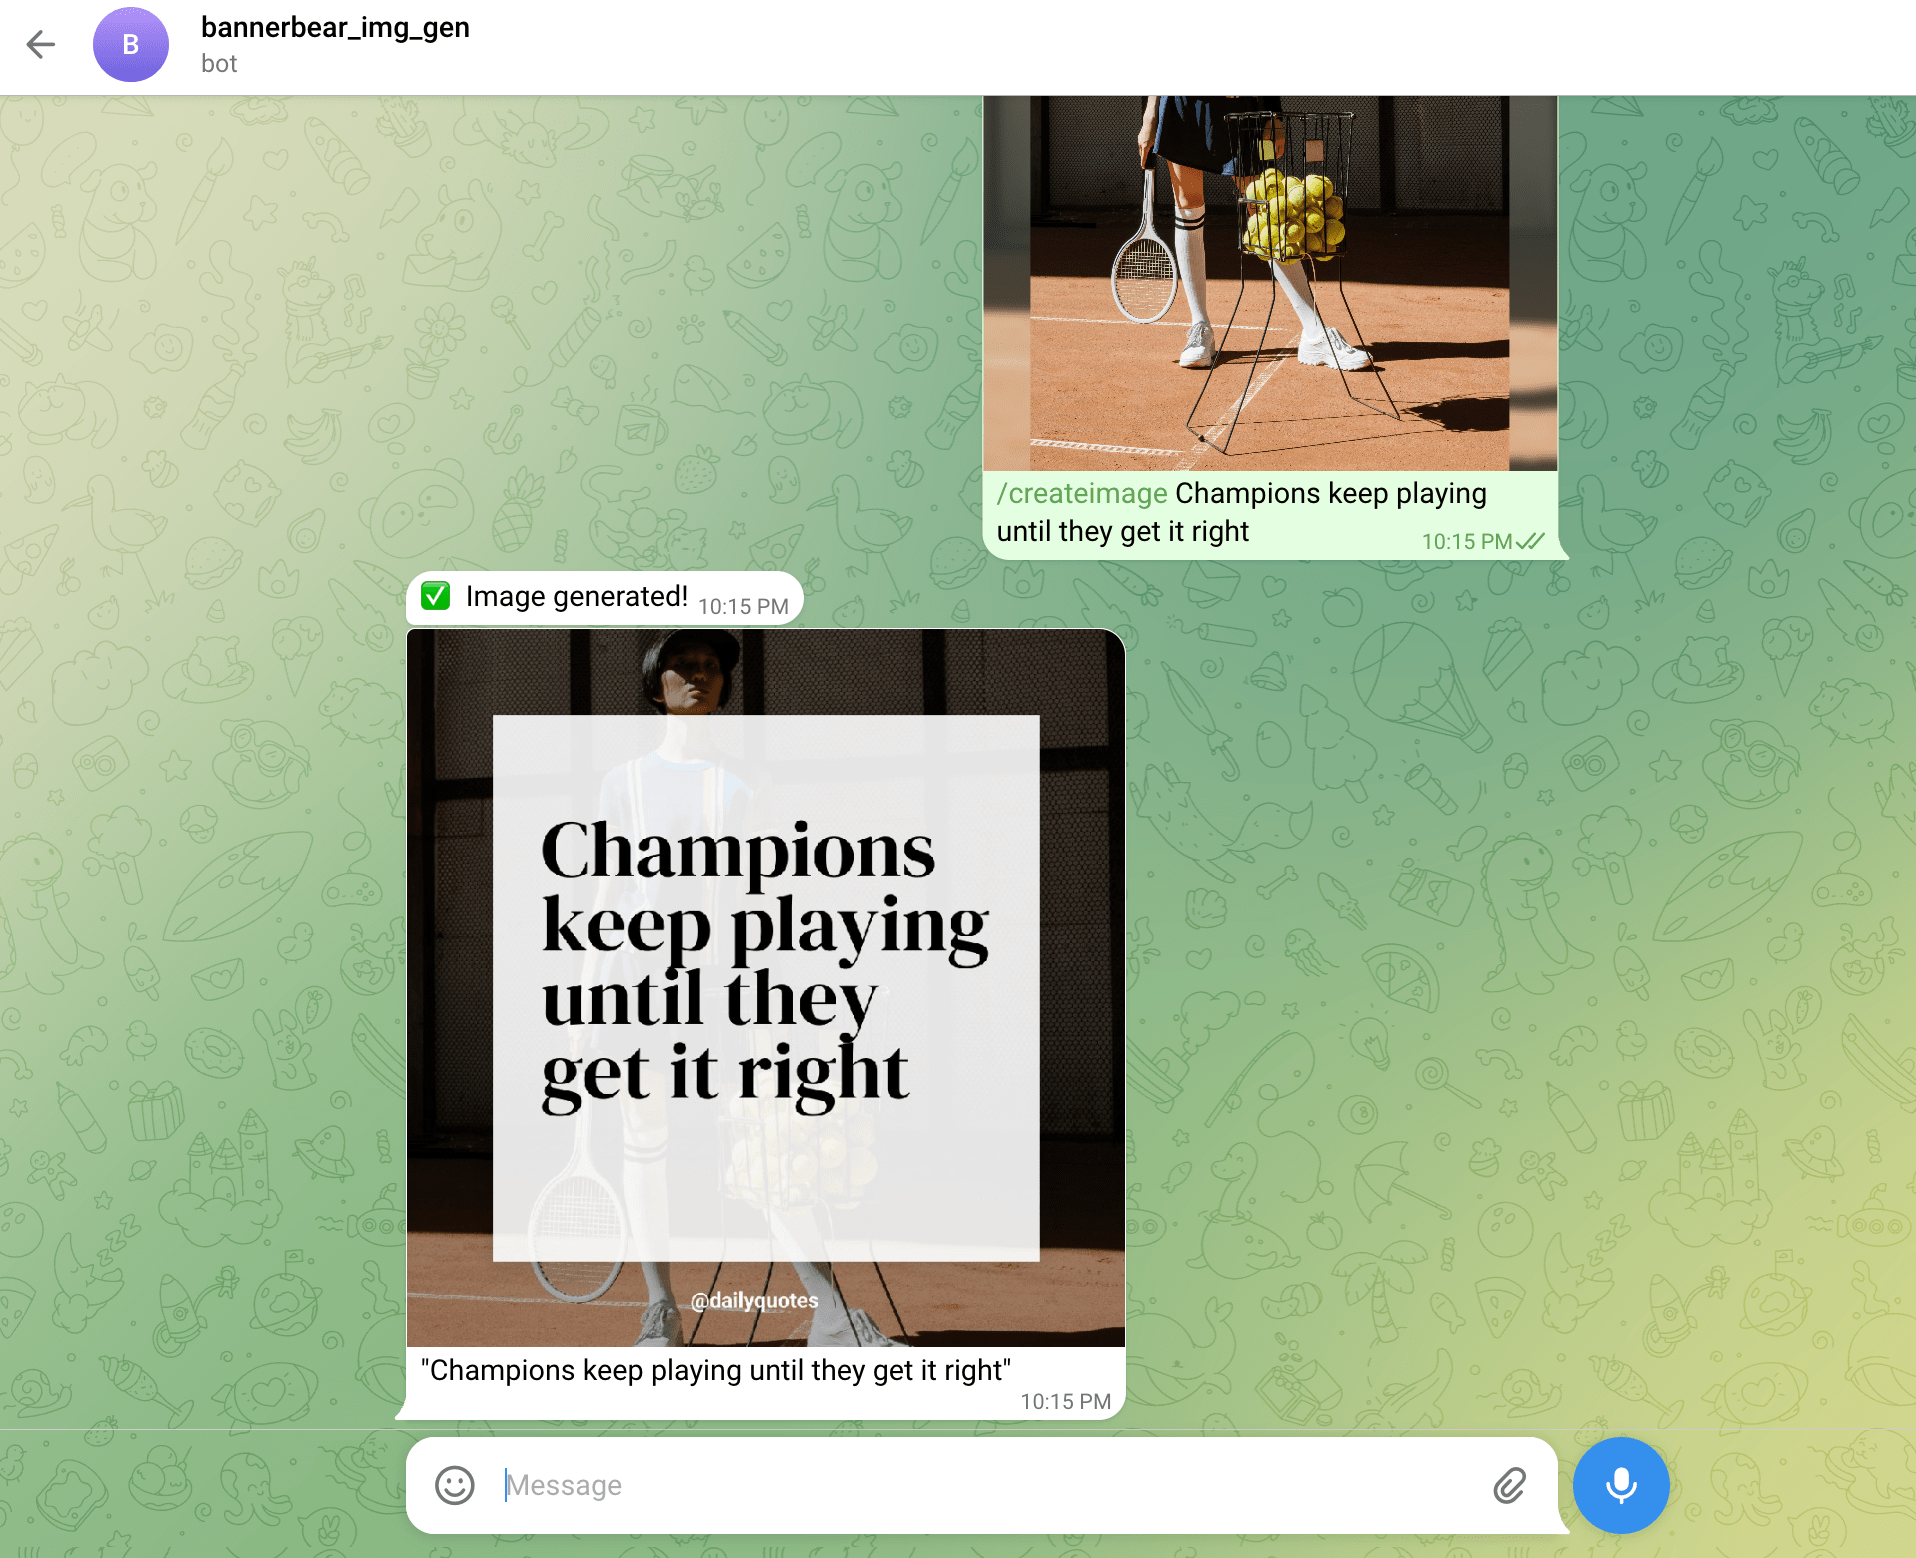
In Telegram, open your bot and:
- Send
/createimagefollowed by your text - Attach your image
- Wait for the image to finish generating

If your quote image appears successfully like in the screenshot above, congratulations! You’ve just built a Telegram chatbot that can create images on demand anytime, anywhere.
More examples…
🐻 Bear Tip: All generated images can also be accessed from your Bannerbear account.
Common Issues and Troubleshooting
Even with everything set up correctly, issues may pop up. Here’s some common issues and how to fix them quickly:
❌ Bot Not Responding
- Check your Telegram bot token.
- Verify your server can make outgoing requests.
- Check for firewall issues.
❌ Image Not Generating
- Check your Bannerbear template layer names match the code.
- Verify your API key and template ID are correct.
- Ensure your Bannerbear account has available credits.
- Bannerbear has rate limits. Implement queueing if you expect high usage.
Next Steps
Generating images on demand using a Telegram chatbot like this has many advantages. It’s fast, convenient, and easily integrates with other APIs. If you’d like to take it a step further, you can deploy the bot on a server or a cloud function, connect a database to track usage, integrate AI, add user authentication, or even extend your bot to other platforms like Discord, Slack, or WhatsApp.
You can use it for:
- Creating social media content
- Designing blog post featured images
- Producing marketing materials
- Making personalised greeting cards
…and more.
🐻 Bear Tip: If you haven't already, sign up for Bannerbear here and get 30 API credits free!
