
How to Build a Discord Bot That Creates Personalized Certificate Images For Members Using Bannerbear (Node.js)
Contents
In Discord servers, bots play a huge role in making the community lively and engaging. Some moderates the server, some bring fun using interactive commands, and some can even pull data from external sources.
When running a community, recognition matters just as much. Discord members love earning badges. It gives them a sense of achievement and belonging in the server. To enhance your community experience, you can use a bot that automatically sends a congratulations message in the channel, along with a personalized image featuring the member’s username and profile picture—proudly announcing their milestone, achievement, or good news to everyone, like this:
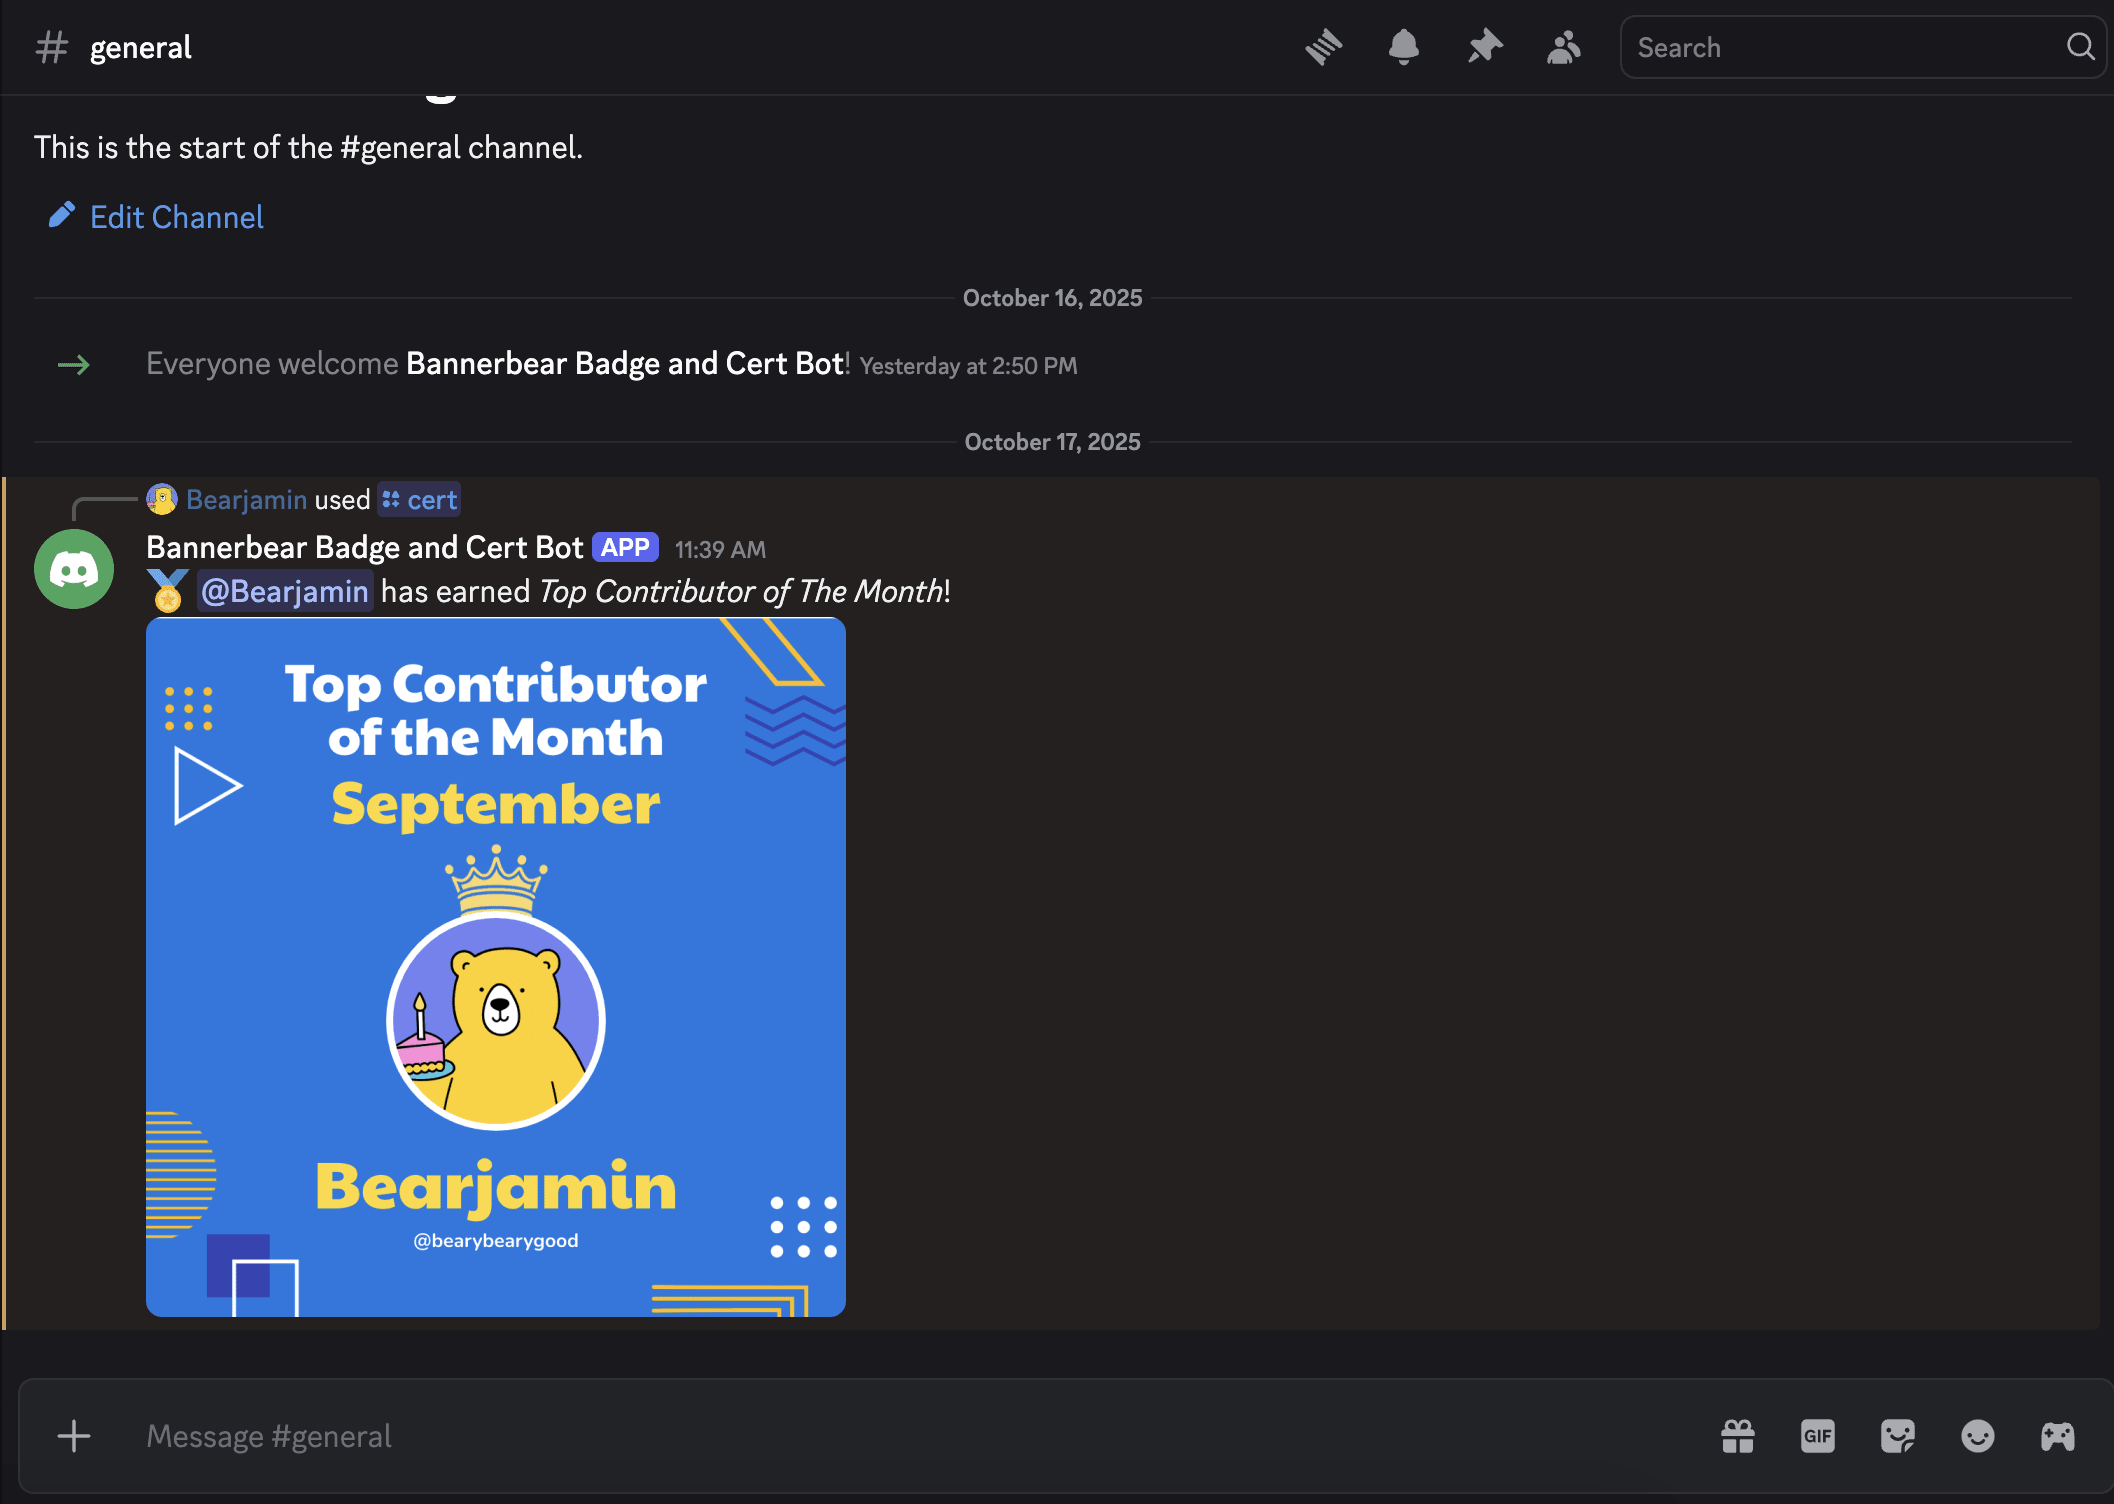
That’s what we’ll build in this tutorial—a Discord bot that generates personalized certificate images and sends them to the channel.
🐻 Bear Tip: To keep this tutorial simple, we’ll let a moderator trigger the process by typing a command like
/cert. But if you’d like, you can take this further by fully automating it so the bot generates and sends certificates whenever a specific event happens.
Let’s get started!
Why Automate Certificate Images with Bannerbear on Discord
Recognition drives engagement and engagement builds a strong community. On top of the usual Discord badges awarded to members, you can enhance your server experience by using automated certificate images to:
- Reward participation : Highlight contributors and event winners.
- Celebrate milestones : Show progress in courses, challenges, or streaks.
- Gamify your server : Turn achievements into collectible visuals.
And with Bannerbear, it can be done easily. Bannerbear is an API that lets you automatically generate custom images, videos, and more from templates. It provides SDKs for Node.js, Ruby, and PHP, making it easy to integrate automated image generation into any project, including Discord bots.
To generate images automatically, you need to create a design template that serves as a blueprint for creating the images in Bannerbear. A design template can consist of:
- Static objects - These remain the same in every generated image (e.g., a logo)
- Dynamic objects - These change based on data you provide (e.g., names, images)
Here’s an example of a Bannerbear design template:
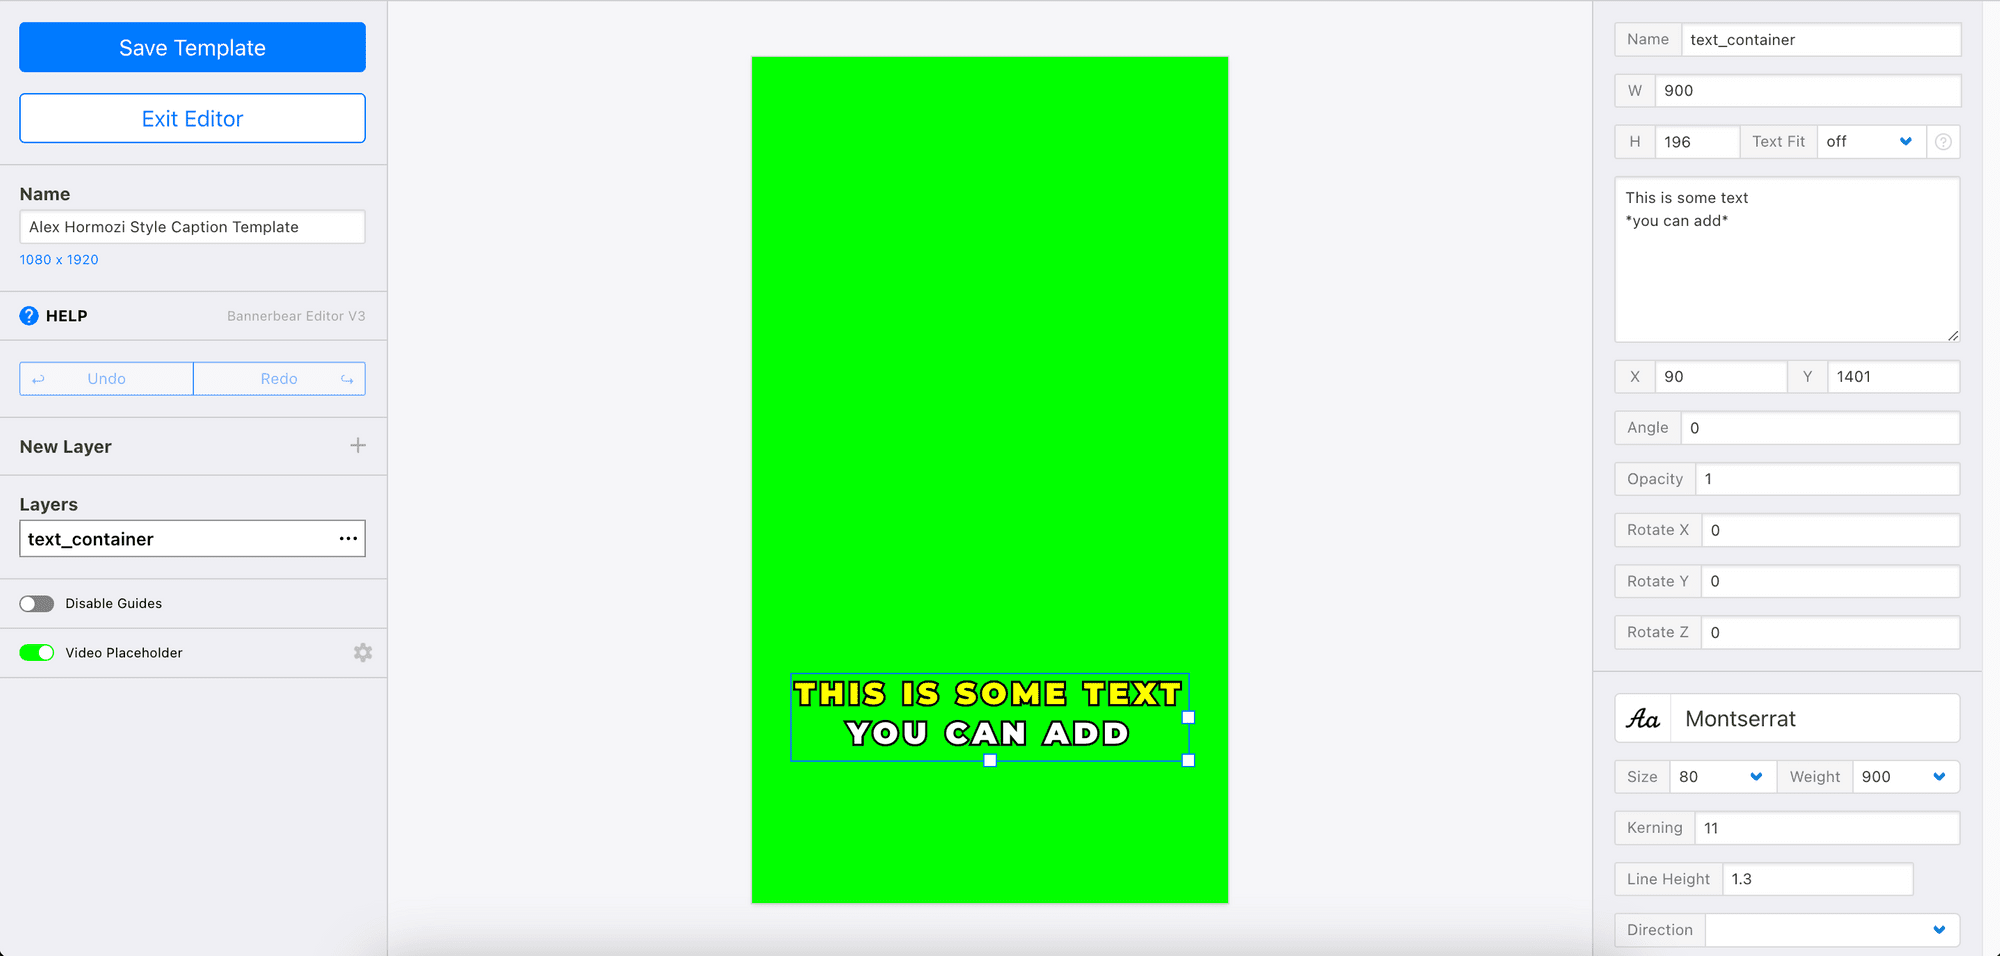
By passing different data to the API, you can alter the values of the dynamic objects and automatically create personalized certificate images for your Discord members.
Pre-requisites
Before we begin, make sure you have:
- Node.js and npm installed on your machine
- A Discord server
- A Discord Developer account
- A Bannerbear account (sign up for 30 free API credits here!)
Setting Up Your Project
In your terminal/command prompt, create a new folder and initialize a new Node.js project:
mkdir discord-badge-cert-bot
cd discord-badge-cert-bot
npm init
Install the packages needed:
npm install discord.js bannerbear dotenv
Then, create a .env file in your root folder and insert the credentials needed for the project:
DISCORD_TOKEN=your_discord_token
DISCORD_BOT_APPLICATION_ID=your_bot_application_id
DISCORD_GUILD_ID=your_discord_guild_id
BANNERBEAR_API_KEY=your_bannerbear_api_key
BANNERBEAR_TEMPLATE_ID=your_bannerbear_template
🐻 Bear Tip: Replace the placeholders with your actual values later.
Bannerbear: Designing Your Certificate Template
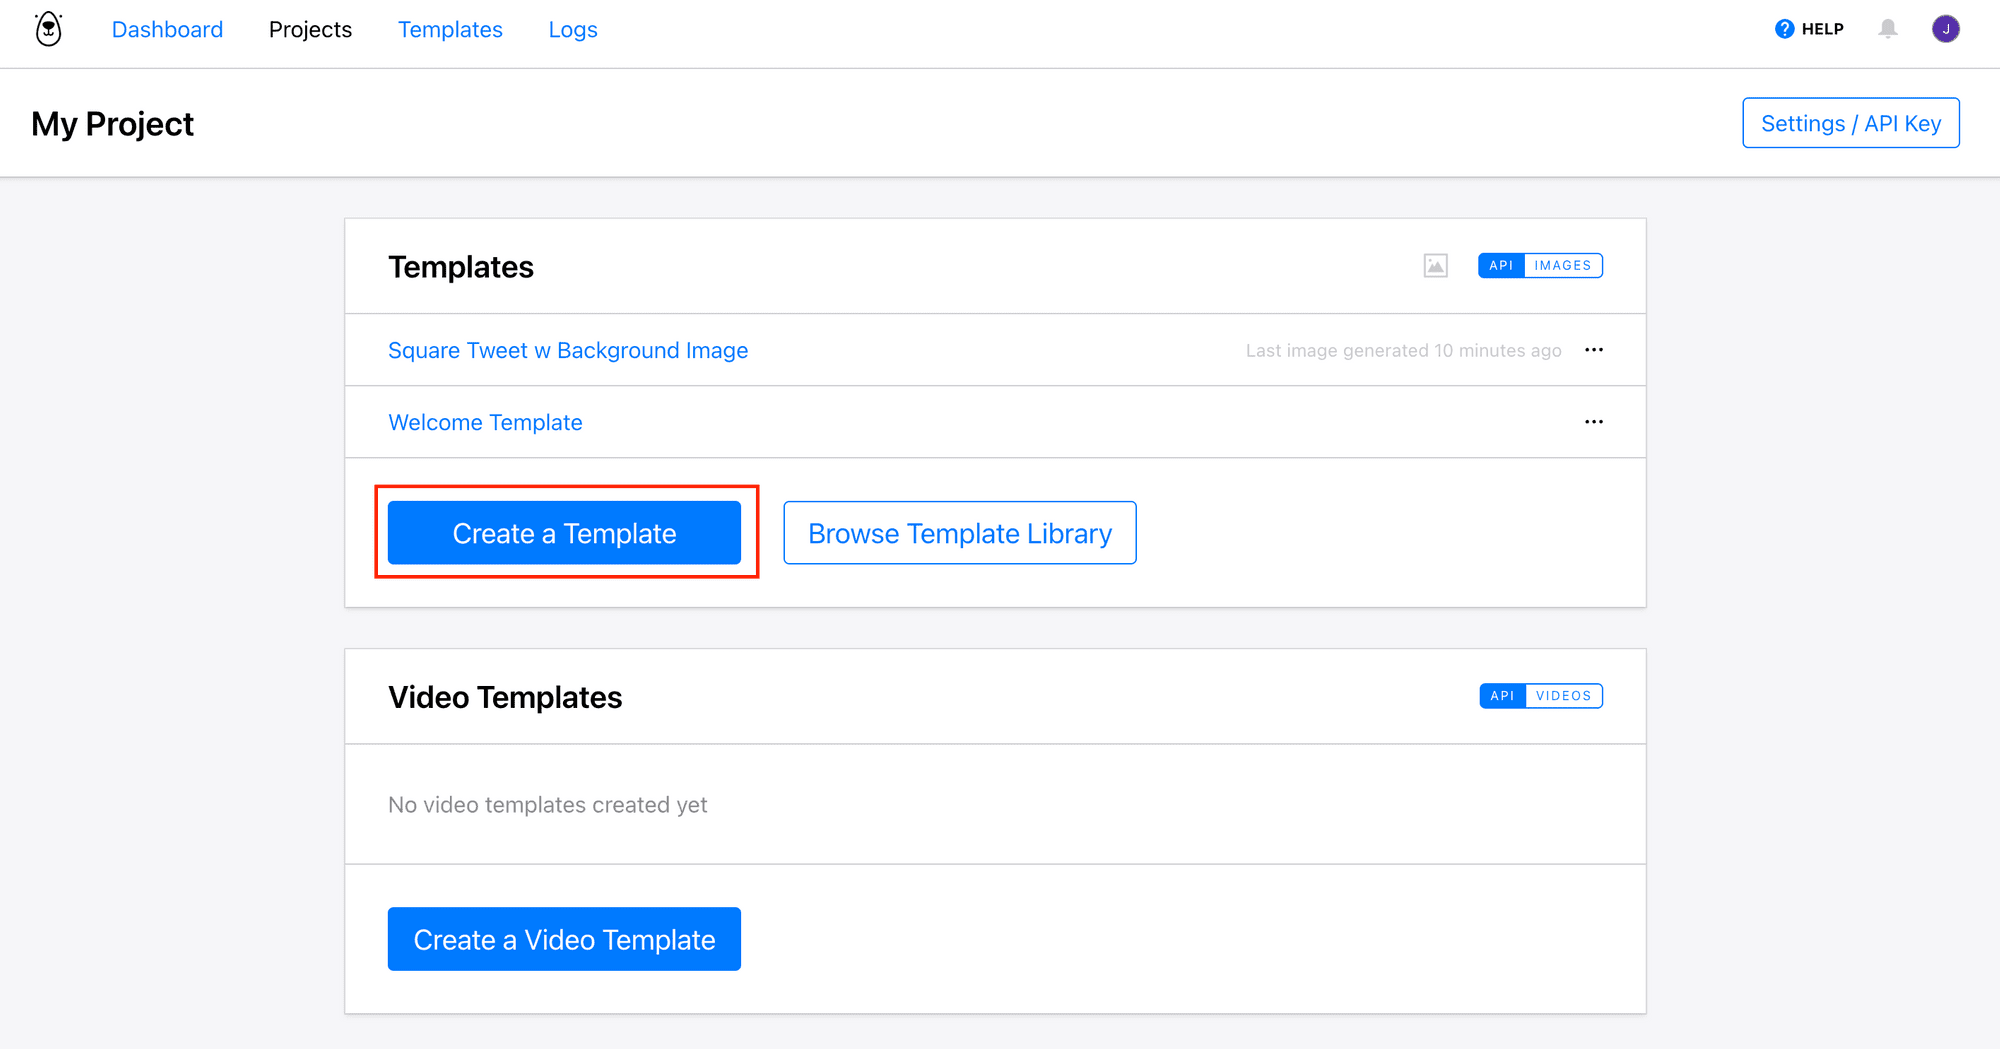
Head to your Bannerbear dashboard and create a new template. You can create one from scratch by clicking “Create a Template” from your project page:
…or by duplicating a pre-made template from Bannerbear’s Template Library, like this one (click on it to duplicate):
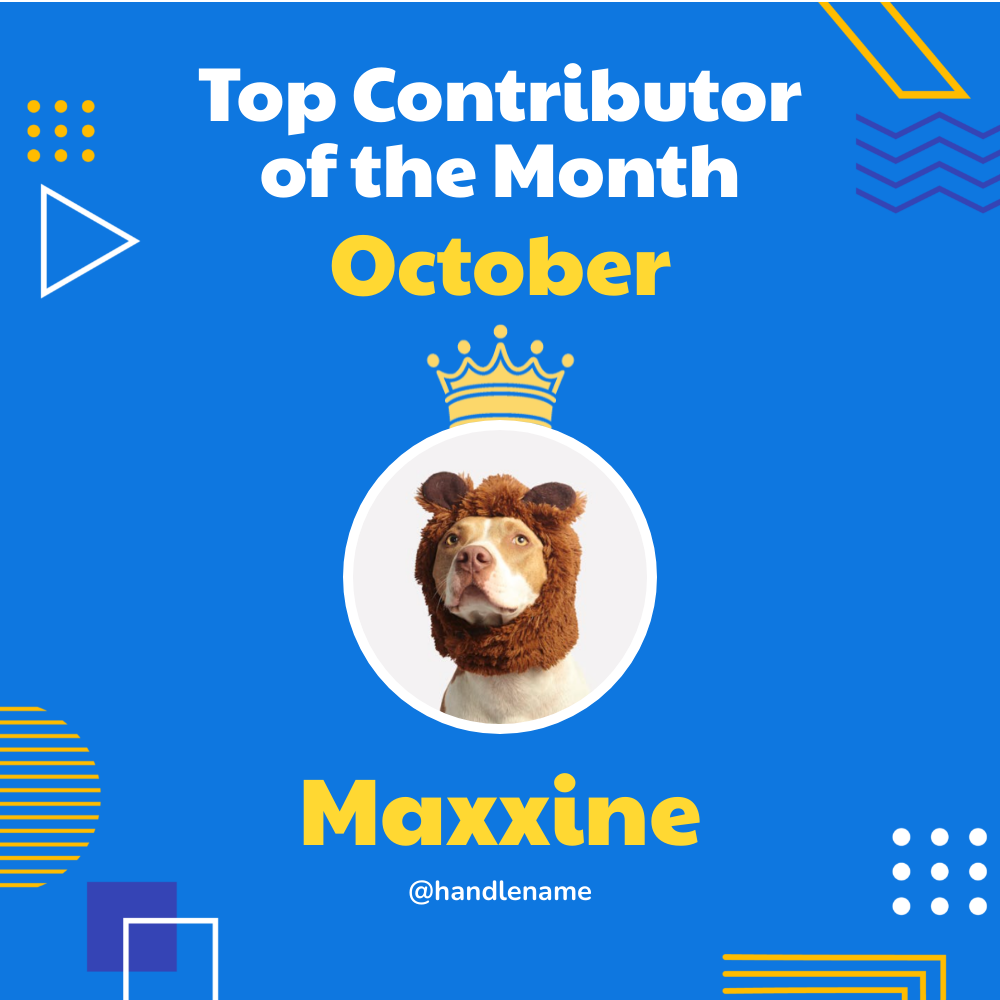
The template contains dynamic objects like name, handle_name, date, and image_container:
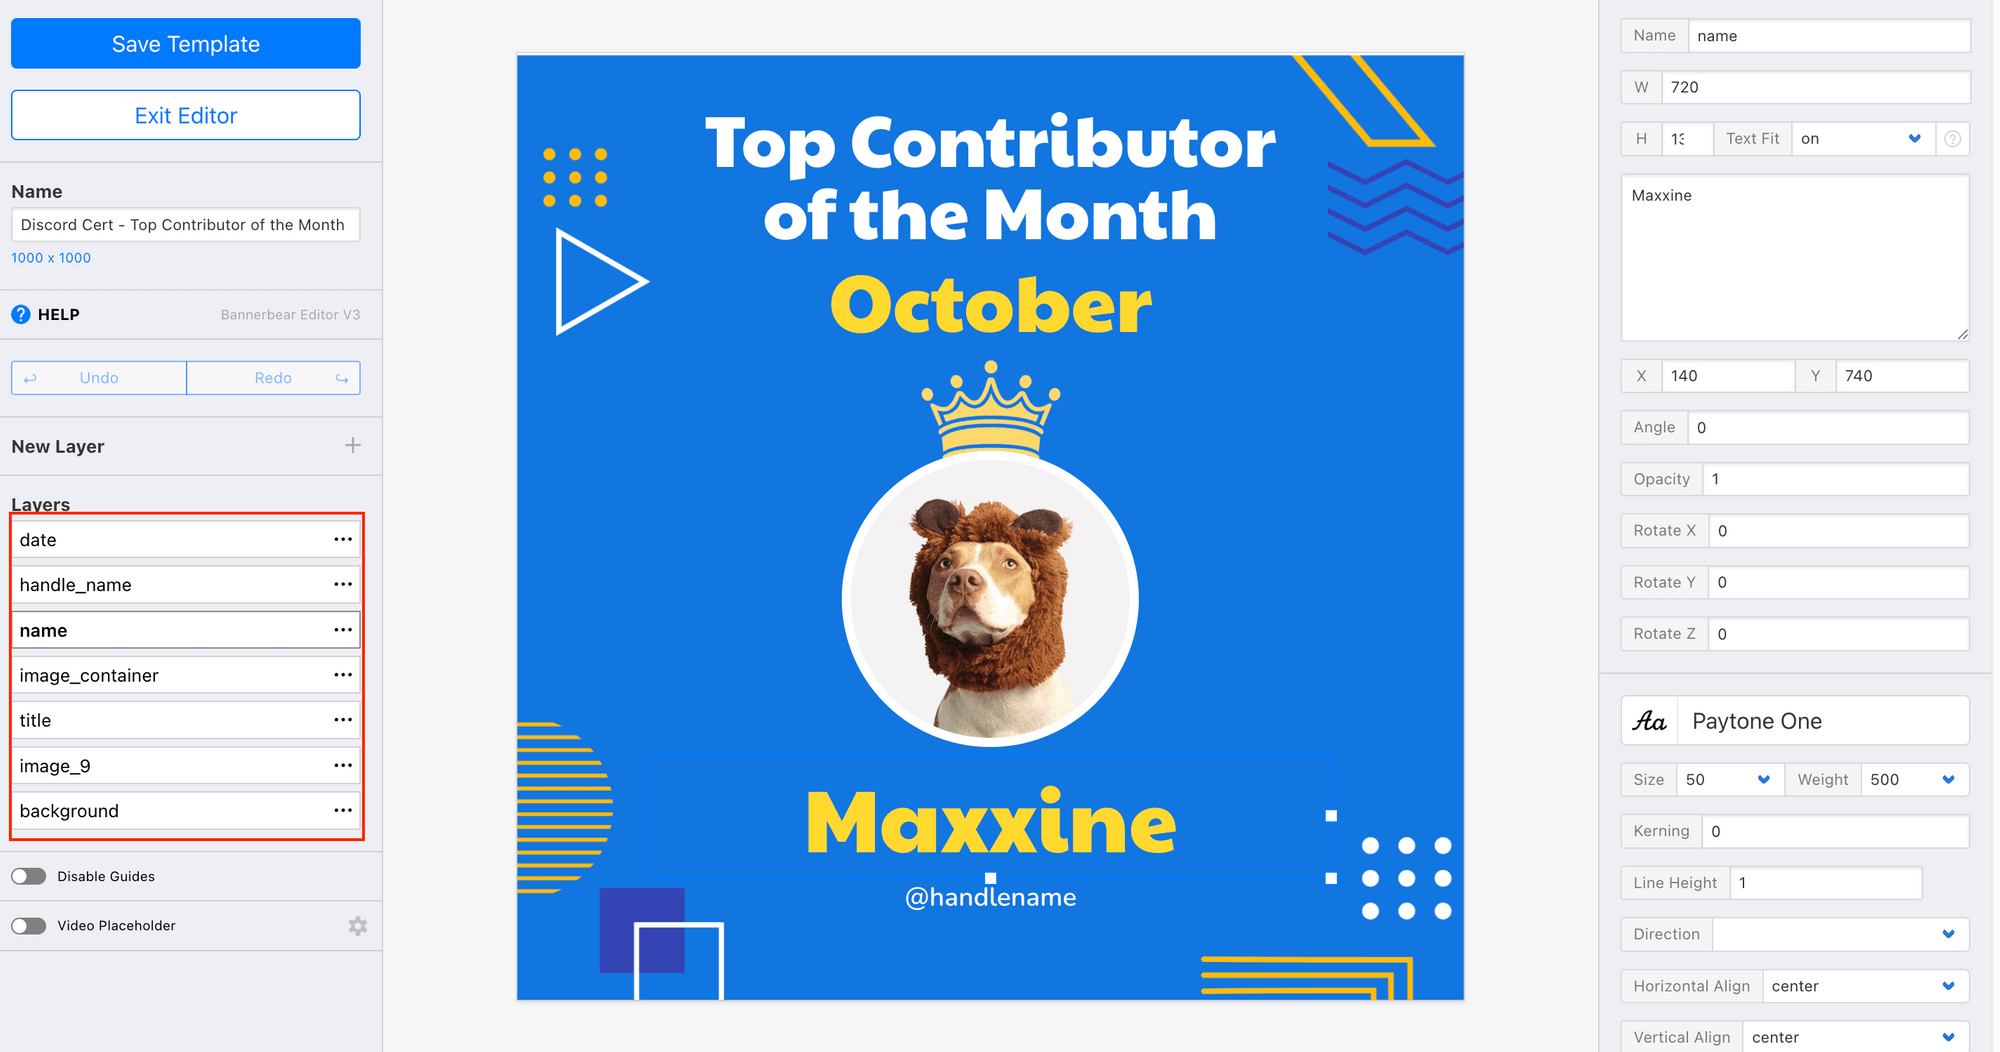
The values of these objects can be changed using Bannerbear’s API to generate different quote images.
Once you’ve created your template, click on the three dots at the top right corner to see your template ID:
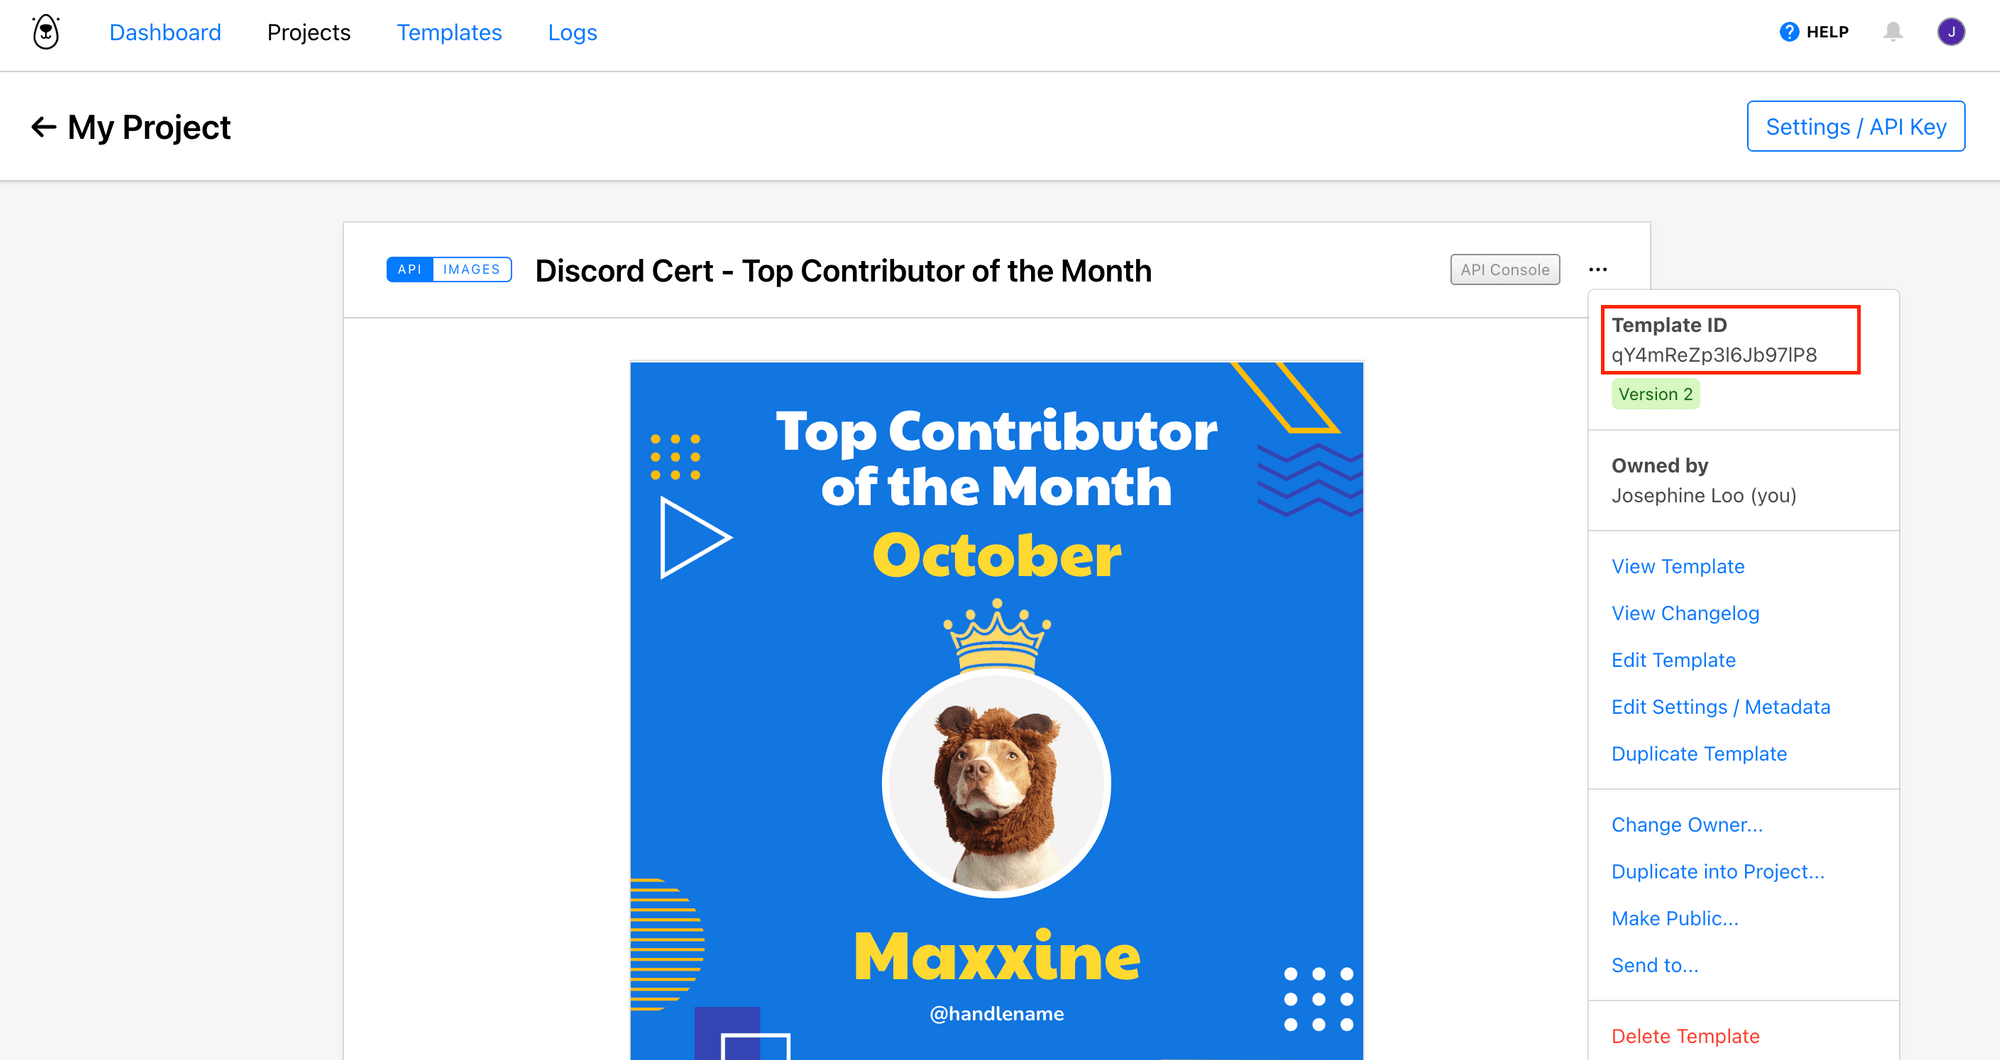
Copy and place it in your .env.
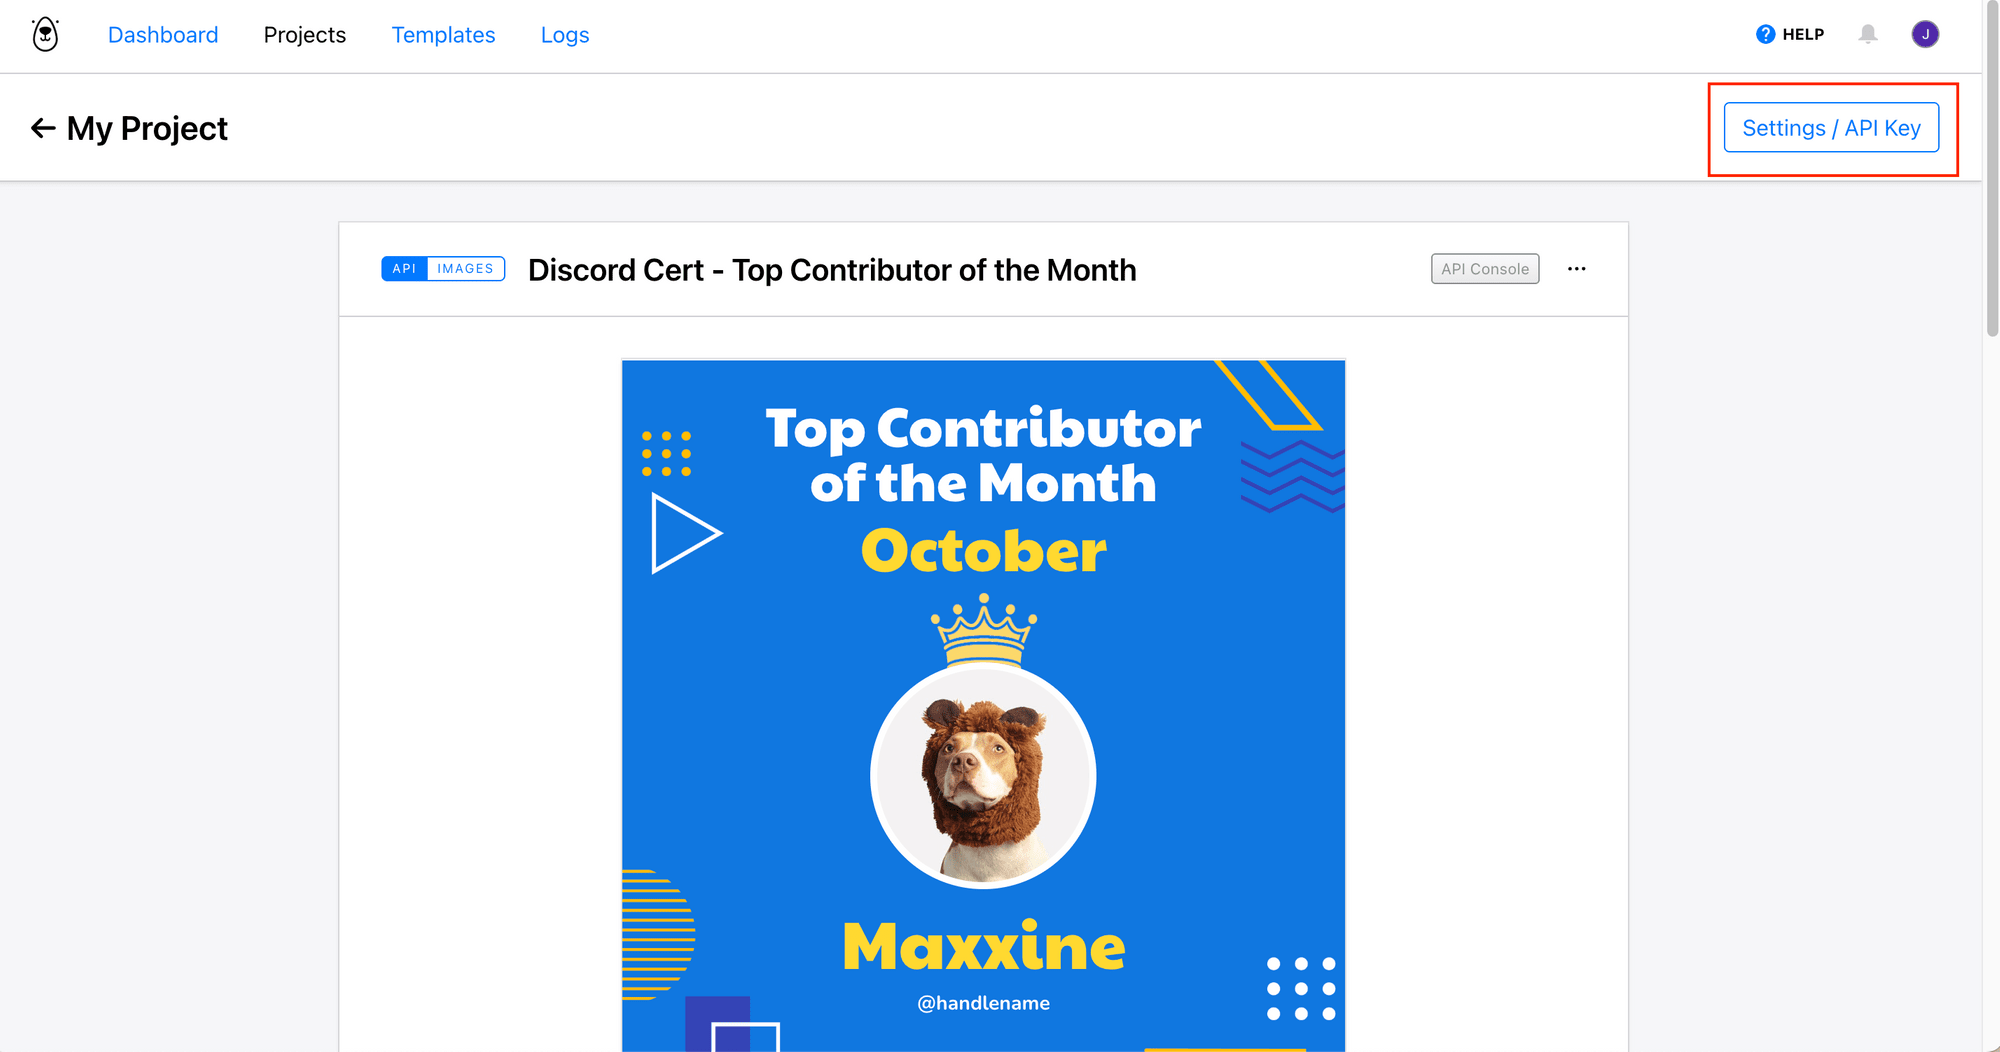
Do the same for your API key:
Discord: Creating a Discord Bot
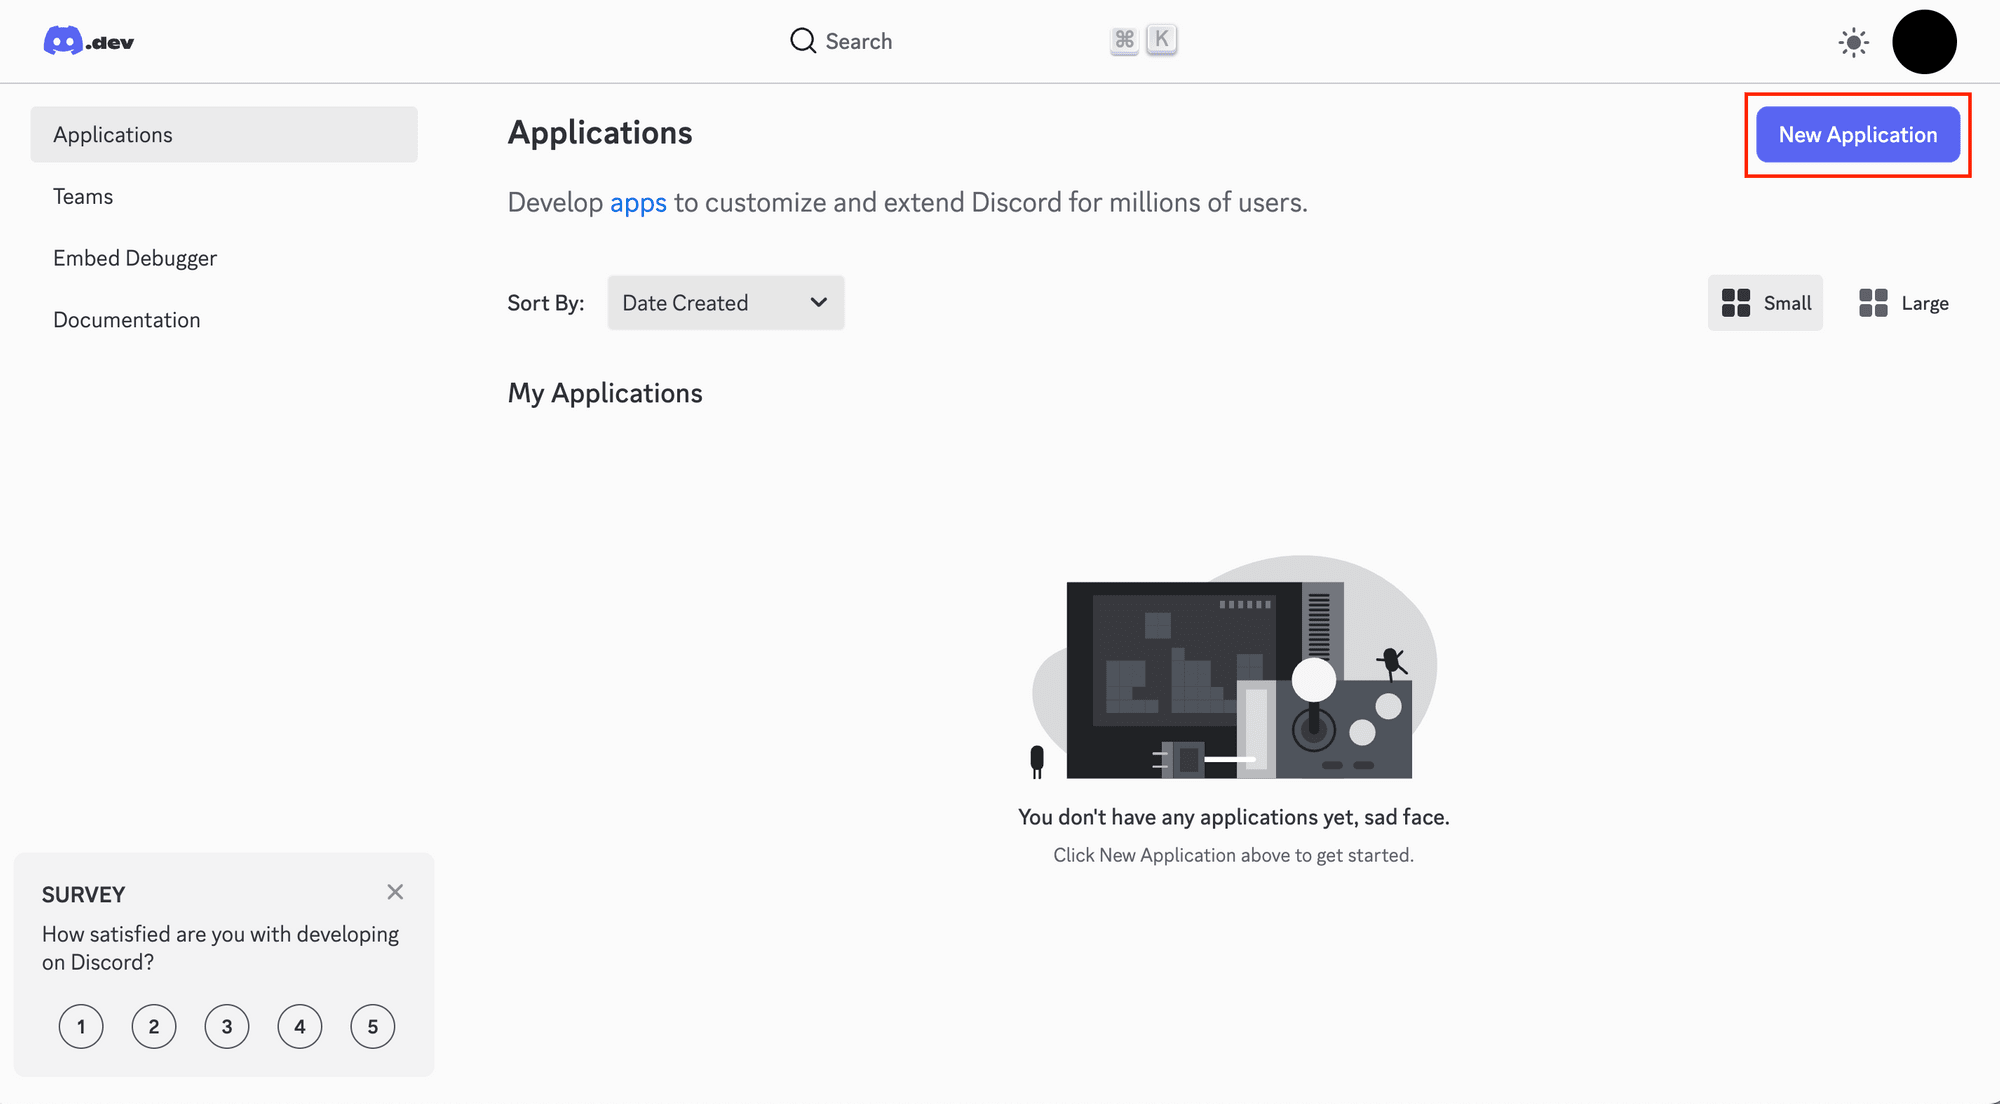
Step 1. Create a Discord Application and Bot
Go to Discord Developer Portal and create a new application:
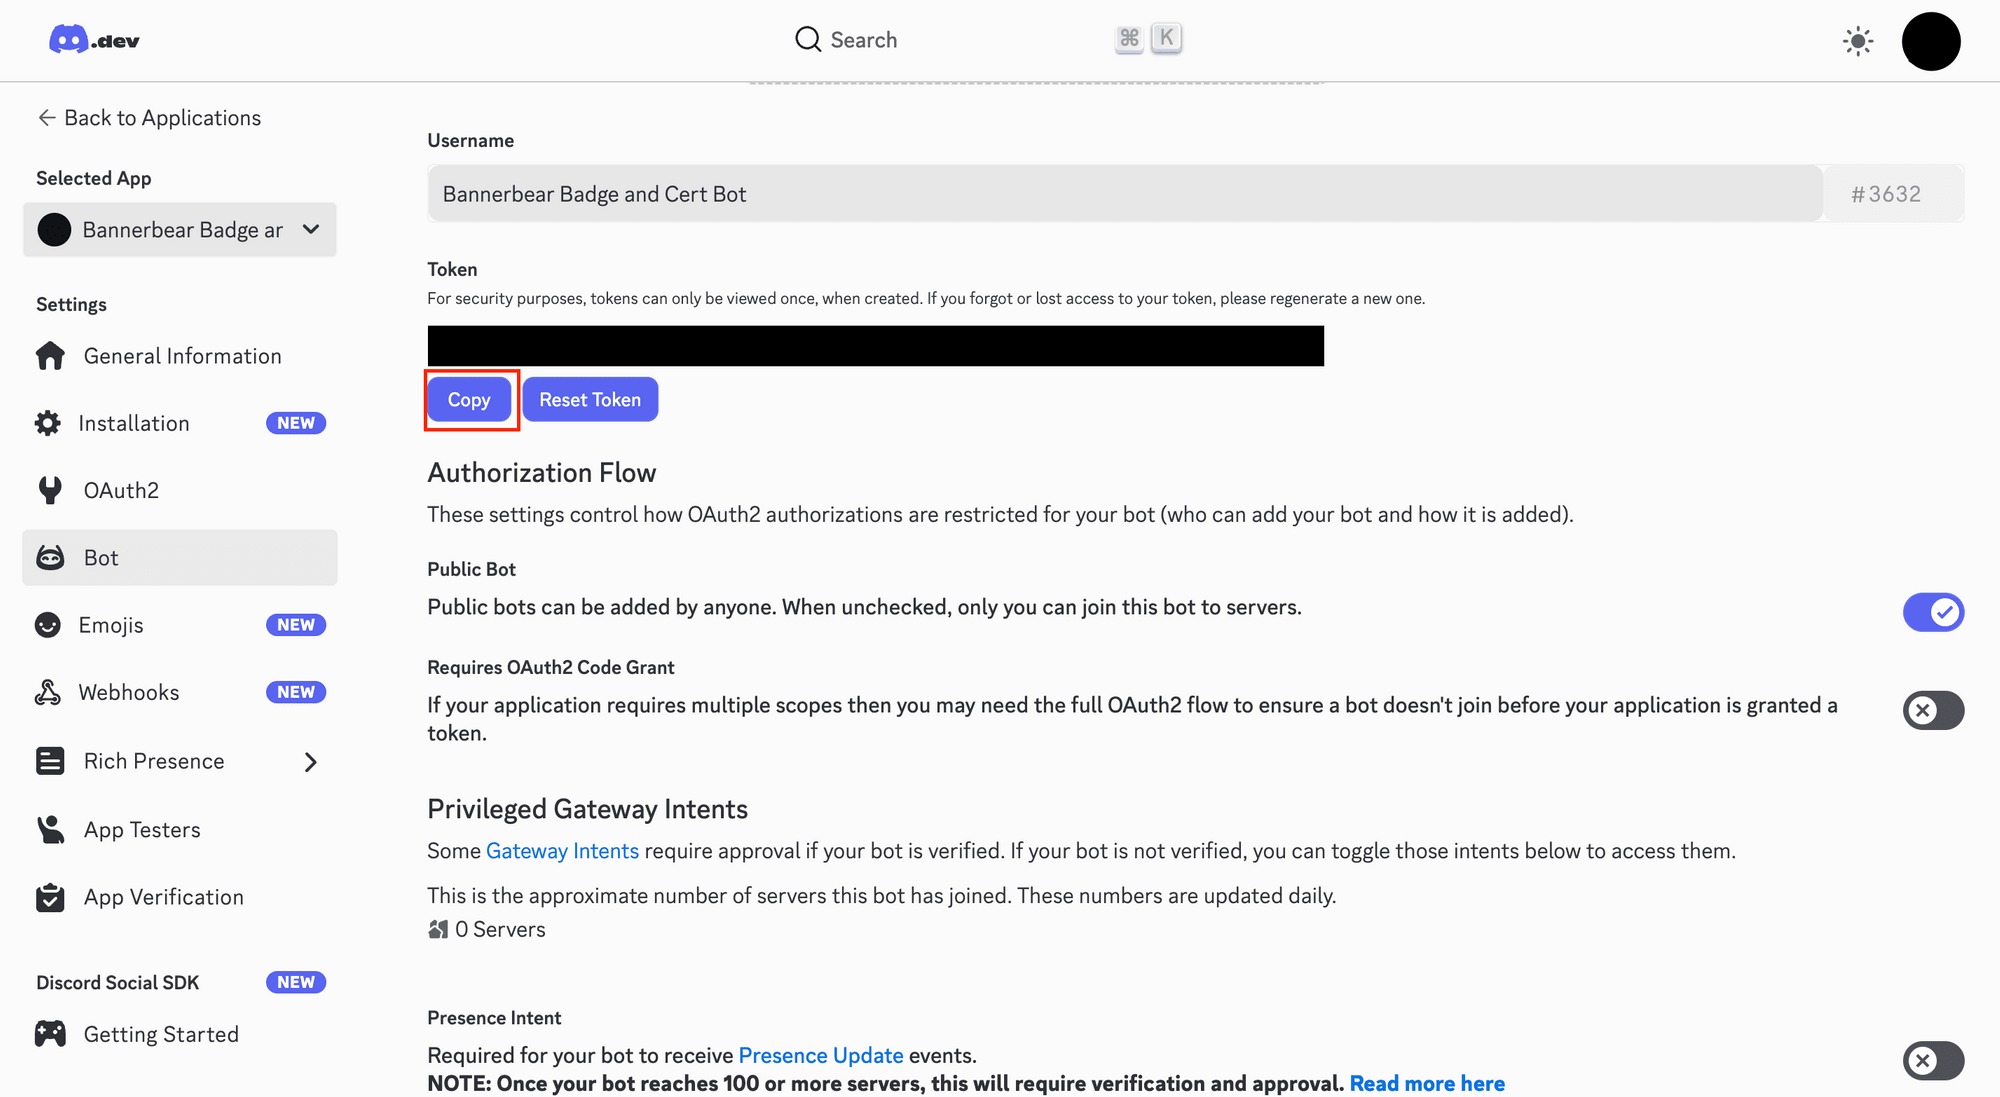
Go to Bot , click “Reset Token” :
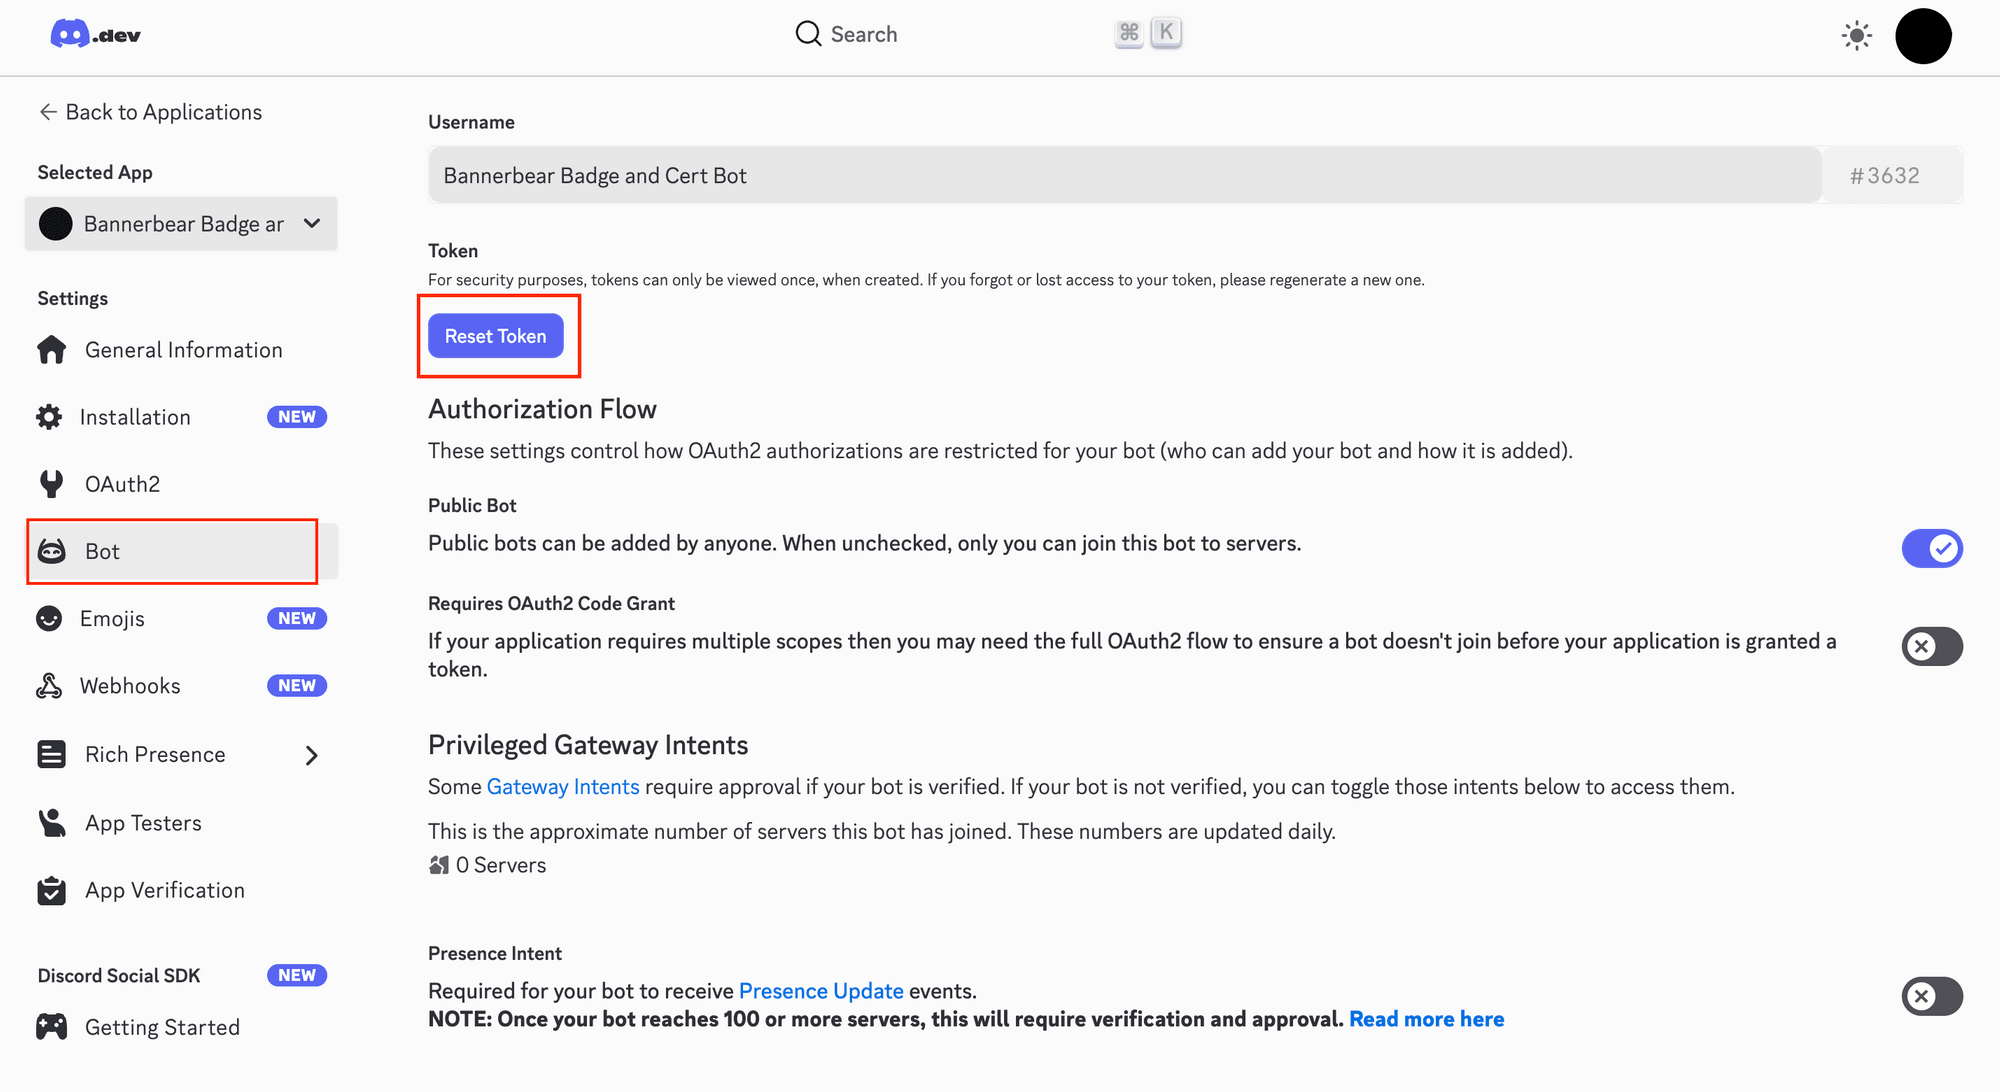
Copy the new token and place it in your .env file:
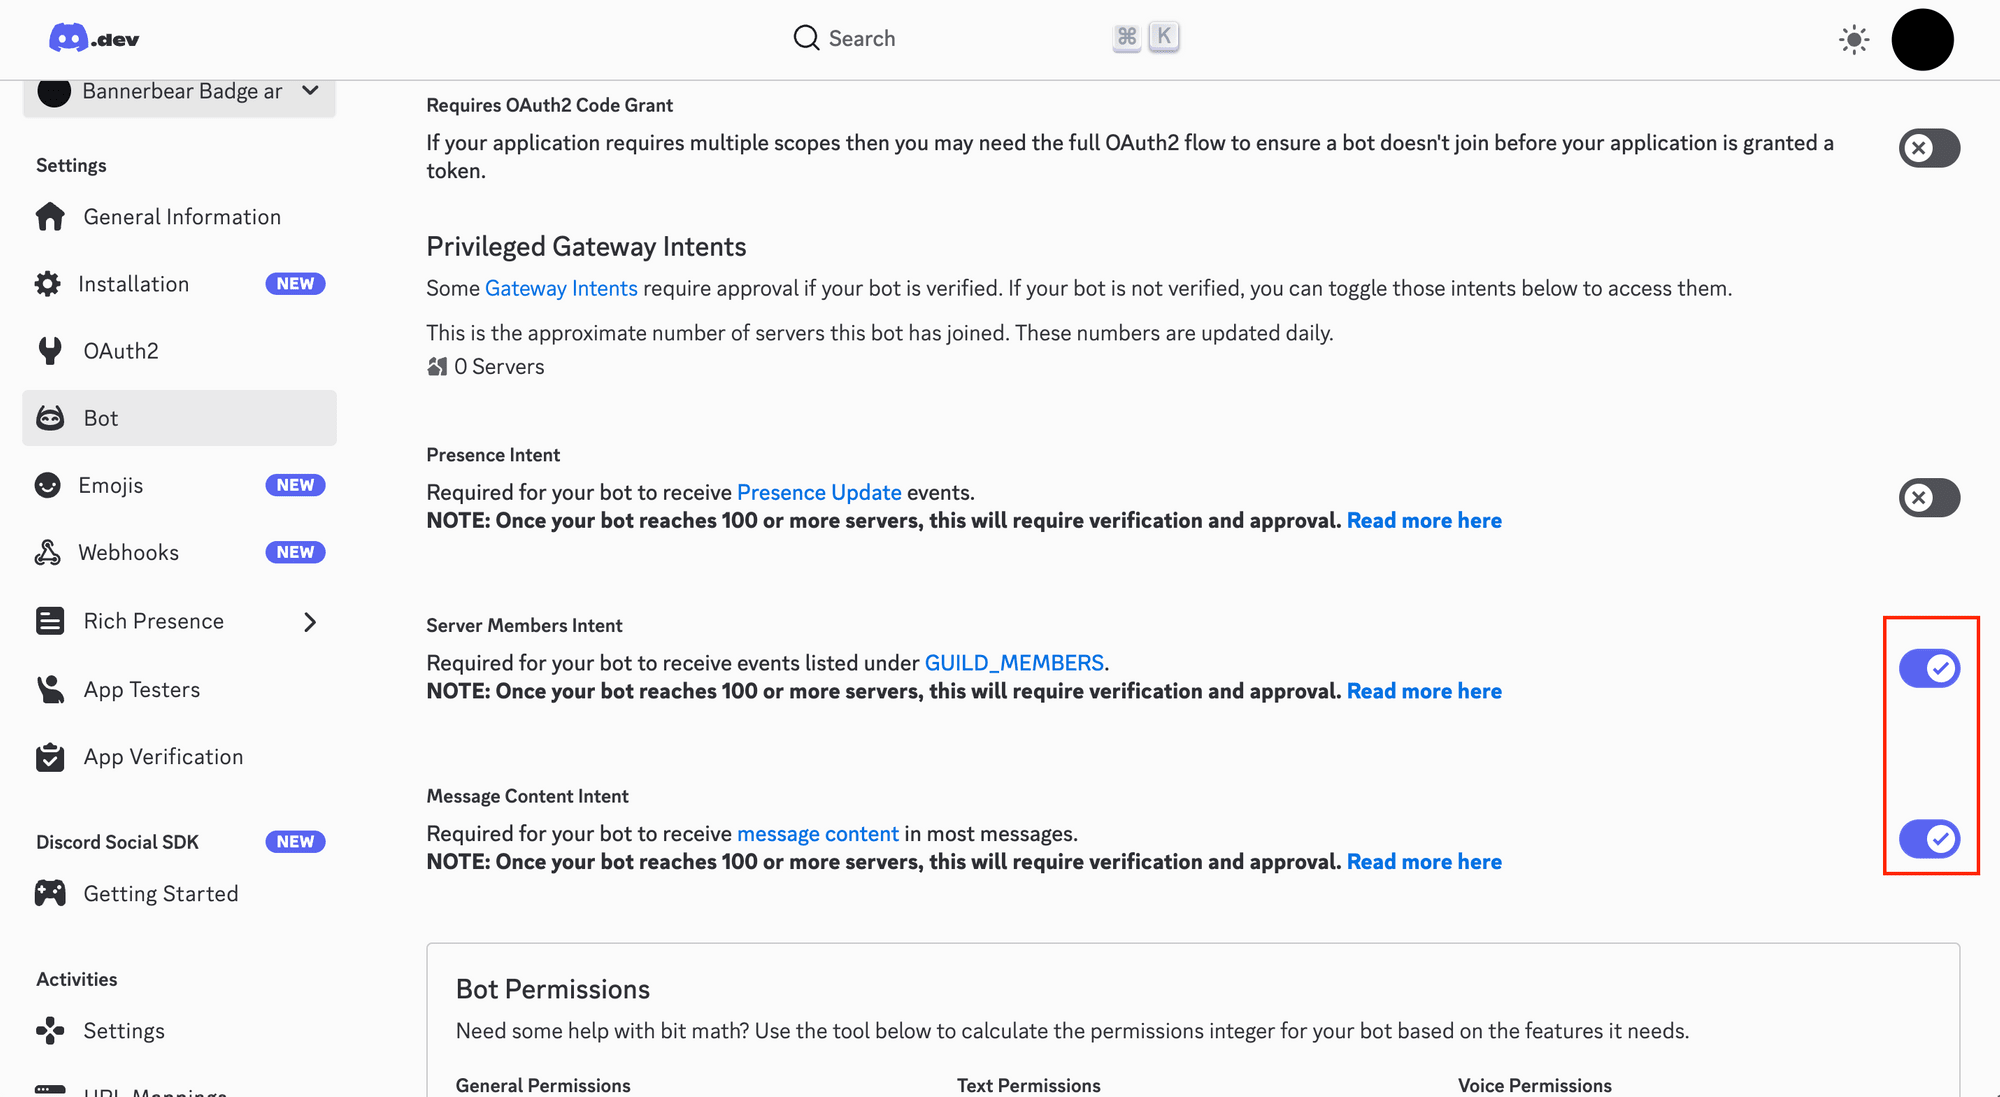
Under Privileged Gateway Intents , turn on:
- Server Members Intent
- Message Content Intent
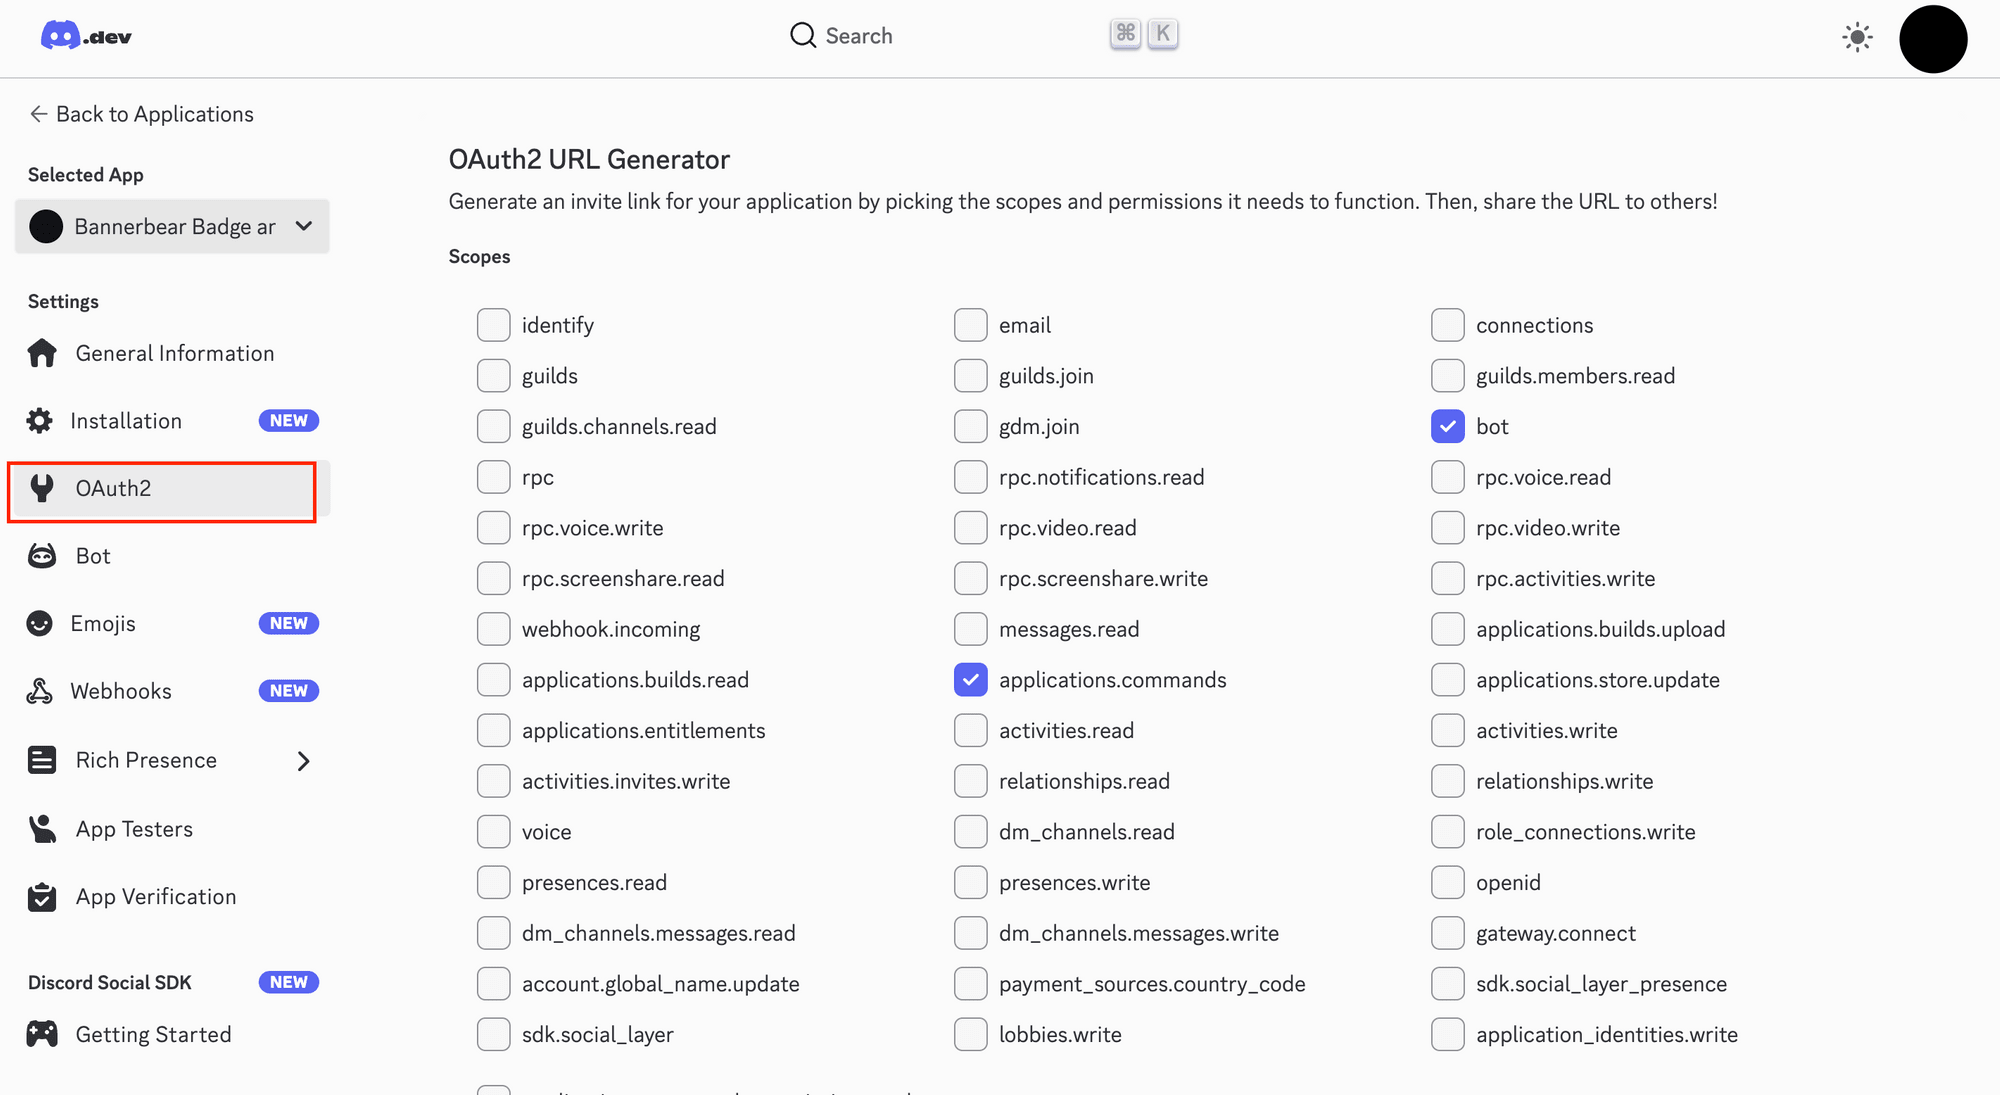
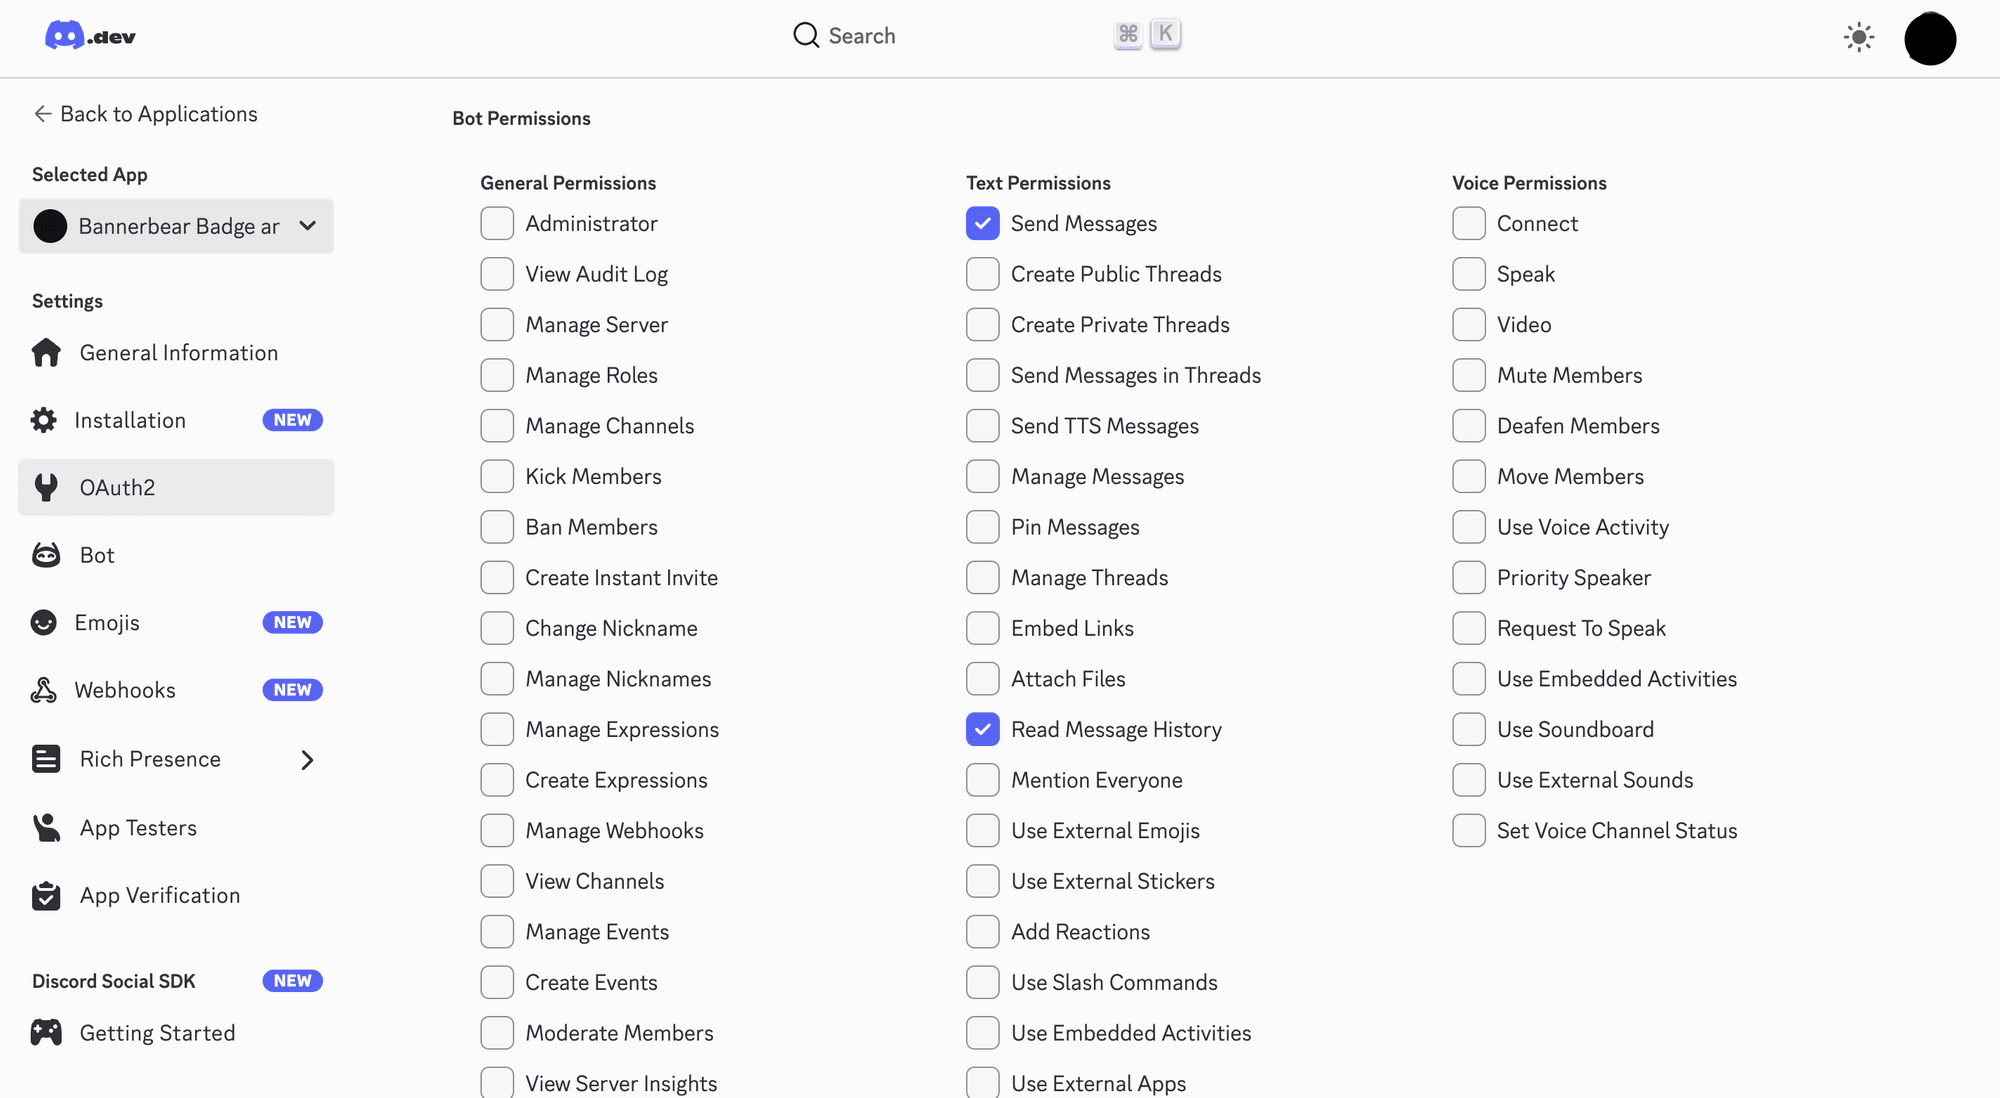
Go to OAuth2O→OAuth2 URL Generator , and select “applications.commands” and “bot” under Scopes :
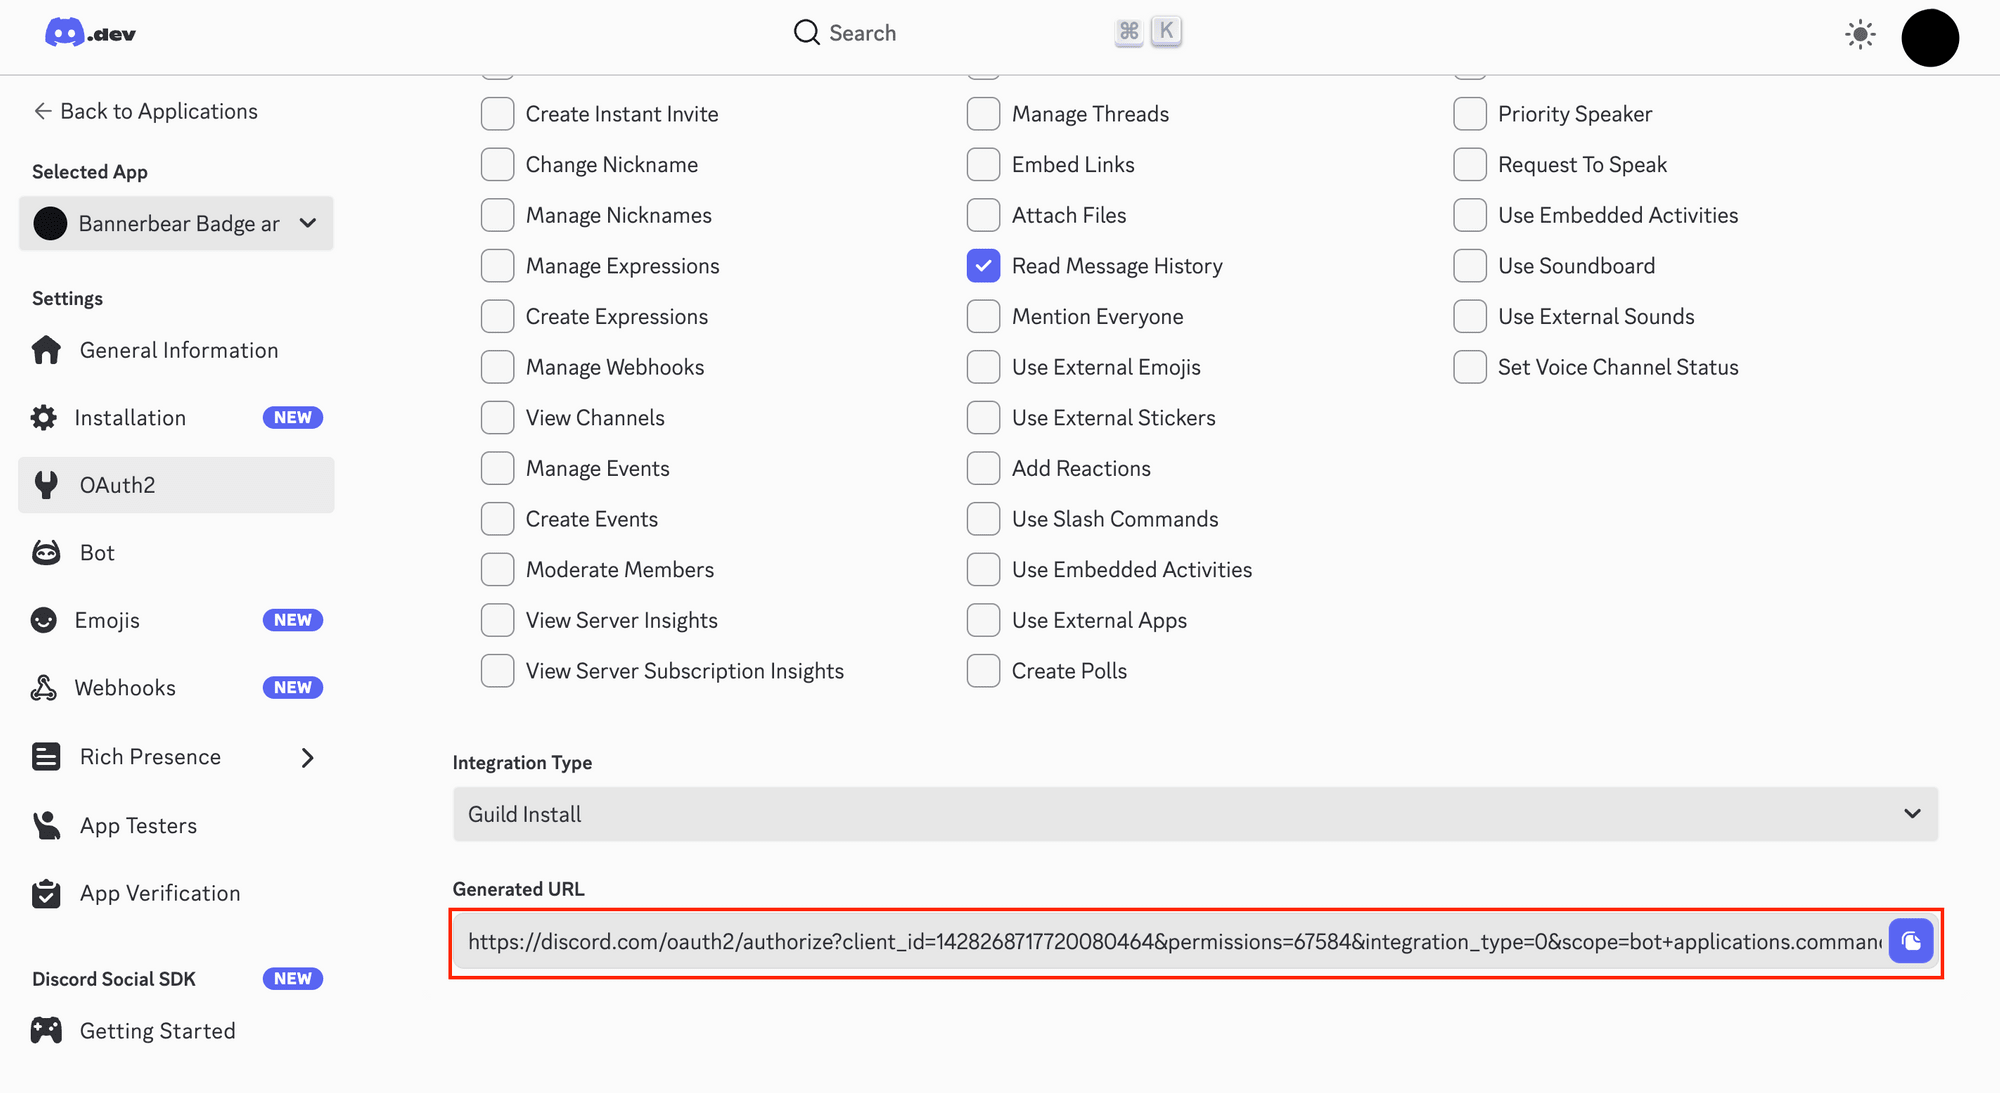
Scroll down to Bot Permissions , select “Send Messages” and “Read Message History”:
Step 2. Add the Bot to Your Discord Server
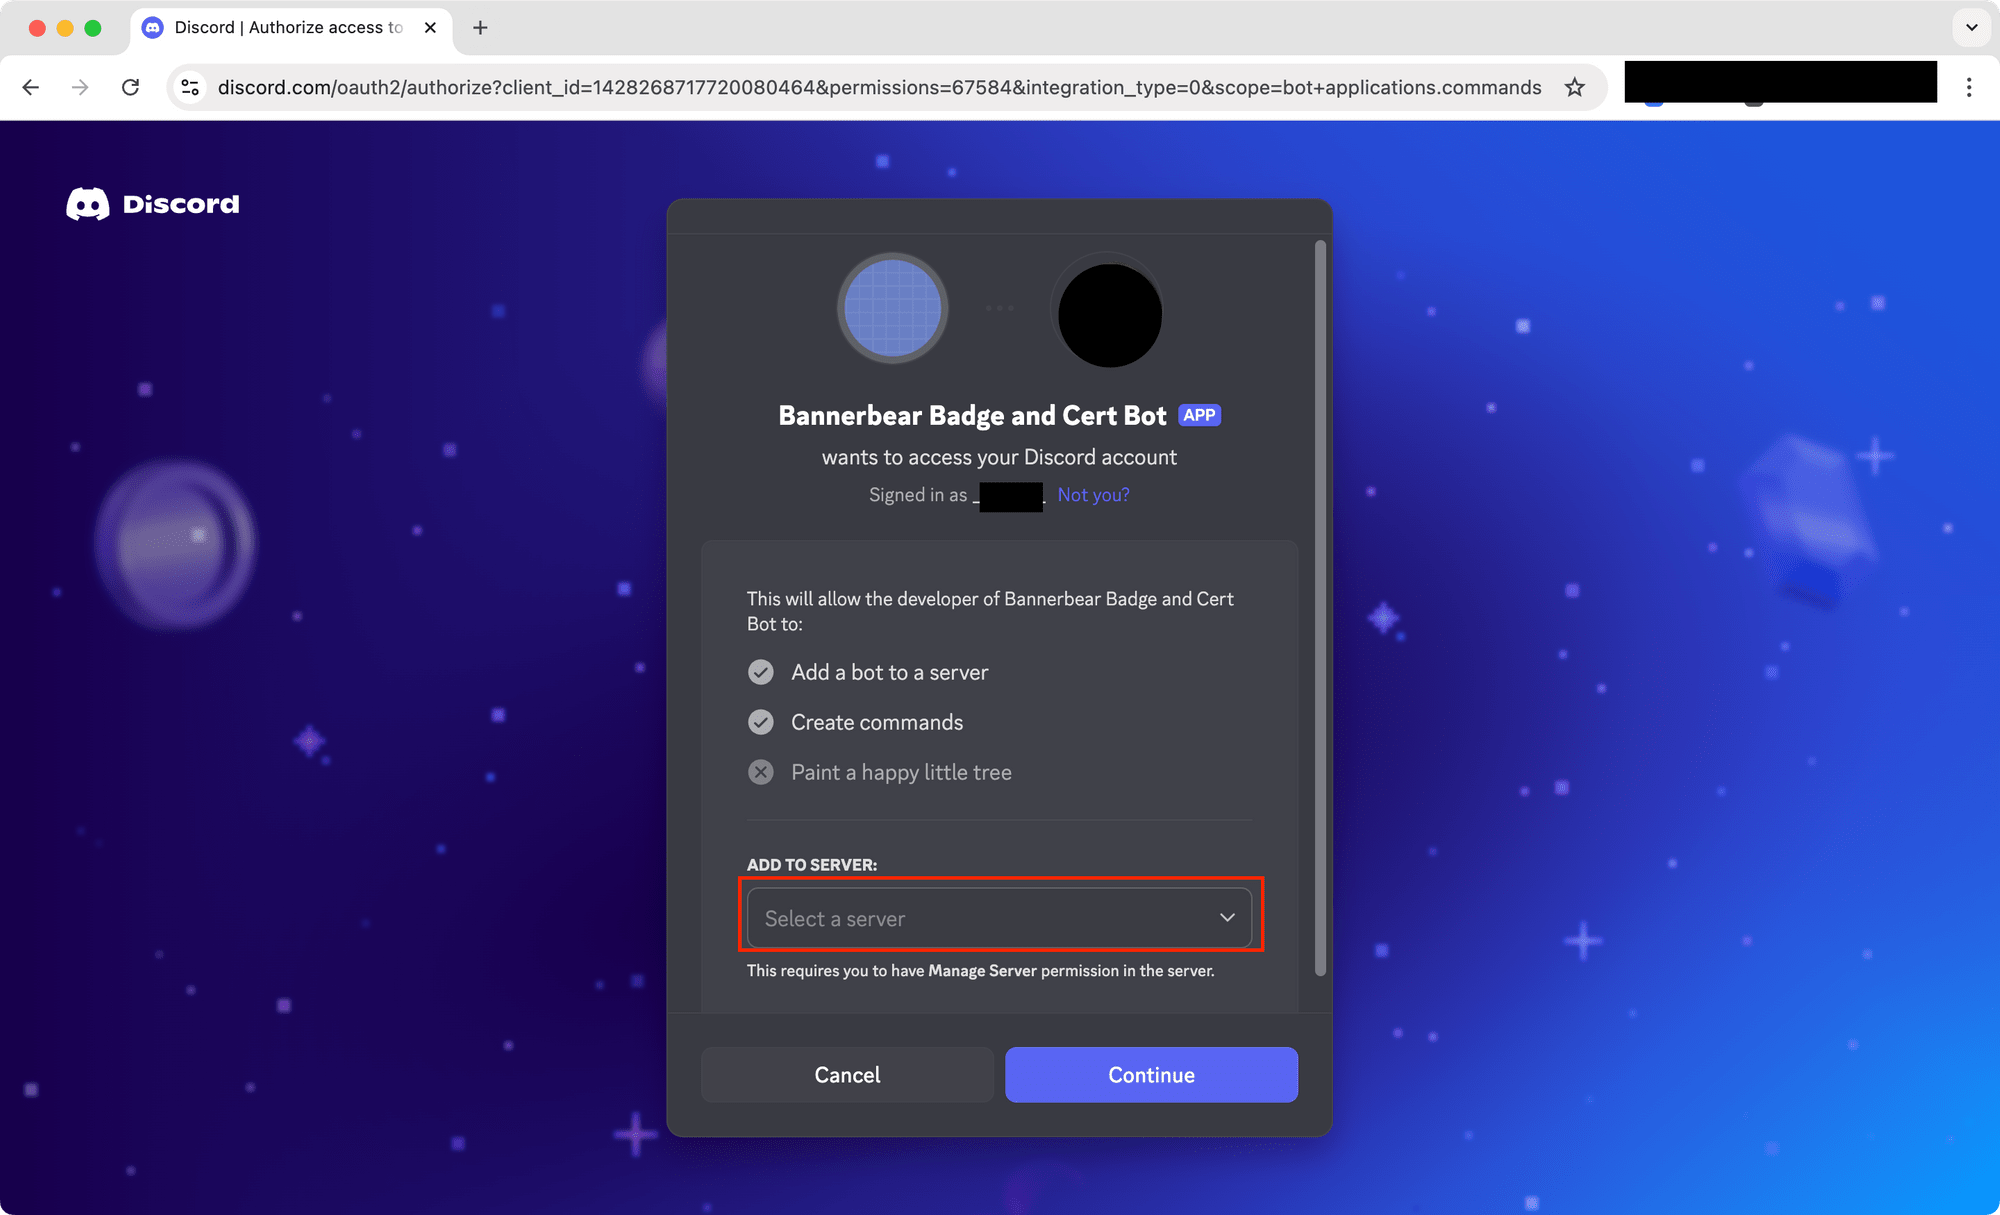
On the same page, scroll down to find the generated URL. Copy and open it in your web browser:
On the opened page, select your server and click “Continue” to add the bot to your server:
Step 3. Create a Slash Command
We’ll register a bot command called /cert that takes:
- a user mention (recipient)
- date
Note: Commands can only be registered via HTTP endpoint.
Create a Node.js script (e.g., register-commands.js) and insert the code below:
import 'dotenv/config';
import { REST, Routes, SlashCommandBuilder } from 'discord.js';

const commands = [
  new SlashCommandBuilder()
    .setName('cert')
    .setDescription('Create a custom certificate for a user.')
    .addUserOption((opt) => opt.setName('user').setDescription('The recipient').setRequired(true))
    .addStringOption((opt) => opt.setName('date').setDescription('Date').setRequired(true))
    .toJSON(),
];

const rest = new REST({ version: '10' }).setToken(process.env.DISCORD_TOKEN);
const appId = process.env.DISCORD_BOT_APPLICATION_ID;
const guildId = process.env.DISCORD_GUILD_ID; // Discord server ID

(async () => {
  await rest.put(Routes.applicationGuildCommands(appId, guildId), {
    body: commands,
  });
  console.log('✅ Slash command /cert registered successfully.');
})();
The code registers the /cert command and specify the parameters that can be sent together with the command (user and date).
🐻 Bear Tip: Can’t find your Discord application and Guild ID? Refer to this guide.
In your terminal/command prompt, run the command below to execute the script:
node register-commands.js
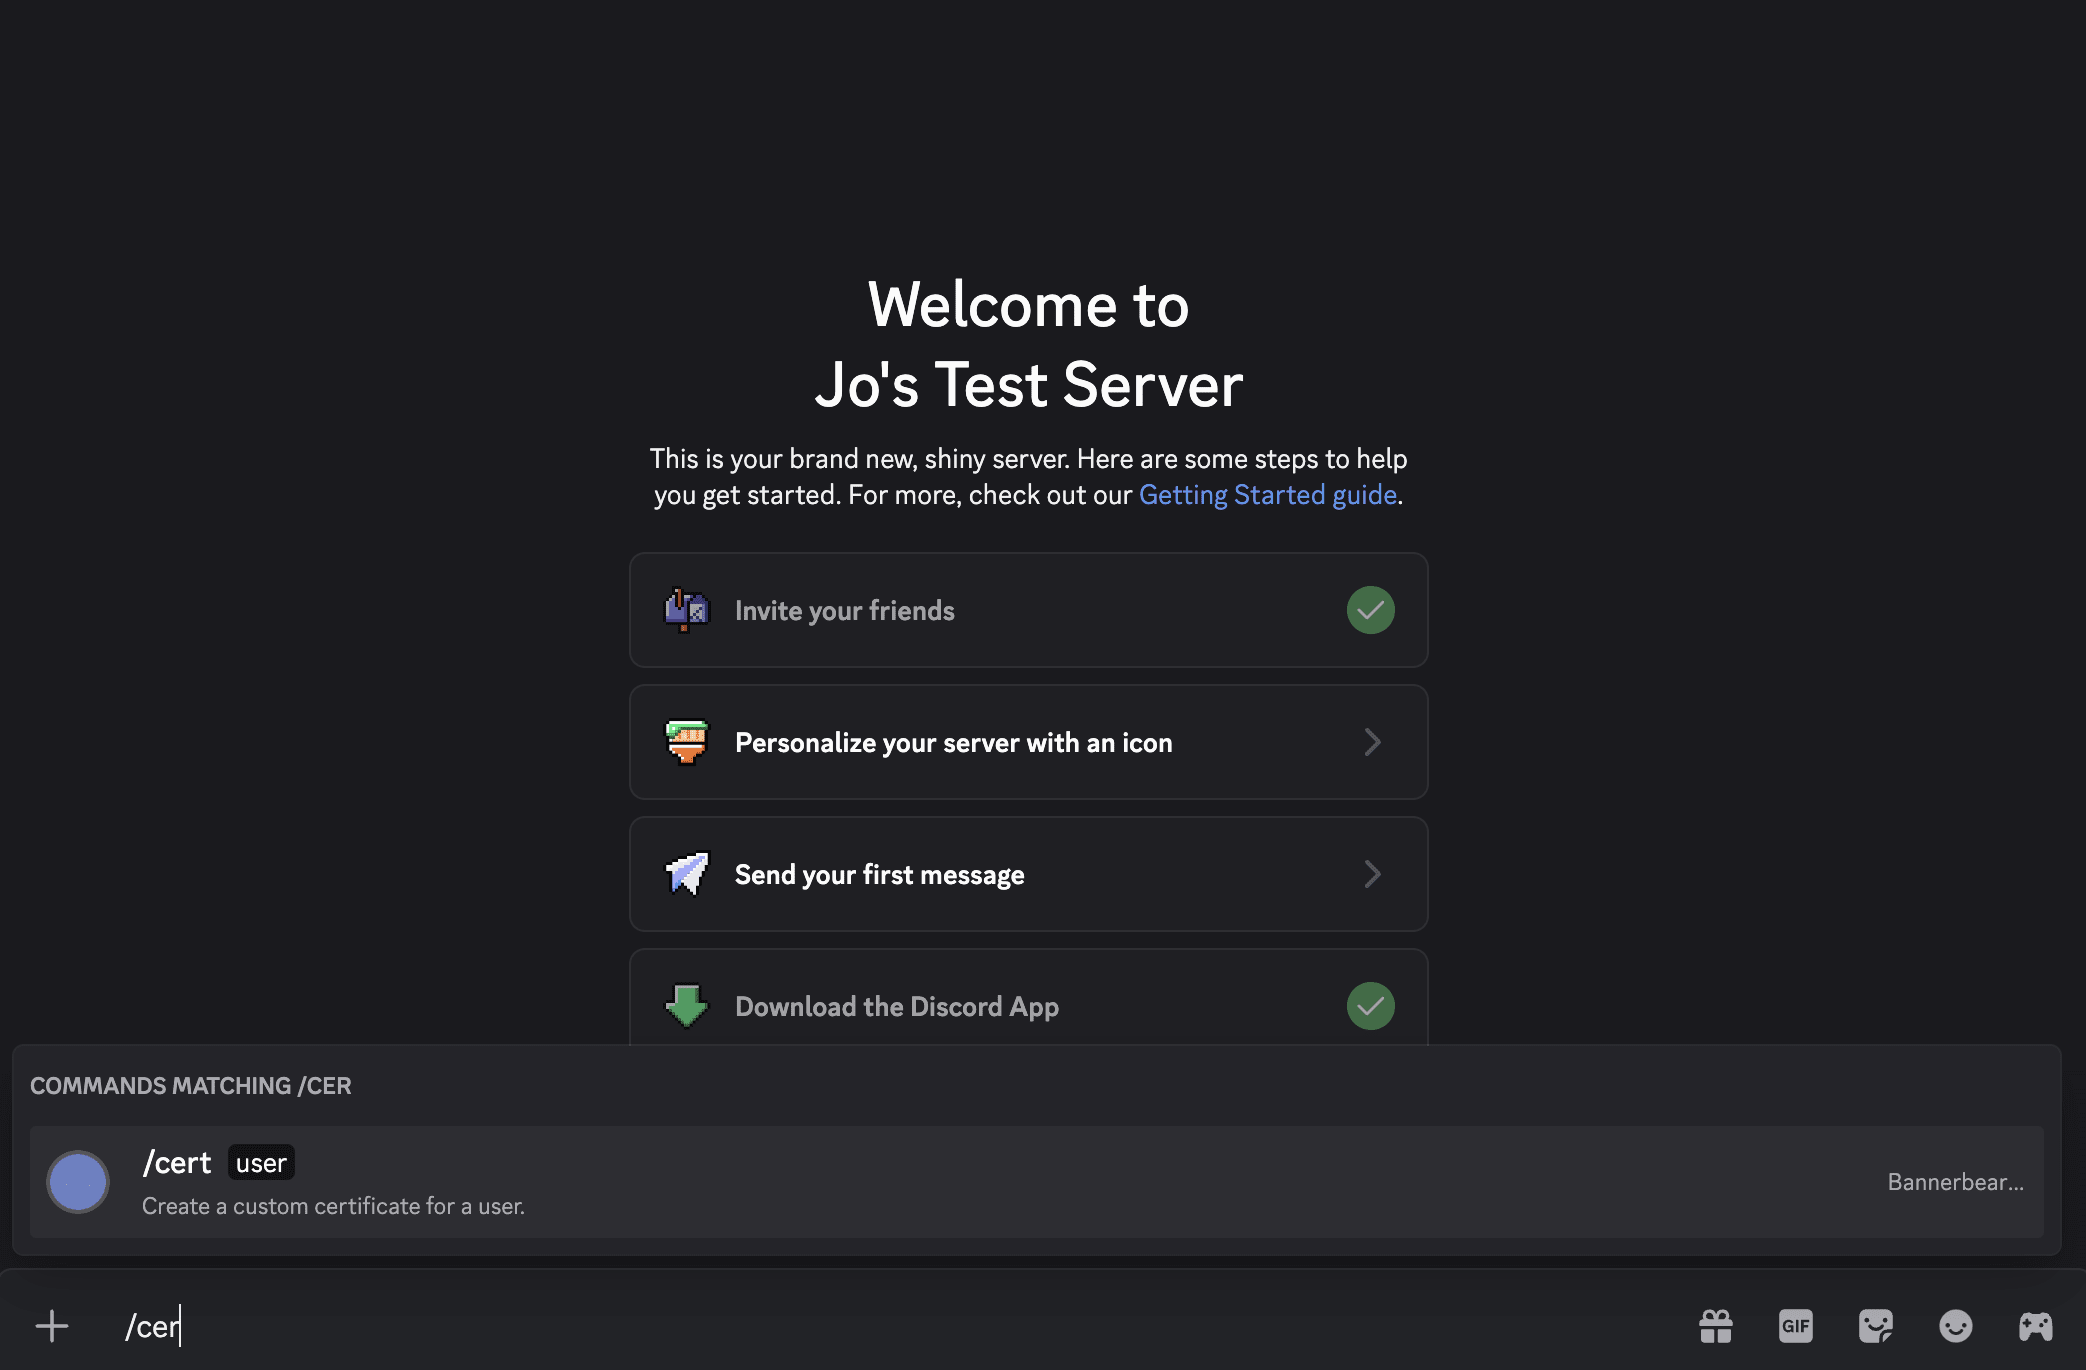
You should now see the /cert command available in your Discord server:
Node.js: Implementing the Bot Logic
Now, let’s build the main functionality of our Discord bot. Create a file named index.js and insert the code below:
import 'dotenv/config';
import { Client, GatewayIntentBits, AttachmentBuilder, Events } from 'discord.js';
import { Bannerbear } from 'bannerbear';

const client = new Client({ intents: [GatewayIntentBits.Guilds] });
const bb = new Bannerbear(process.env.BANNERBEAR_API_KEY);

client.once(Events.ClientReady, (c) => {
  console.log(`🤖 Logged in as ${c.user.tag}`);
});

client.on(Events.InteractionCreate, async (interaction) => {
  if (!interaction.isChatInputCommand()) return;
  if (interaction.commandName !== 'cert') return;

  const user = interaction.options.getUser('user');
  const date = interaction.options.getString('date');

  try {
    await interaction.deferReply();

    // Get user's avatar (static PNG for compatibility)
    const avatarUrl = user.displayAvatarURL({ extension: 'png', size: 512 });

    // Map Bannerbear template layer modifications
    const modifications = [
      { name: 'name', text: user.displayName },
      { name: 'handle_name', text: `@${user.username}` },
      { name: 'date', text: date },
      { name: 'image_container', image_url: avatarUrl },
    ];

    // Create image via Bannerbear SDK
    const result = await bb.create_image(
      process.env.BANNERBEAR_TEMPLATE_ID,
      { modifications },
      true // wait for render to complete
    );

    const attachment = new AttachmentBuilder(result.image_url);
    await interaction.editReply({
      content: `🏅 **<@${user.id}>** has earned *Top Contributor of The Month*!`,
      files: [attachment],
    });
  } catch (err) {
    console.error('Error:', err);
    await interaction.editReply('❌ Failed to generate certificate. Please try again later.');
  }
});

client.login(process.env.DISCORD_TOKEN);
Here's what the code does…
When the bot receives the /cert command, it:
- Extracts the mentioned user and date text.
- Fetches the avatar URL from Discord.
- Sends this data to Bannerbear.
- Replies with the final certificate image.
🐻 Bear Tip: The
create_image()call is synchronous when you passtrueand the result will be returned in the response.
Testing The Bot
We’ve finished setting up the bot and now it’s time to test it out! In your terminal/command prompt, run the command below to start the bot:
node index.js
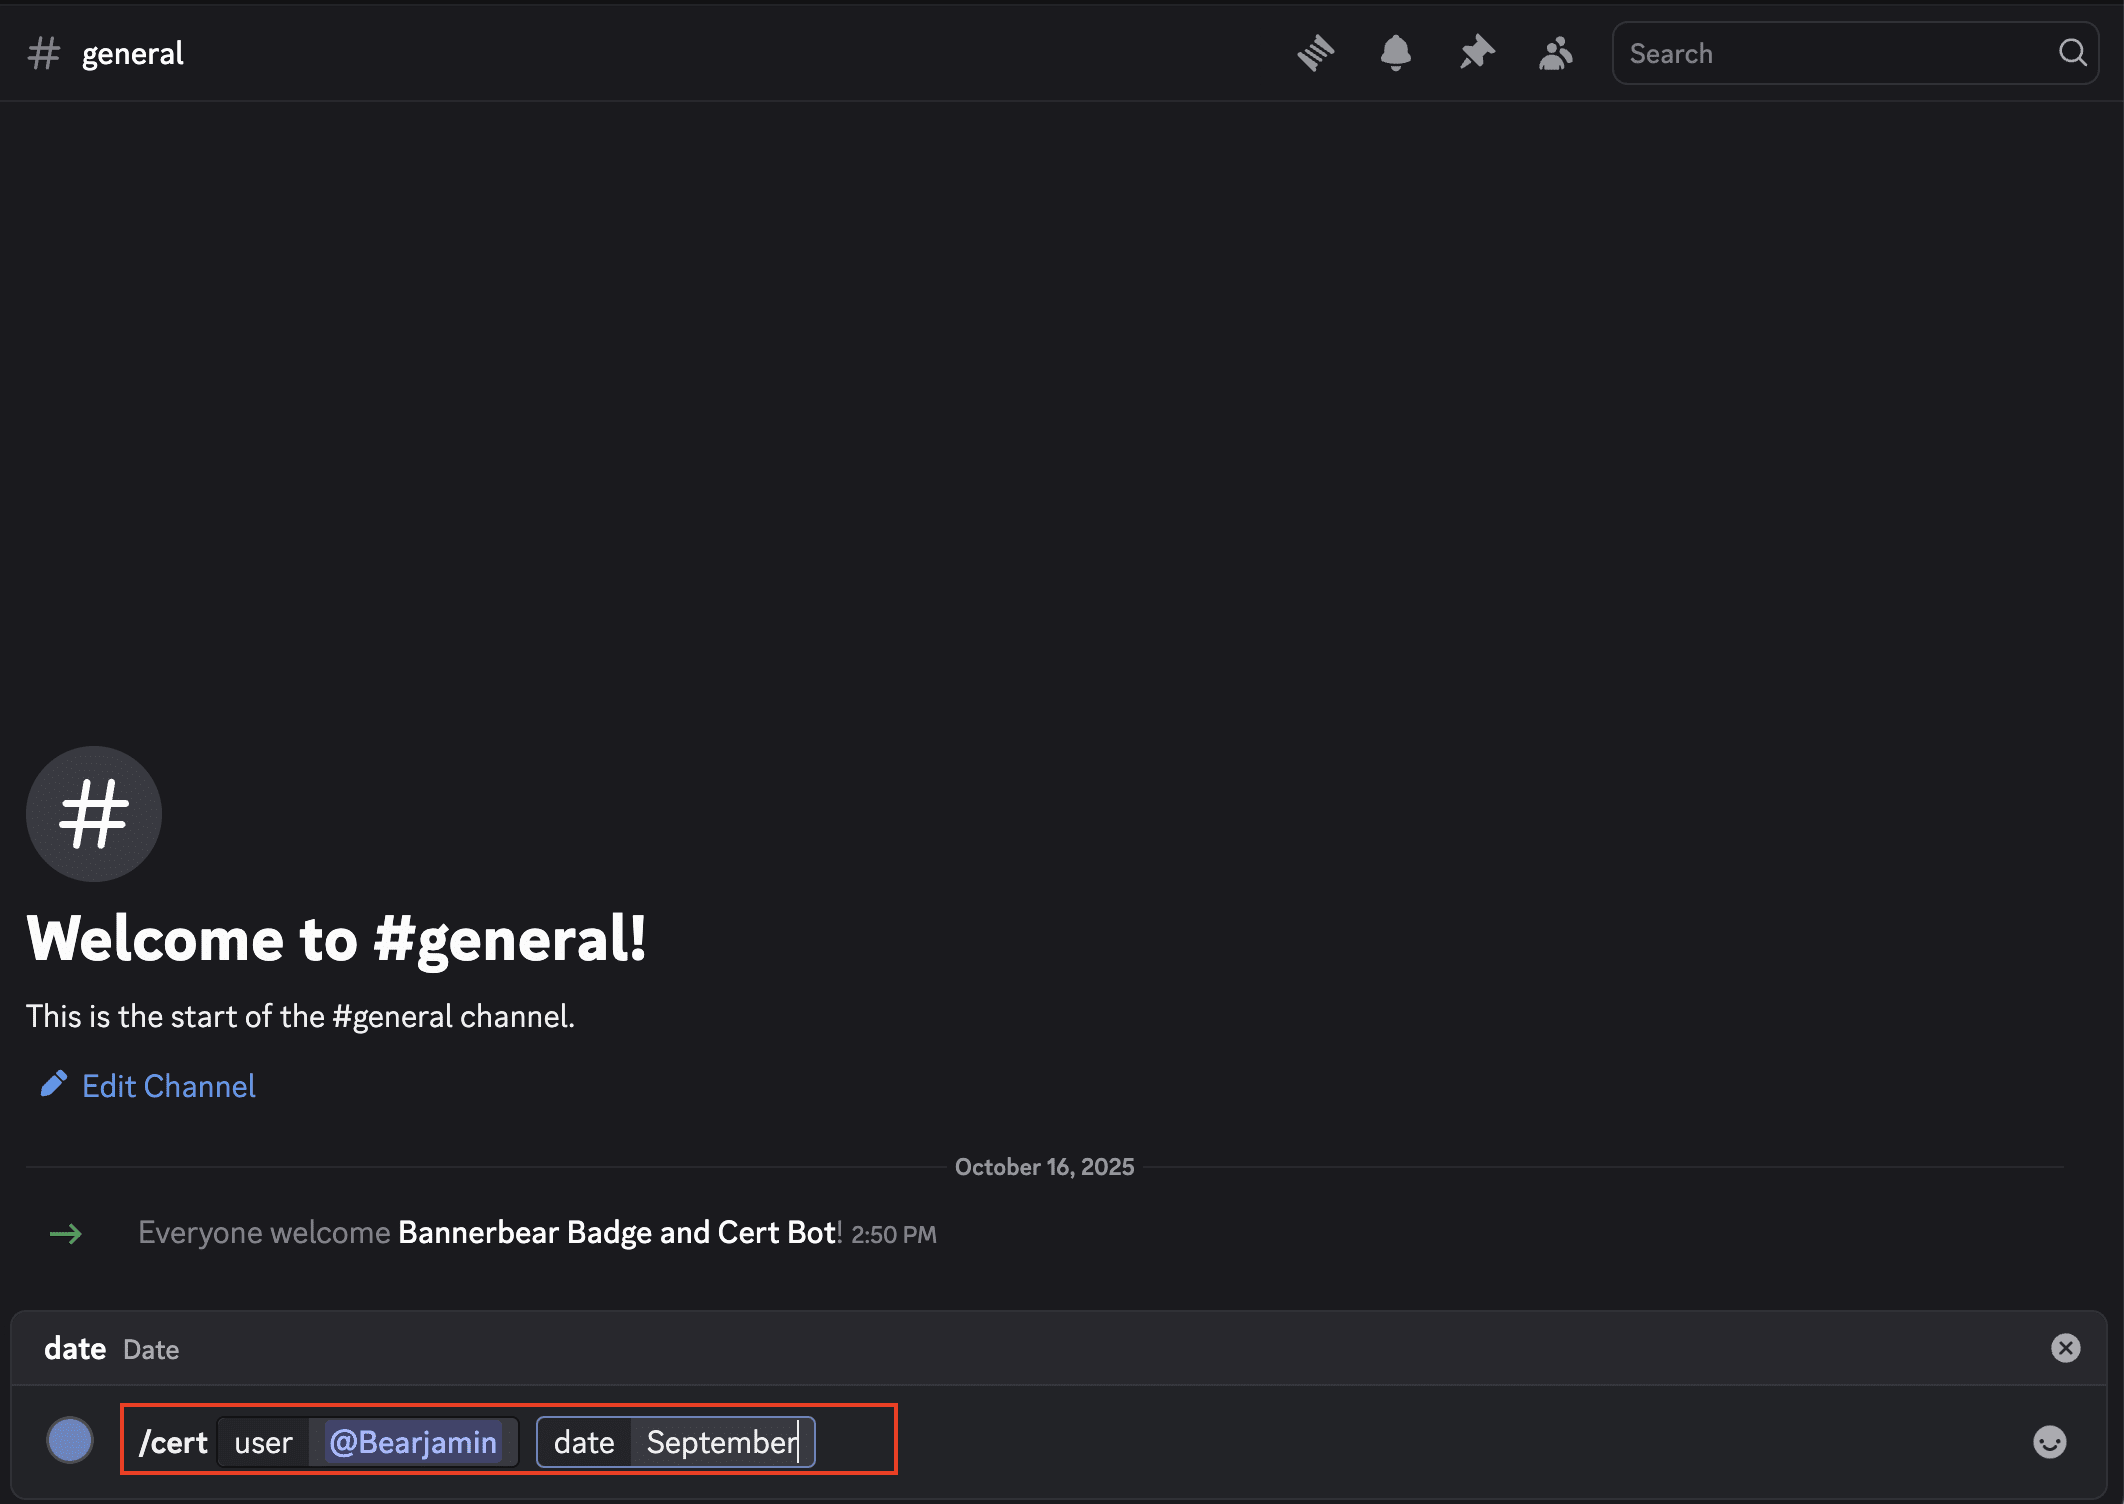
In your Discord server, send the /cert command along with a tagged user and the date:
Within a few seconds, your bot should reply with a certificate image like this:

Congrats! You’ve just built a Discord bot that can generate personalized images with a member’s name and avatar image. The next step is to deploy it live or take it a step further by automating the process so that the bot generates images automatically whenever an event happens. You can even add more commands and designs, just like how you did with this one.
🐻 Bear Tip: Don’t forget to set the role permissions to control who can access and use the bot.
Final Thoughts
A sense of achievement and belonging plays a big role in building a strong Discord community. Small enhancements like this can make a huge difference in improving your members’ overall experience on the server.
If you haven’t already, sign up for a Bannerbear account (get 30 API credits free!) and follow this tutorial (or clone the code from GitHub) to build your own bot. You’ll be surprised how much it can make your members feel more appreciated!
