
From CSV to Branded PDF: Bannerbear Automation Tutorial for Certificates, Invoices & Invitation
Contents
Manually creating documents like certificates, invoices, or invitations may seem easy at first, but once the volume grows, it becomes a real energy drainer. Each entry means updating names, tweaking the layout, and exporting to PDF on repeat…
For many businesses, it’s a daily struggle that quietly eats up hours of valuable time. Service companies need to send monthly invoices to dozens of clients, educational institutions have to prepare certificates for hundreds of graduates, and event planners need to produce customised invitations for thousands of guests. Doing all this with the old copy-and-paste method is slow and risky—one small typo can affect professionalism, and the never-ending repetition easily leads to burnout.
Luckily, there’s a smarter way. With Bannerbear, you can automatically turn a CSV file or an Airtable base into polished, branded PDFs. Whether it’s course certificates, sales invoices, or event invitations, Bannerbear can transform raw CSV data into professional-looking PDFs within minutes!
In this article, we’ve put together some of Bannerbear’s best tutorials into one complete guide. You’ll learn how to set up automation for certificates, invoices, invitations, and more using no-code tools like Airtable and Zapier, as well as building developer-friendly workflows with Node.js.
Why Automate Branded PDFs?
Images are great for social media posts or quick previews, but for formal documents, PDFs are the gold standard. They preserve formatting across devices, are easy to print, and carry a level of professionalism that PNGs or JPEGs can’t match.
And here’s why you should automate the process of creating them:
- Better consistency : Every certificate, invoice, or invitation carries the brand identity, like logo, colors, and fonts, without any variation.
- Higher scalability : Easily generate dozens or thousands of documents in bulk without manual editing.
- Time savings : Replace hours of repetitive work with a workflow that runs in minutes.
- Fewer errors : No more typos from copy-pasting or formatting mishaps.
In short, automating PDF creation frees up your team’s time and ensures every document stays polished and professional, even when handling large volumes.
The Core Tools You’ll Use
Here are the main tools you’ll be using to build your automation workflow, whether you prefer a no-code setup or a developer-friendly approach:
- Bannerbear Templates : Think of these as design blueprints for generating the PDFs.
- Data Source (CSV or Airtable): Your structured data (e.g., student names, order details, metrics) that feeds into Bannerbear’s template.
Workflows :
- No-code : Connect Airtable or Zapier directly to Bannerbear for quick setup.
- Code : Use Bannerbear’s API with custom code for more flexibility and scale.
What is Bannerbear
Before we dive into the tutorials, let’s take a closer look at the tool that powers our PDF generation automation—Bannerbear. Bannerbear is an API that helps you automatically generate custom PDFs, images, and videos from templates.
A template serves as a blueprint for creating the PDFs, images, and videos in Bannerbear. It consists of:
- Static objects - These remain the same in every generated PDF (e.g., a company logo)
- Dynamic objects - These change based on data you provide (e.g., text, images)
Here’s an example of a Bannerbear design template in the editor:

By passing different data to the API, you can alter the values of the dynamic objects and automatically create unique content based on a single template.
🐻 Bear Tip: Bannerbear also offers libraries in various popular programming languages, such as Node.js, Ruby, and PHP.
How to Automate Certificates, Invoices, and Reports with Bannerbear
Note: Some tutorials below may show image outputs, but you can easily generate a PDF using the same process—just specify PDF as your export format instead.
Tutorial 1: Generating Certificates from Airtable
Bannerbear’s tutorial How to Instantly Generate Certificates Online with Bannerbear and Airtable is a great starting point. It shows how to turn attendee or student data stored in Airtable into professional course completion certificates.
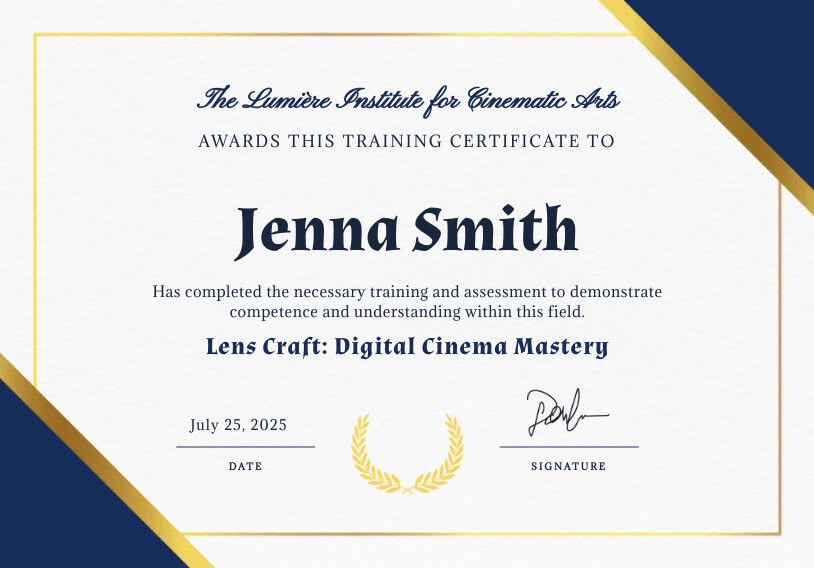
Here’s the workflow:
- Design your certificate template – Use Bannerbear’s Template Editor to create a design for the certificate. Add static branding (logo, border, signature) and dynamic layers (name, course, date).
- Prepare an Airtable base – Create a table with one row representing a person, with fields like
Name,Course, andDate of Completion. - Connect Airtable to Bannerbear – In the Bannerbear app, connect Airtable and map each field to the corresponding dynamic layer in the template.
- Bulk generate PDFs – Bannerbear will pull the data and produce a PDF for each record. The URLs of generated certificates will be stored back in Airtable.
Tutorial 2: Automating Invoices via Event Triggers
In How to Automatically Create an Invoice for Successful Sales with Bannerbear, the tutorial demonstrates how to automatically generate invoices whenever a sale happens via Zapier. No manual trigger or PDF editing is needed.
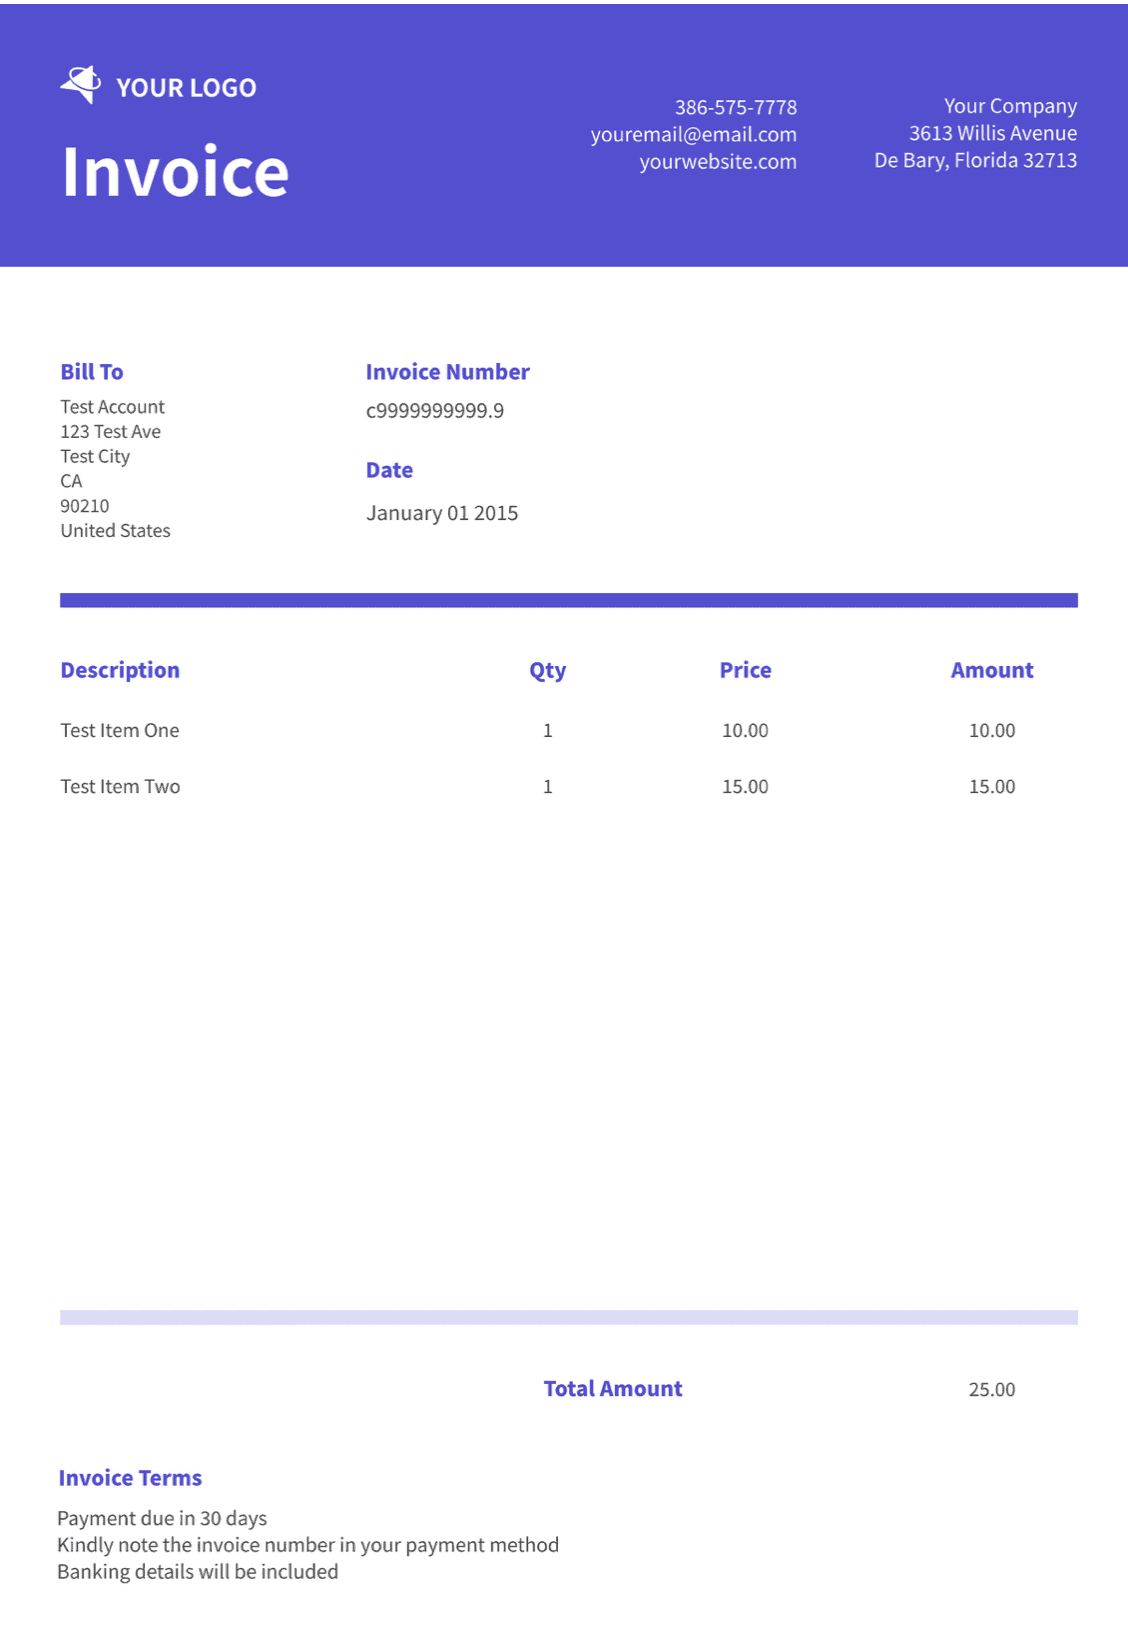
Here’s the workflow:
- Set up your invoice template – Create a Bannerbear template with dynamic fields like customer name, items, amount, date, invoice number, and other relevant details.
- Build a Zapier workflow
Trigger: Successful sale in PayPal or Stripe
Action: Send sale data to Bannerbear to populate the template - Output PDF invoice – Zapier can then email it to the customer, or you can save it in Google Drive or Dropbox.
Once a new sale comes in, the Zapier workflow will be triggered, and Bannerbear will generate the invoice automatically.
🐻 Bear Tip: If you don’t need real-time generation, you can batch-generate them weekly from a CSV of sales data instead.
Tutorial 3: Bulk-Generating Invitations
Automation isn’t just for business documents, it works for personal events too! In How to Generate Wedding Invites for Your Entire Guest List, you’ll learn how to create personalised invitations at scale.

Here’s the workflow:
- Design your invitation template – Create an invitation template in Bannerbear, with static elements like the date and location, and dynamic layers like the guest’s name.
- Create a guest list in Airtable – Create a table with one row per guest.
- Connect Airtable to Bannerbear – In the Bannerbear app, connect Airtable and map each field to the corresponding dynamic layer in the template.
- Generate PDFs in bulk – Bannerbear will pull the data and produce a PDF for each record. The URLs of the generated invitations will be stored back in Airtable.
The same principles can be applied to other events too, like conferences or marketing campaigns. Just adjust the template design to match the occasion!
🐻 Bear Tip: Add a QR code for the RSVP link. Bannerbear can generate it automatically for each invitation.
Tutorial 4: Developer Workflow with Node.js and CSV
For developers, Bannerbear’s API gives you more flexibility compared to using the built-in Zapier integration or the Bannerbear dashboard. It’s also the best option if your goal isn’t just to generate PDFs, but to integrate this feature into your own application. The tutorial How to Create Business Cards with QR Codes Using Bannerbear (Node.js) shows you exactly how to do that.

Here’s the workflow:
- Design your template – Create a template in Bannerbear, with static and dynamic layers needed for your use case.
- Parse your CSV – Use a library like
csv-parserin Node.js to read the rows in your CSV file. - Build API payloads – For each row, map the CSV columns to the template layers.
- Send requests to the Bannerbear API – Call Bannerbear’s API with the payload. Bannerbear will start the generation and return a URL for each generated PDF.
This approach gives full flexibility: batch runs, error handling, conditional logic, and direct integration into your app or backend.
No-Code vs Code: Which to Choose?
Bannerbear supports your PDF automation goals, whether you prefer the no-code approach or full customisation through the API. If you’re not sure which one suits you better, here’s a quick table to help you decide:
| Aspect | No-Code (Bannerbear Dashboard, Zapier) | Code (API) |
|---|---|---|
| Setup speed | Very fast; no coding needed | Slower, requires dev time |
| Flexibility | Limited logic, predefined triggers | Full control, custom logic possible |
| Scalability | Good for small/medium volume | Best for high volume, bulk generation |
| Maintenance | Easy for non-tech teams | Requires dev oversight |
Conclusion
With Bannerbear, you can easily automate the entire PDF creation process, whether it’s for certificates, invoices, or invitations. The results are always personalised, professional, consistent, and ready within minutes.
Ready to give it a try? Explore Bannerbear’s ready-made templates for certificates, invoices, and invitations, or experiment with the free generator tools to see how easy it is to turn data into professional PDFs:
- Online Certificate Maker
- Online Wedding Invite Maker
- Online Event ID Card Maker
- Online Invoice Maker
🐻 Bear Tip: Sign up for a Bannerbear account here—you’ll get 30 free API credits!
