Use Workflows along with the Add Image Overlay tool to burn a logo, watermark, badge, or border on your video. For this example, we'll burn the Bannerbear logo into a video.

Workflow
With a fresh Workflow, add your inputs in the Inputs section. These are the values for your workflow's declared inputs, keyed by name. Each input contains the following:
- name - used as references in your workflows and API requests
- type - the type of input you're supplying
text(string)url(web url)number(integer)boolean(true/false)
- required - determines whether a run must supply this input
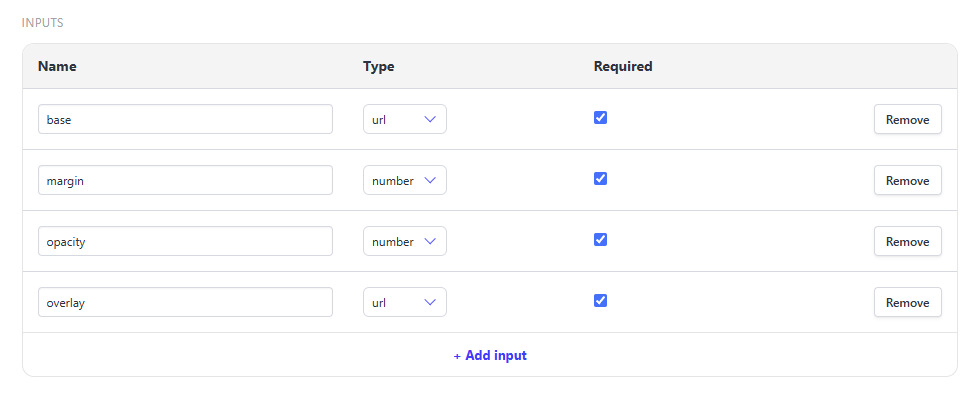
Add a Tool step and select Add image overlay from the drop-down menu. Use the + ref button to select the appropriate input references. In the example below, our inputs are
base(for the base video)overlay(for the logo)margin(to define the gap from the edge of the video)opacityto define the opacity of the logo)
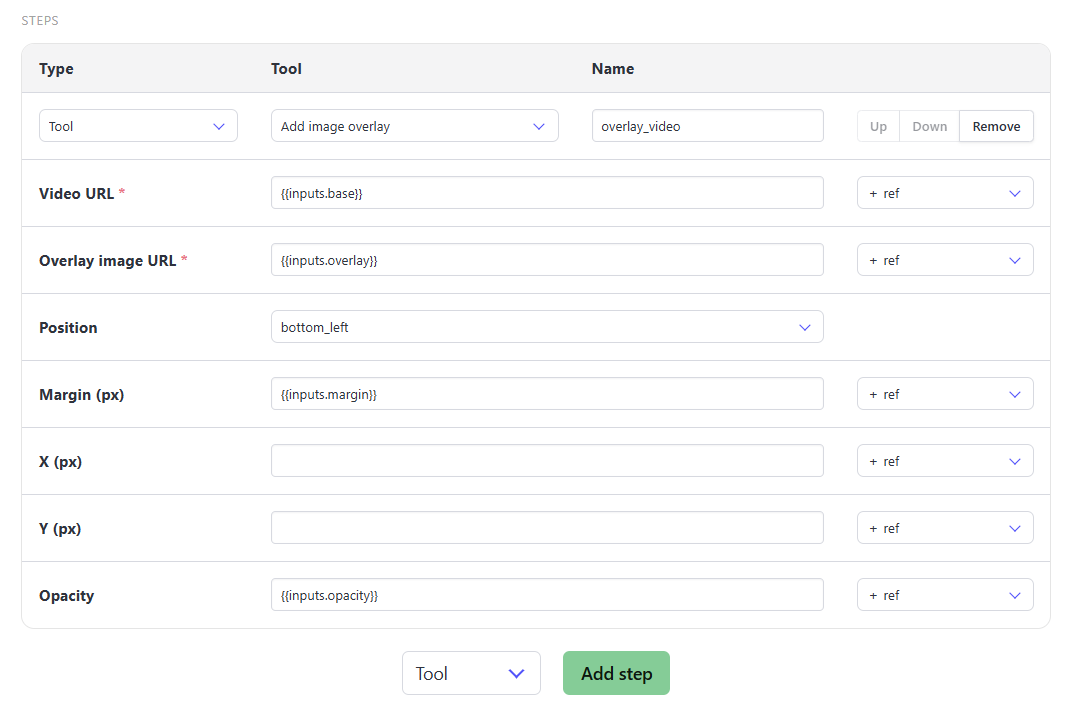
A step's inputs can reference a workflow input as {{inputs.<name>}} or an earlier step's output as {{steps.<key>.<output>}}.
API Workflow Run
Send a POST request to the /v5/workflow_runs endpoint, along with your workflow UID and a list of declared "inputs": {"input1", "input2"}. May also be sent as a bare top-level object instead of nested under input.
var data = {
  "workflow": "VymBYa7gMjW6JQ2njM",
  "inputs": {
    "video_url": "https://cdn.bannerbear.com/sample_videos/clip.mp4",
    "title_text": "New Arrival"
  }
}
fetch('https://api.bannerbear.com/v5/workflow_runs', {
  method: 'POST',
  body: JSON.stringify(data),
  headers: {
    'Content-Type' : 'application/json',
    'Authorization' : `Bearer ${API_KEY}`
  }
})
Note: Workflows can be created via the API as well. See Create a Workflow for more.

