Scaling video production usually means multiple tools strung together, manual steps between each one, and expensive subscriptions that add up fast. V5 solves that. Workflows lets you chain together images, animations, and videos in a single, purpose-built automation so that you can enjoy minimal tool-switching and a code-free process.
If you’ve ever wanted to create a polished, multi-step automated video framework without learning FFmpeg or building every frame from scratch, these are feature updates you should be excited about!
In this new feature release, we’ll walk you through what setting up a template and generating an image looks like now, and then move through building your first Workflow.
Getting Started With V5
Setting up templates and generating images is straightforward. Here's how to do it in V5:
How to Set Up a Template
A Bannerbear template takes your design and turns it into a reusable automation. Keep the core of it distinct while changing the text, swapping in new images, and adjusting colors. Use it for certificates, social media posts, video previews, whatever you need. You can design from scratch, pick a pre-built template, or use AI to get started.
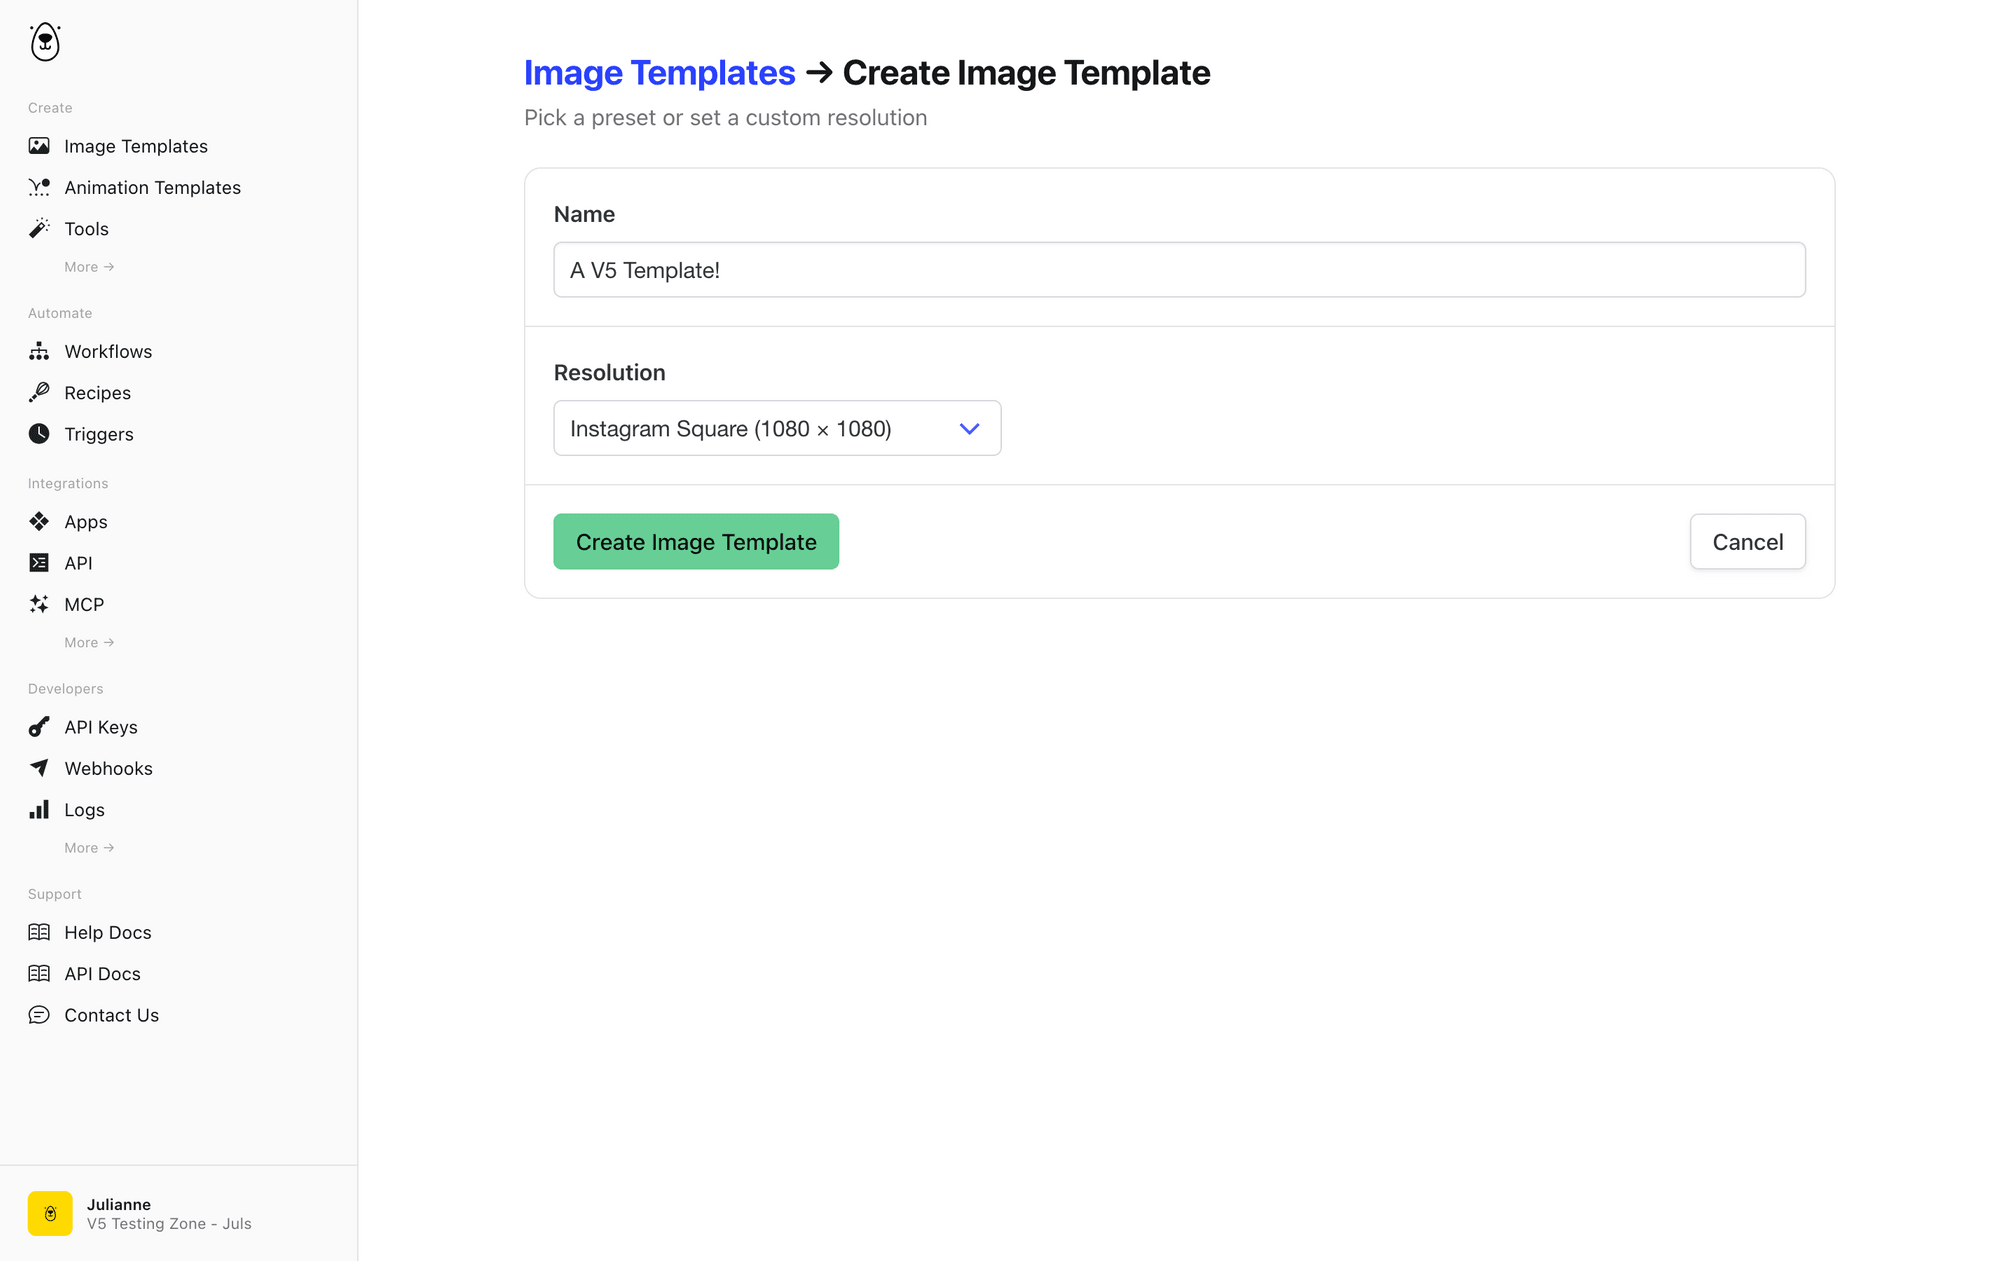
Log into your dashboard, go to Create , and select Image Templates. Create a new template or start from the pre-made library. Give it a name and choose your size.
Once you're on the canvas, add objects—text, images, shapes, QR codes, and more—and modify them as needed.
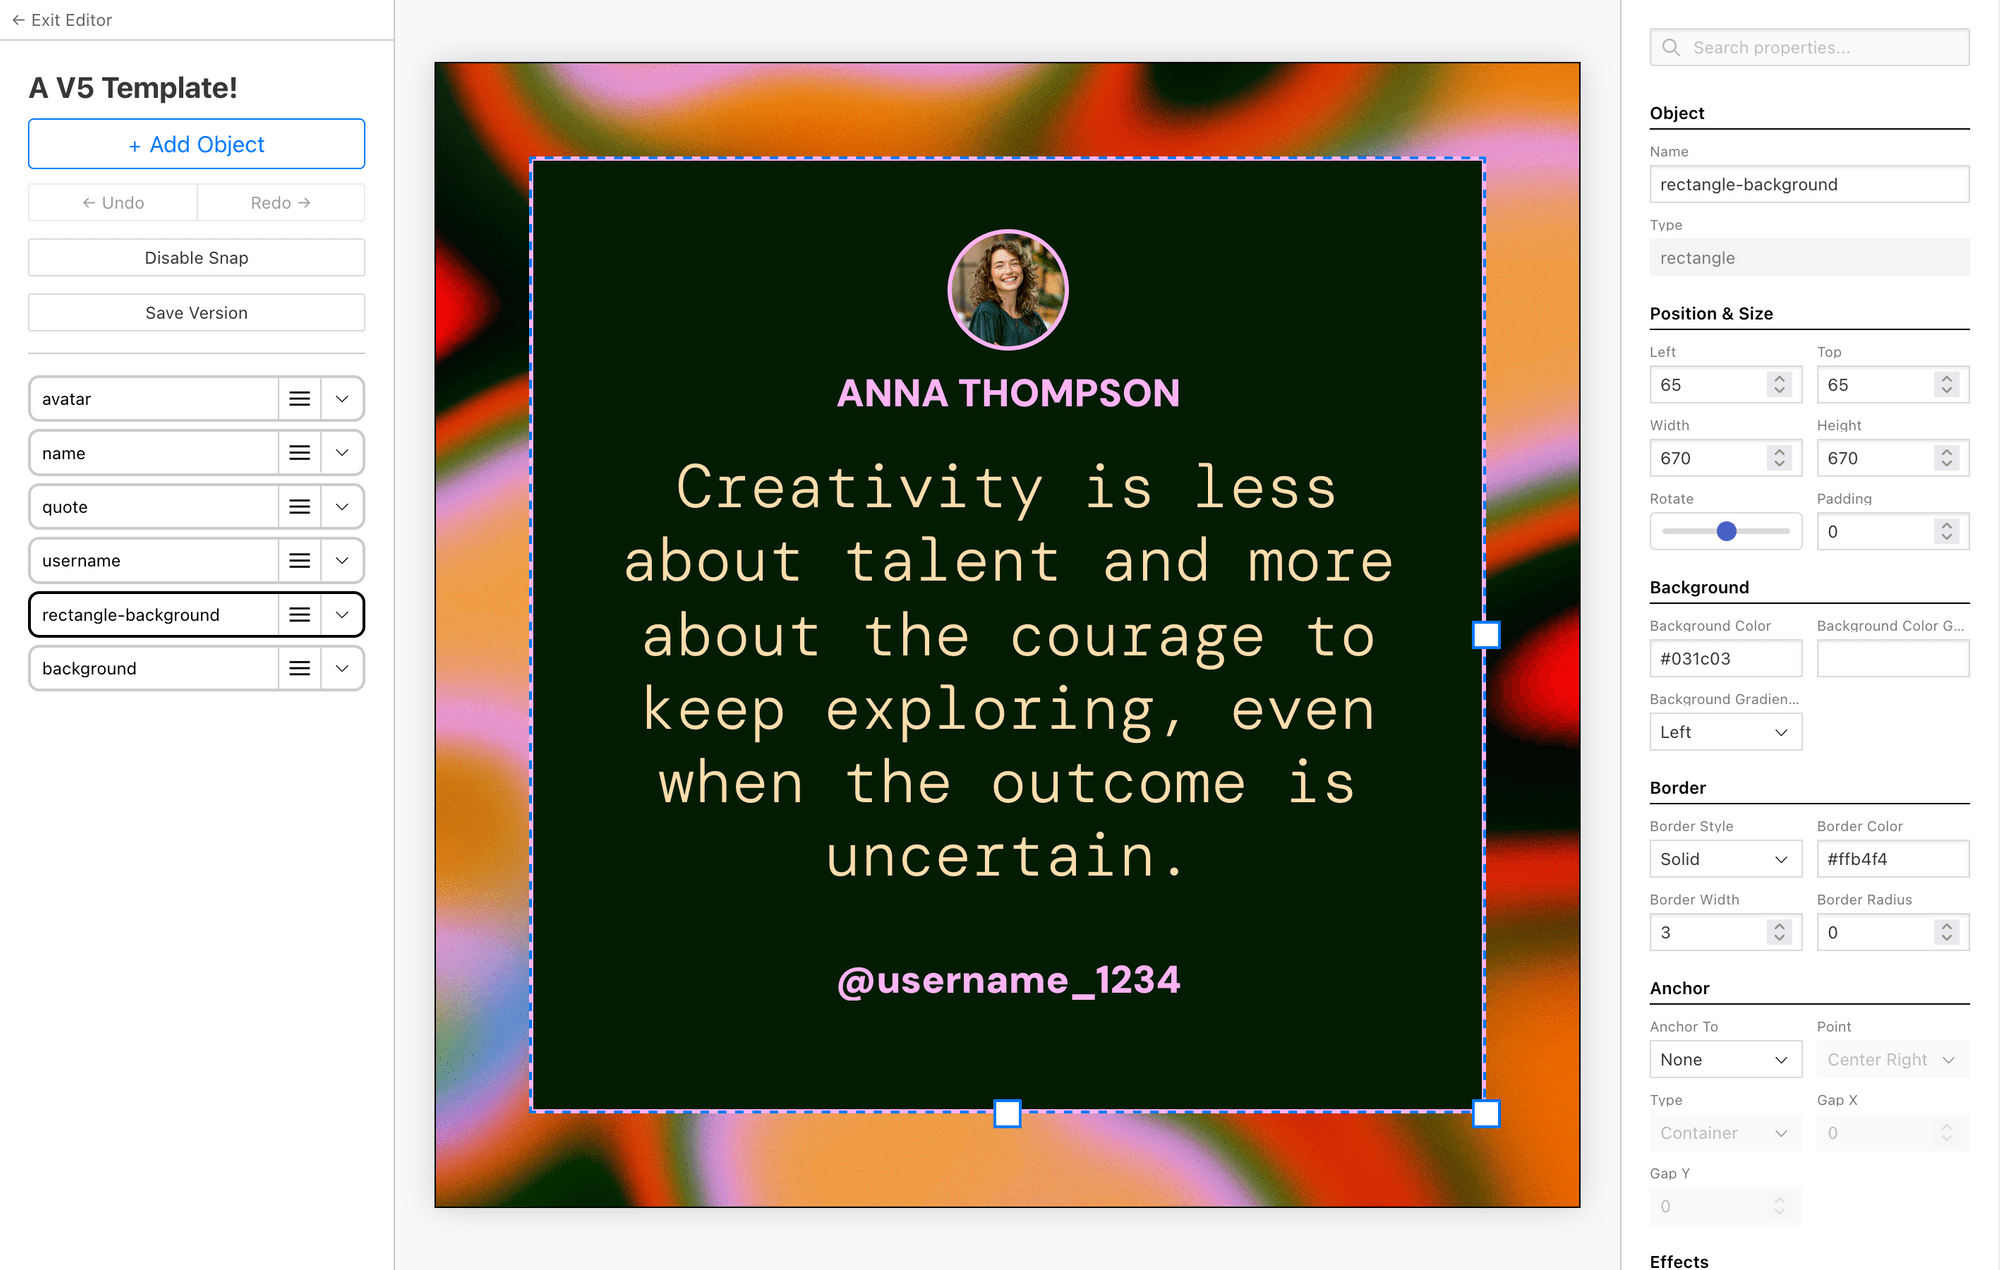
Each object can be set to responsive , so it'll adjust to different sizes without breaking your design.
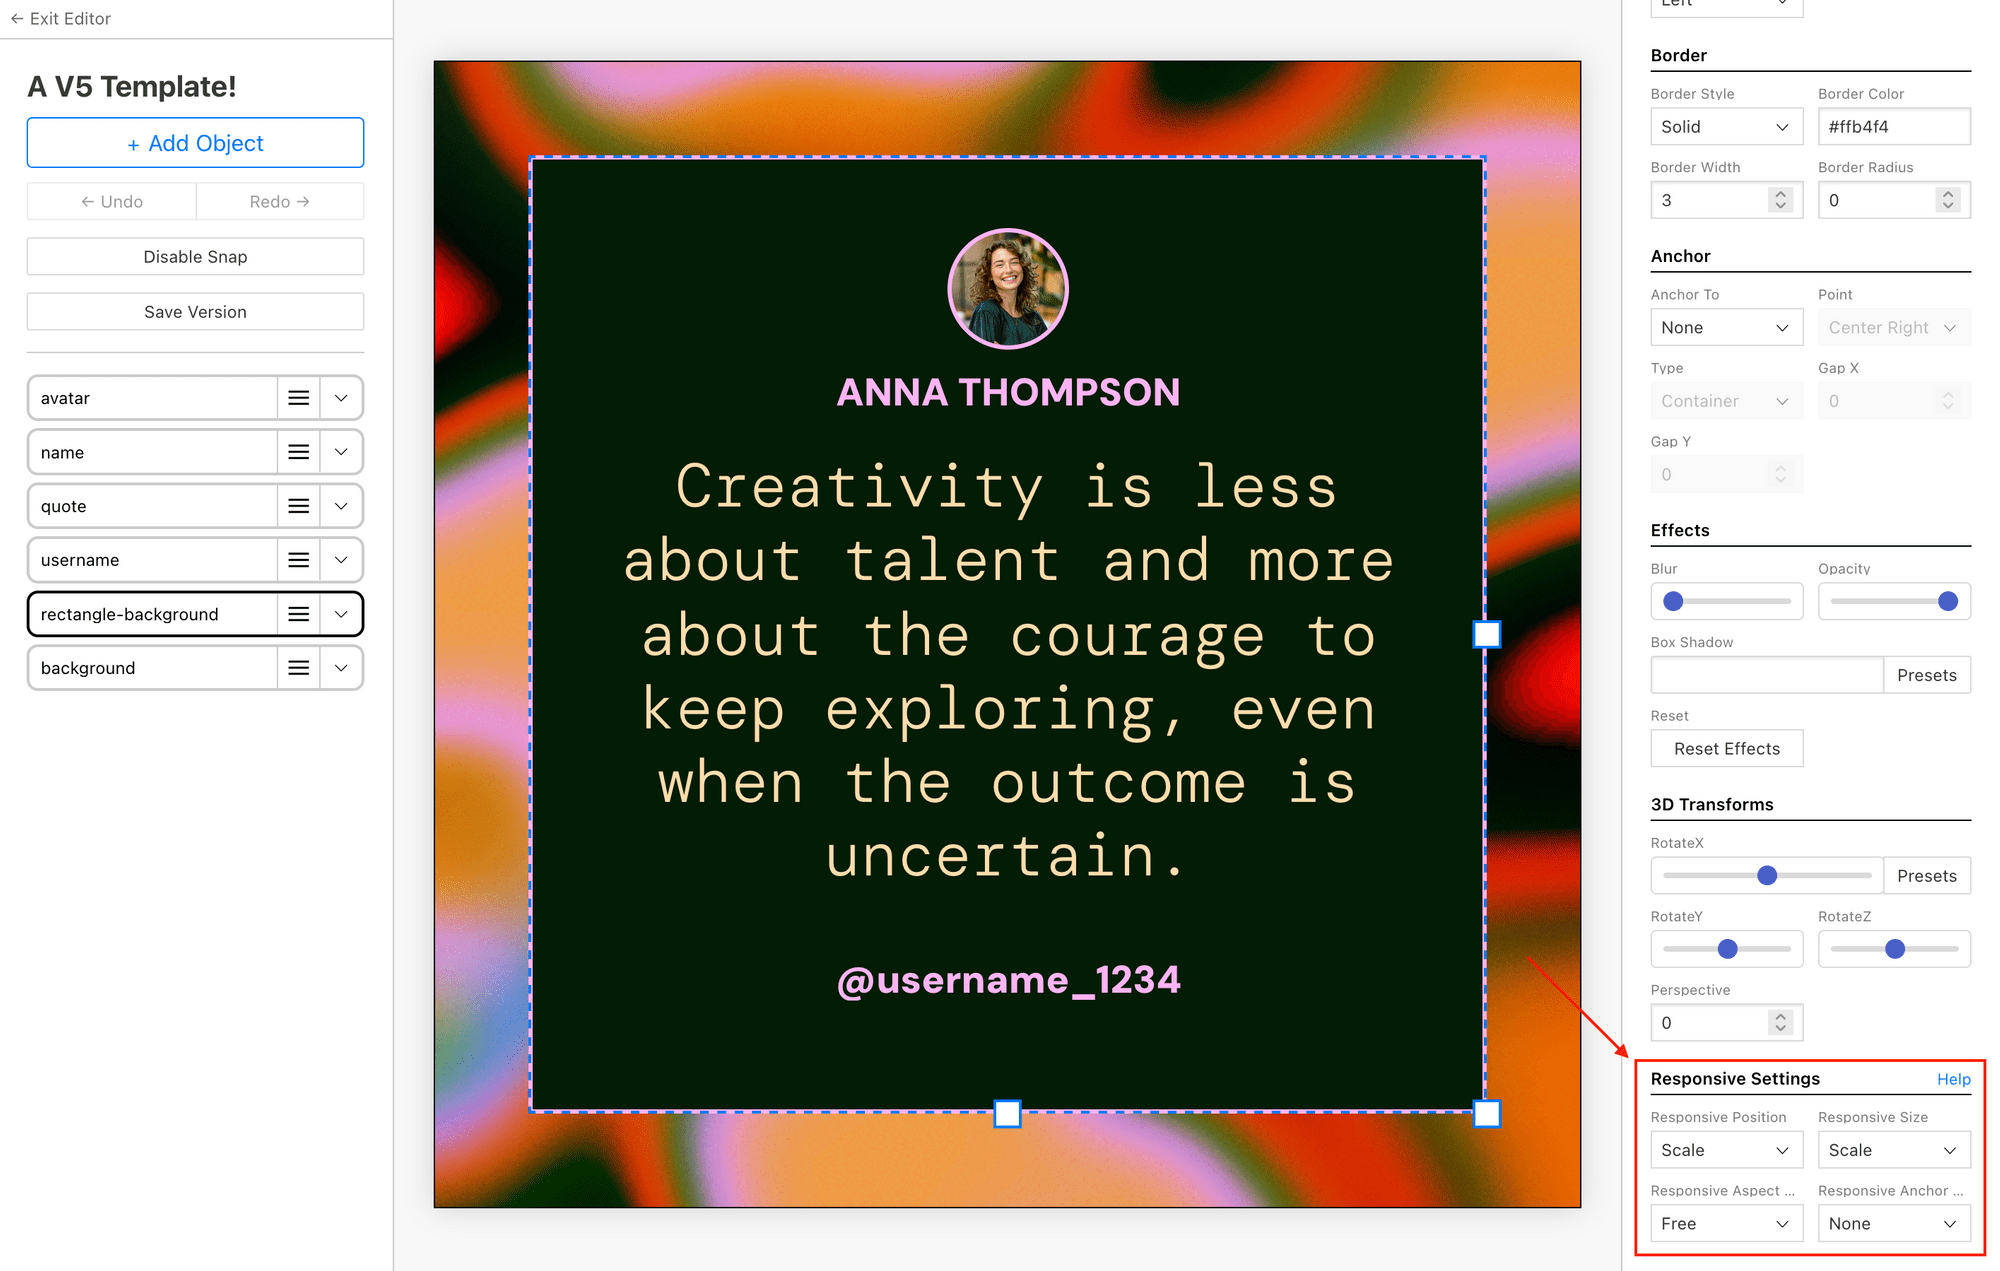
Bear Tip 🐻: Clicking the Help button by Responsive Settings will give you an explanation of each option, so you can choose which works best for your template.
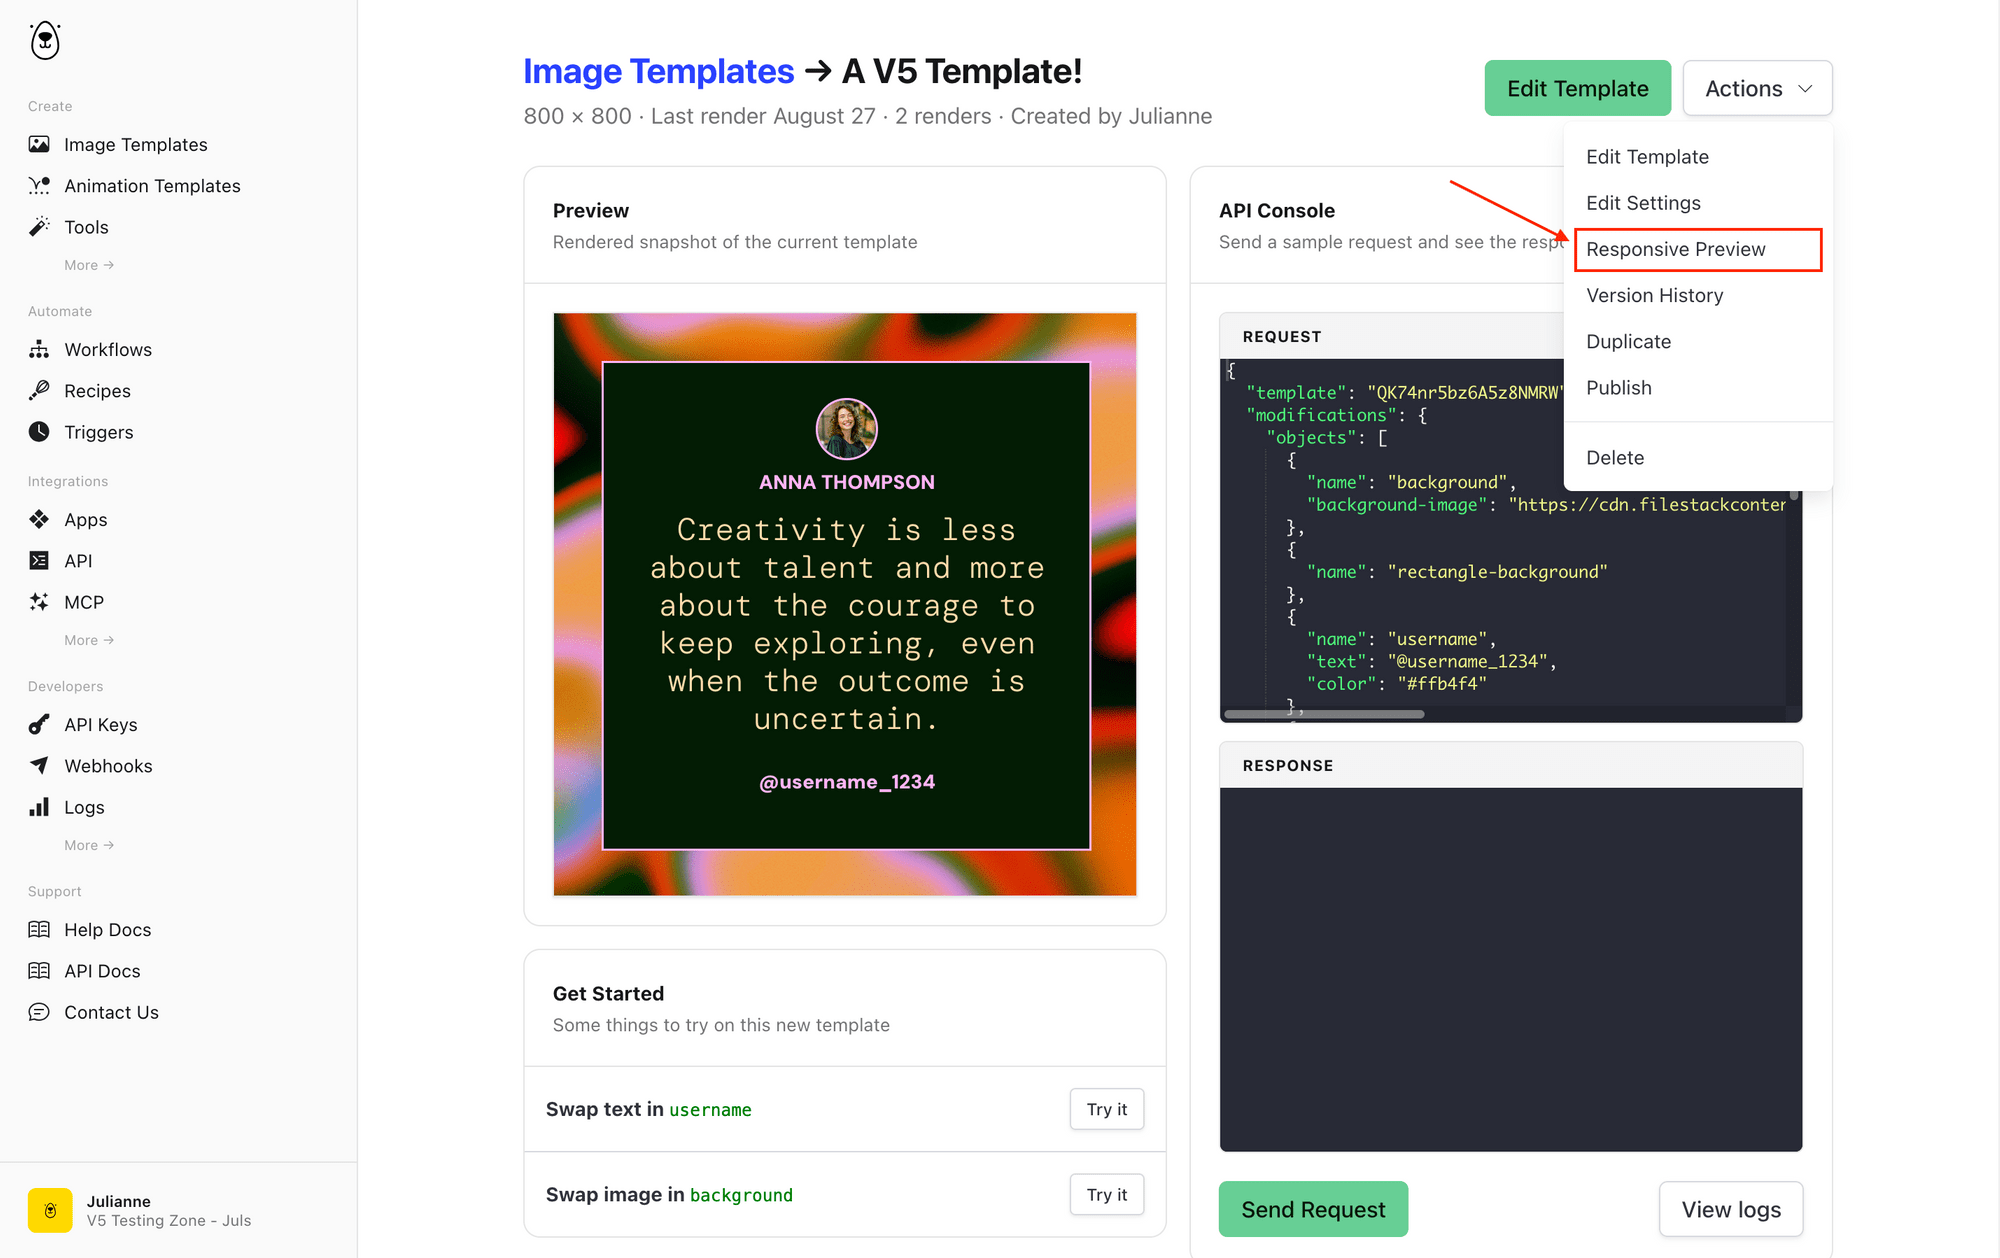
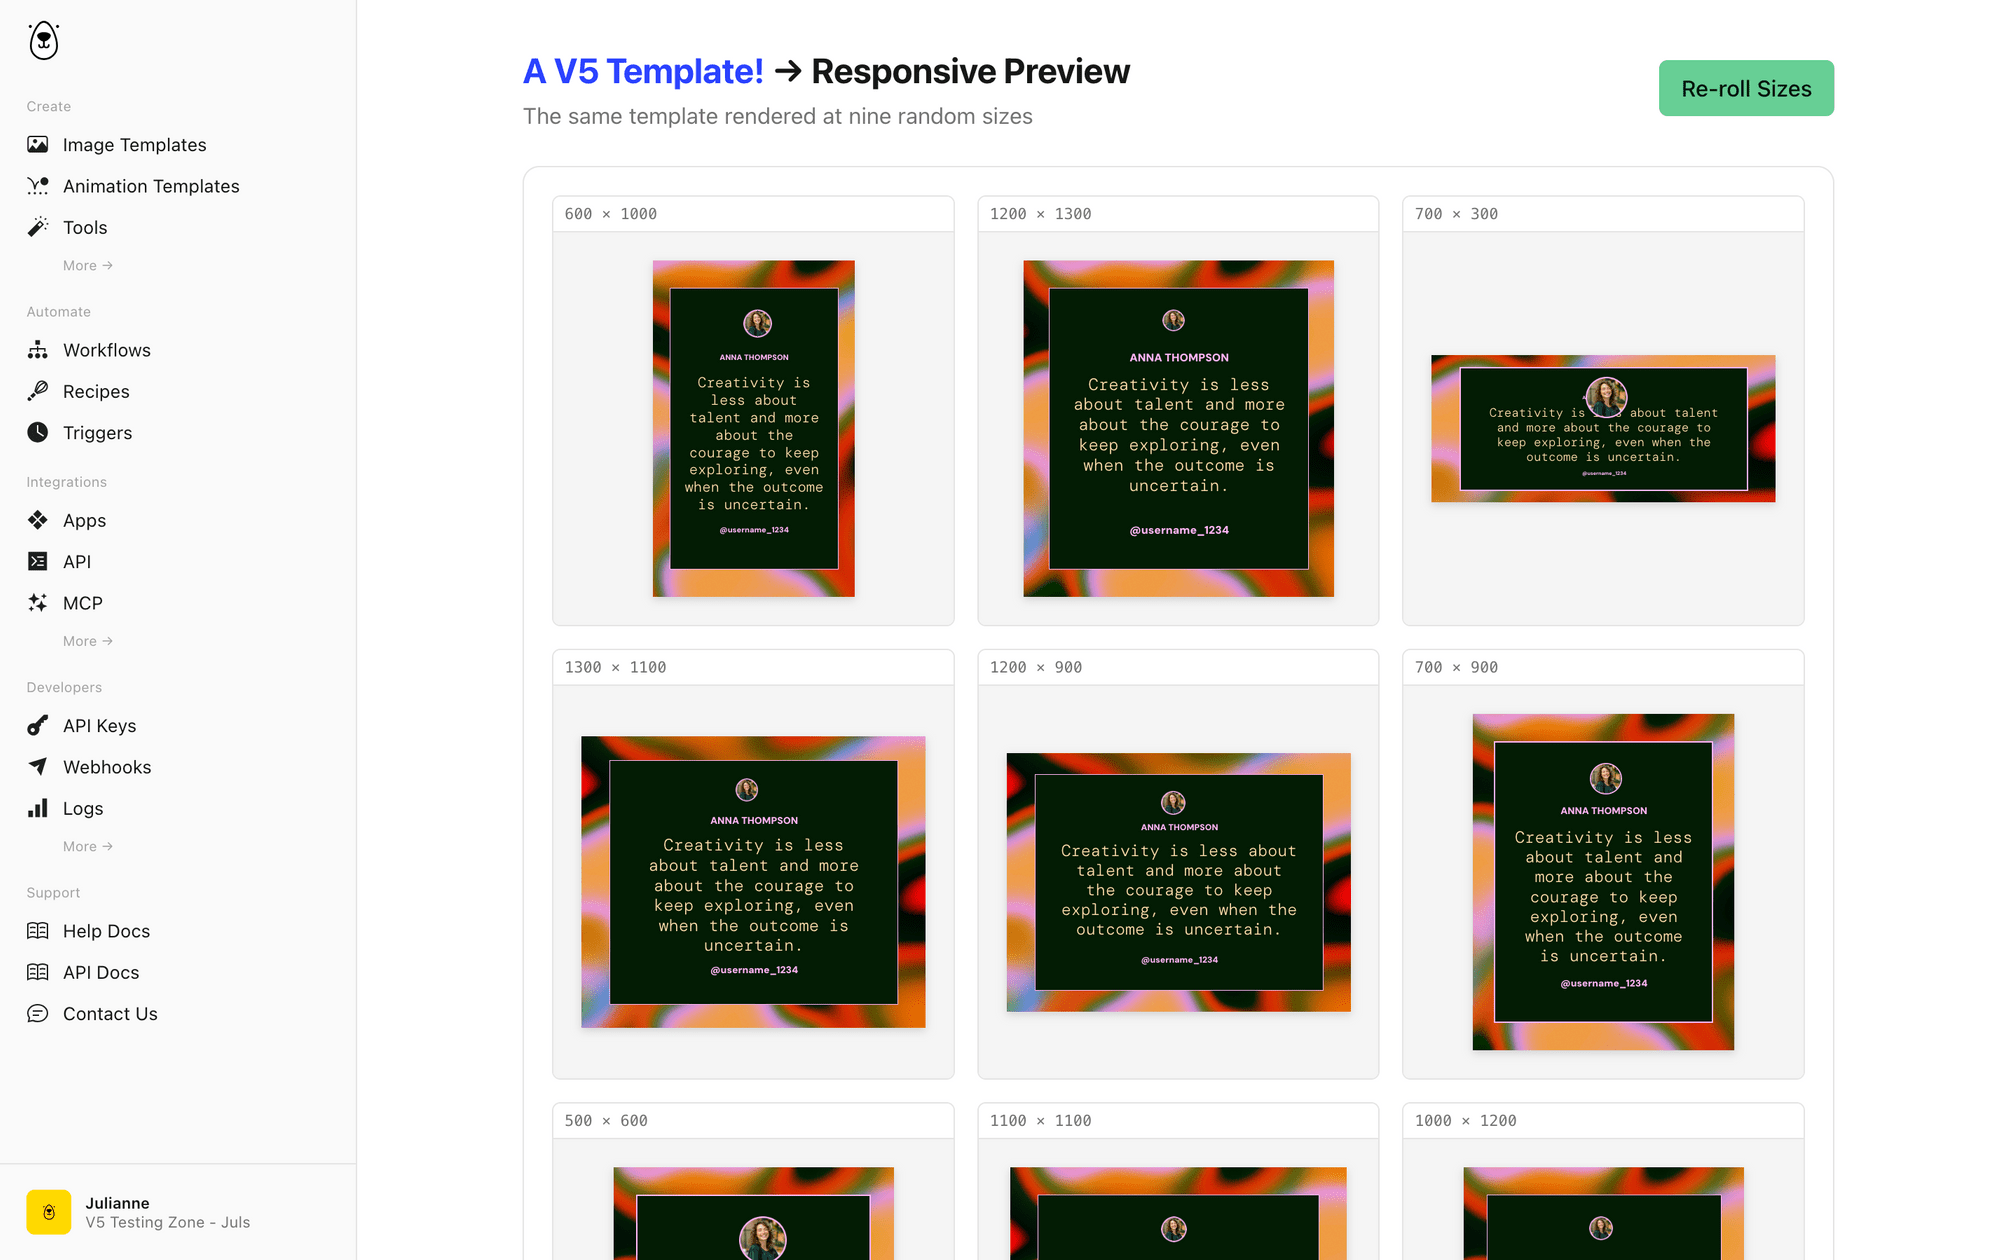
If you've got a responsive template, check out the Adaptive Preview page to see how it handles nine random sizes.
That way, you don't have to design multiple versions every time you need a slightly different size.
When you're ready to render, you've got options: workflow automation platforms like Zapier and Make, direct integrations like Slack, Airtable, and Coda, or the RESTful API to build Bannerbear into your own systems.
Bear Tip 🐻: Miss your V3 templates? Don’t worry—we’ve got an import button at the bottom of the Image Templates page that you can use to bring them over to your new V5 dashboard.
How to Render an Image Via Zapier
Using Zapier is a solution for when you need to pull data from tools that don’t have a direct Bannerbear integration, or when you want to keep your image generation separate from your chat assistant.
To render via Zapier, you’ll need a trigger. It can be a form submission, new spreadsheet row, or a webhook—whatever logically kicks off your workflow. Then, you can add a Bannerbear step with a Create Image action.
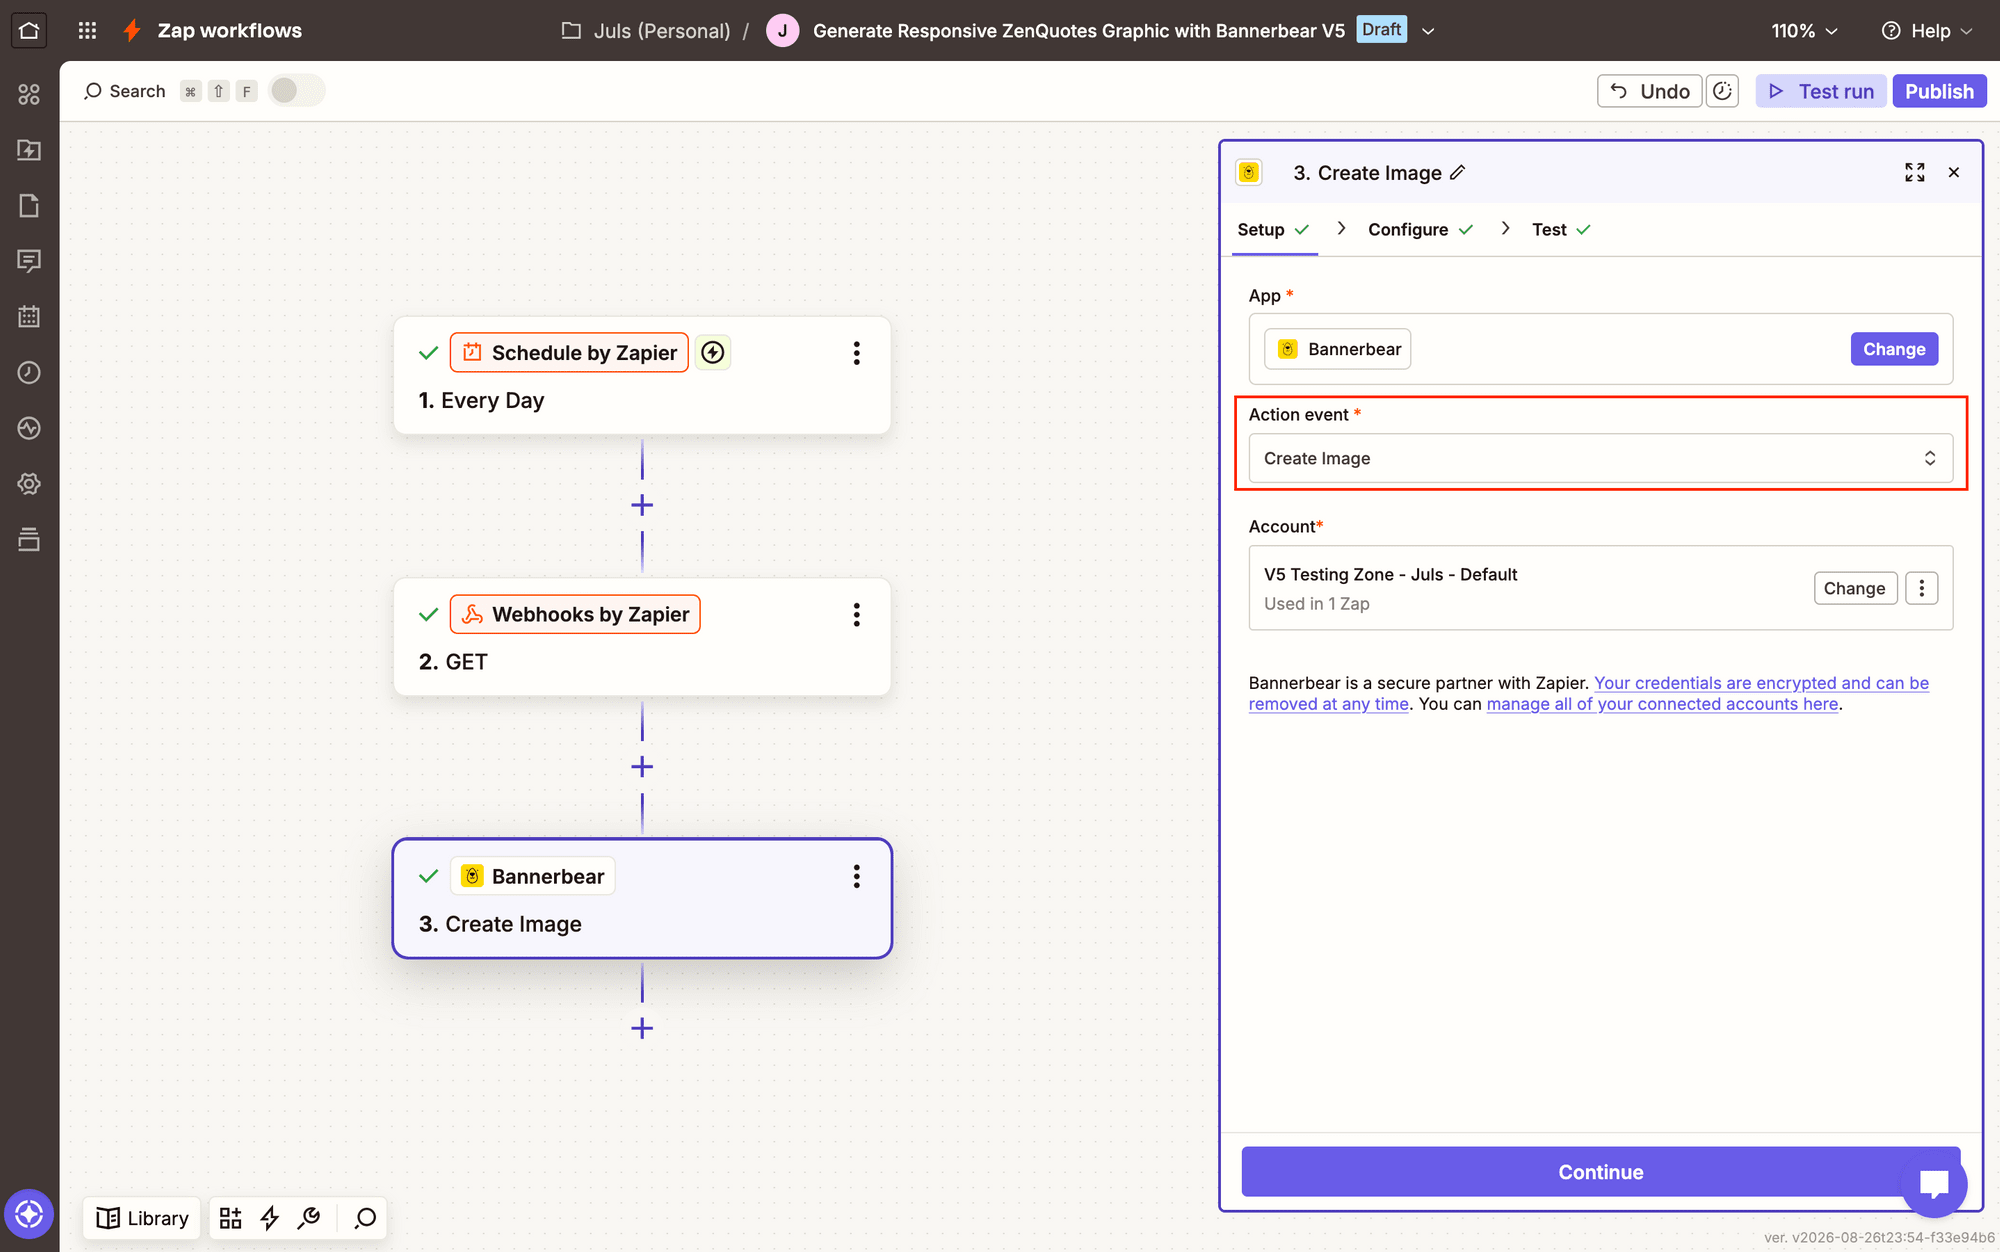
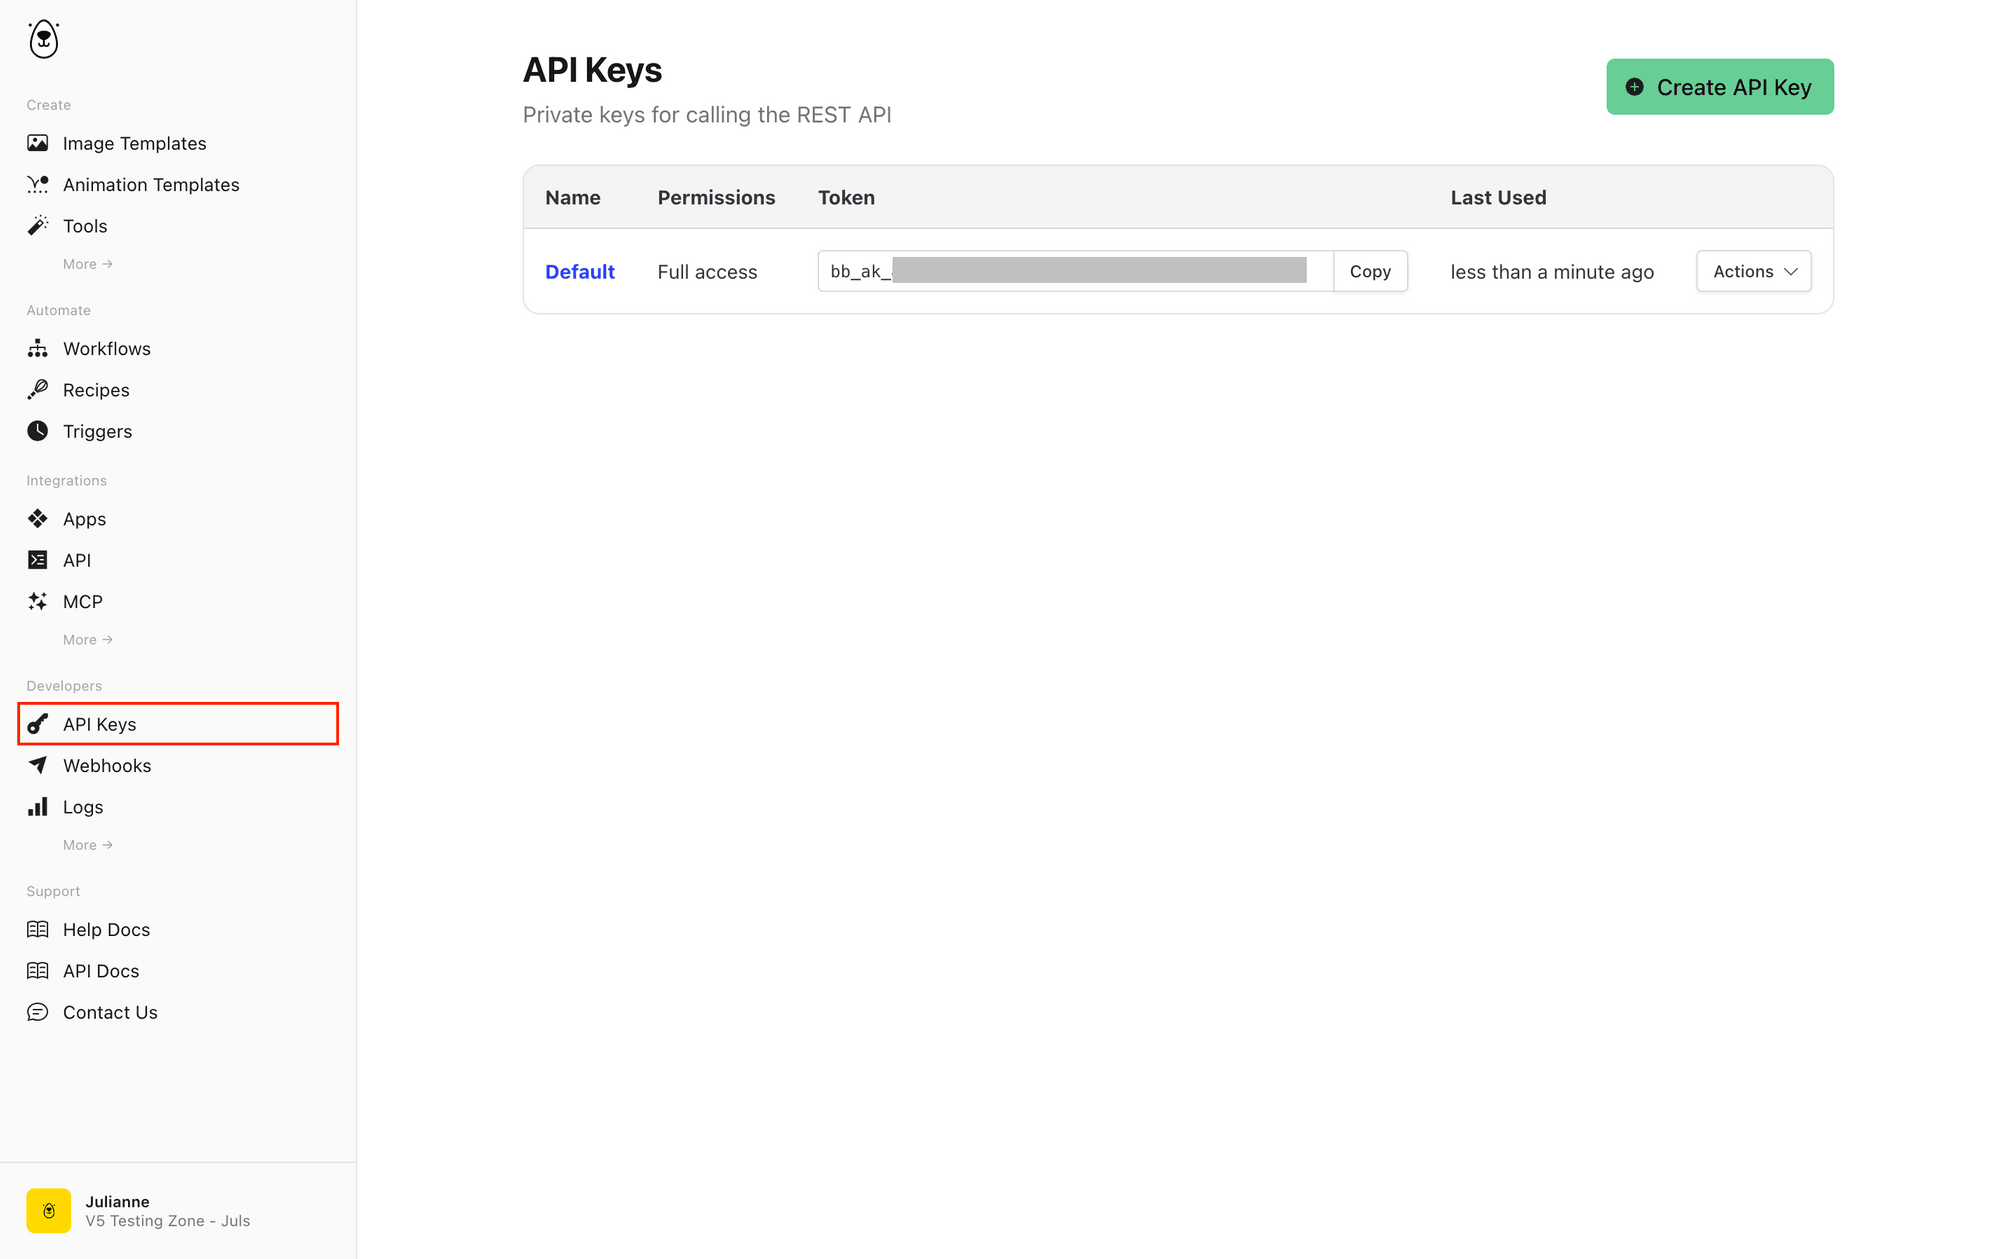
Connect your account first using anAPI key from the Developers section of your dashboard.
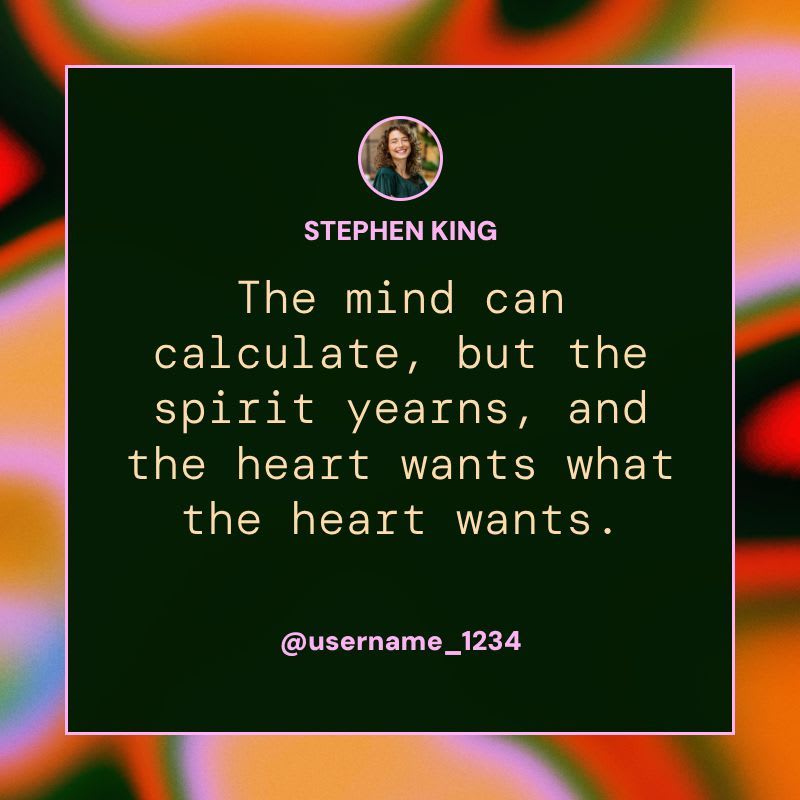
Once connected, select your template. Configure your image by adjusting the size, changing the background, swapping in text—whatever your template allows.
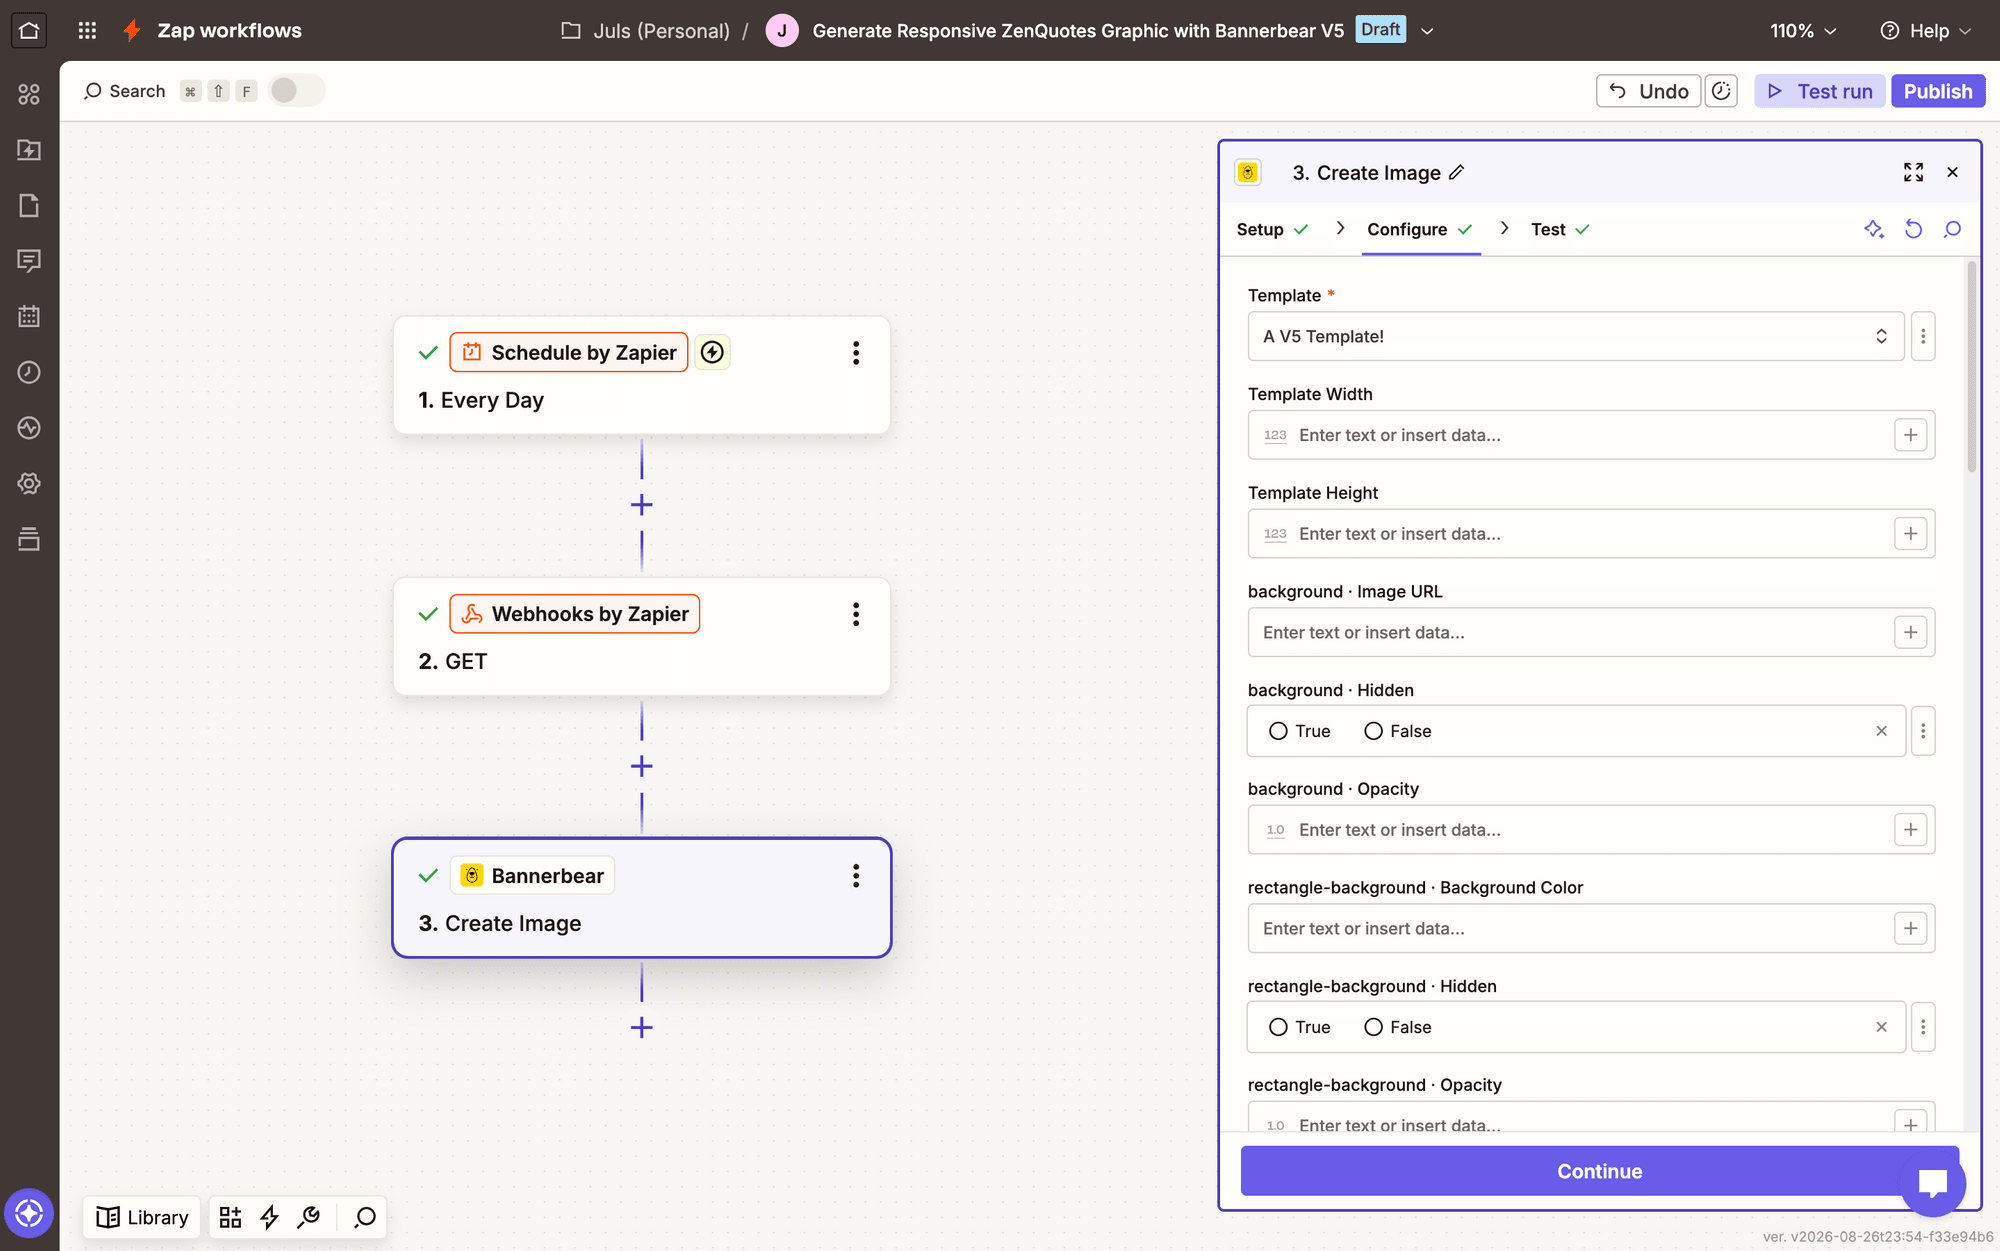
You can also choose your output format, including PDFs.
Test it. Once it runs, your image is generated and ready to save or share automatically, with no manual steps in between.
How to Render an Image Via Chat
With Bannerbear's MCP, you can generate images directly in ChatGPT or Claude. But here's what makes it different from Zapier: you can iterate in real time.
Whether you’re changing colors…
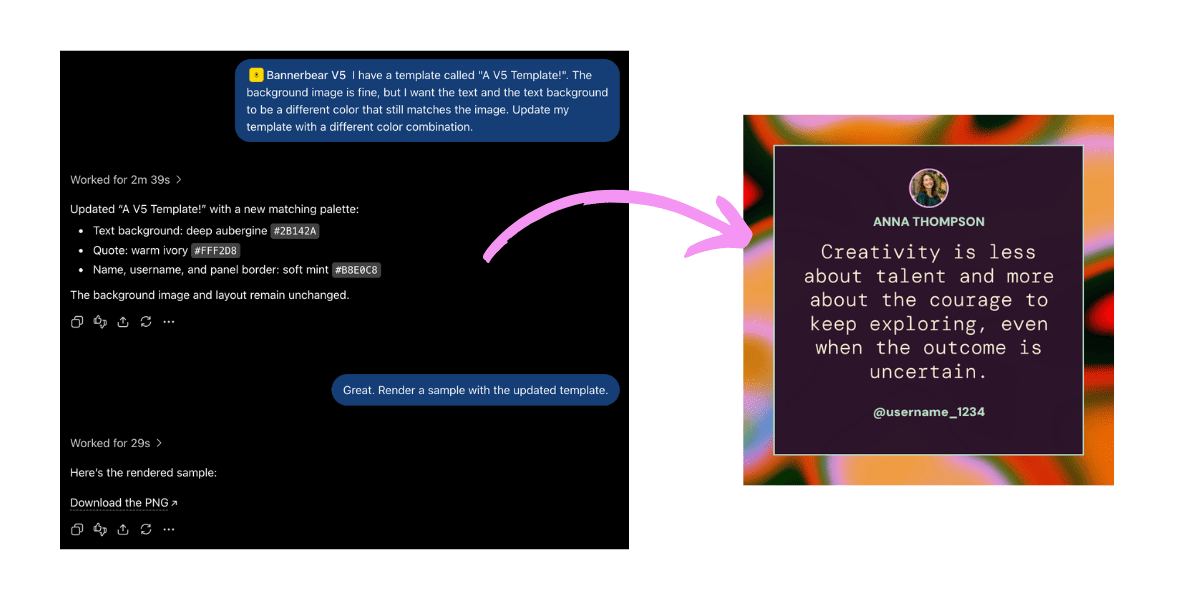
…tweaking layouts…
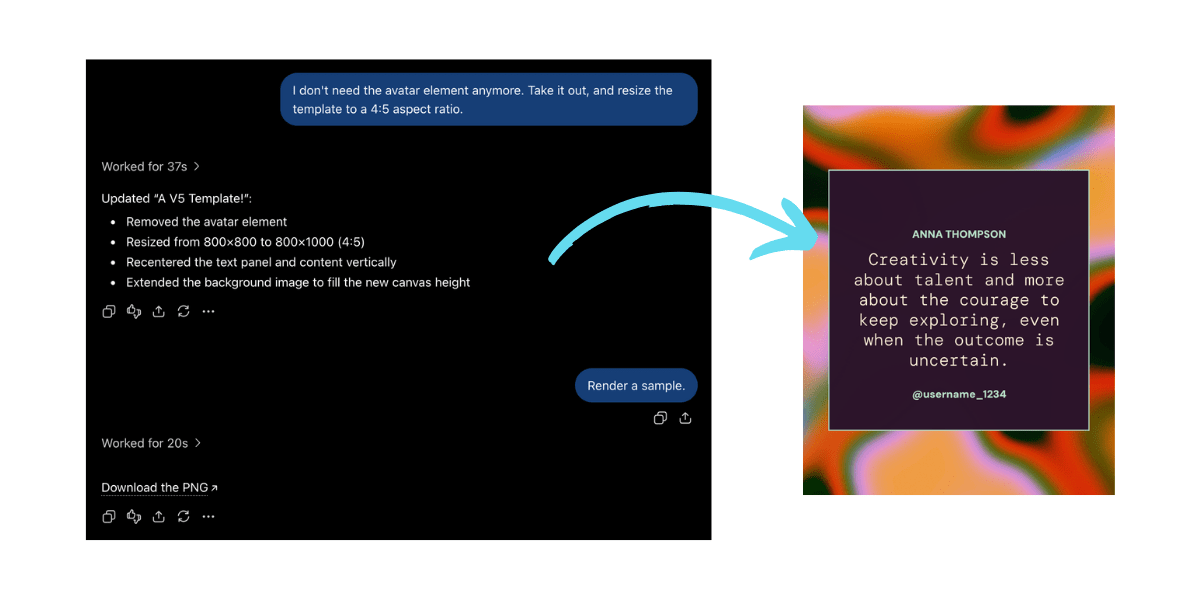
…or generating a few variations…
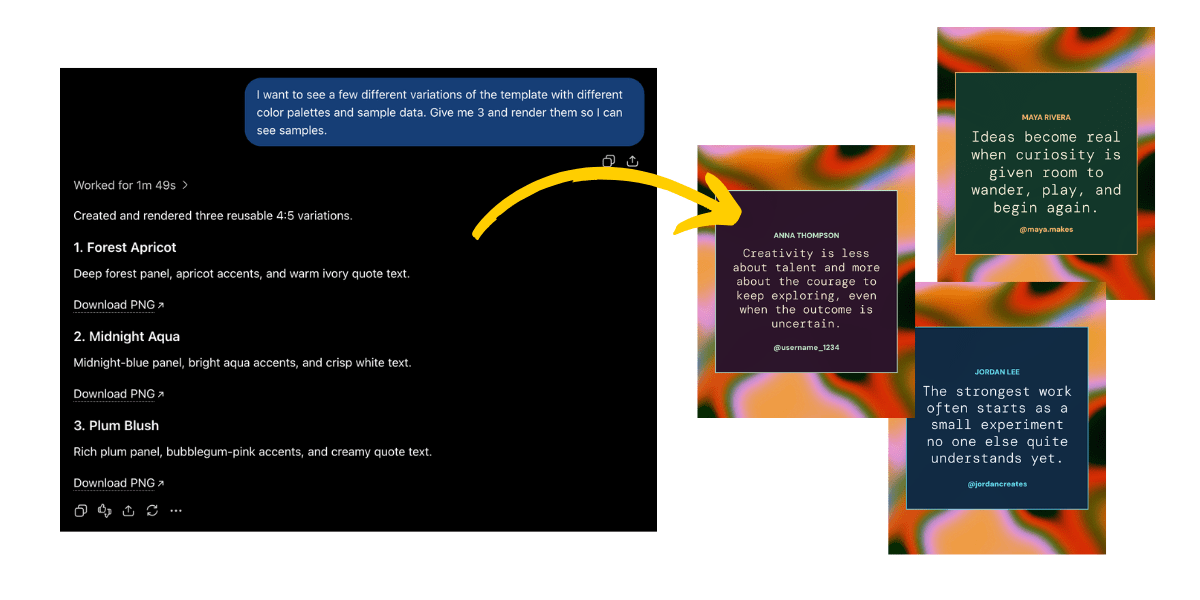
…you can handle all of this conversationally, without rebuilding anything.
Once you've connected Bannerbear to your chat assistant, give it your template, provide your data, and ask it to render. That's it—no rebuilding, no manual steps.
You can also use chat to help craft your input data. Need copy for your template? Let AI help you clean it up. Need a bunch of variations? Ask for them. Everything stays in one conversation.
That's the real power of chat: you're designing and iterating in the same place you're generating.
Workflows: Multi-step Image, Animation, and Video Processes
Workflows is the most powerful update in V5. It lets you chain together actions related to images, animations, and videos in a single automation—everything in one place, with one set of inputs, using tools built for scale.
Traditionally, a lot of image and video automation looked like multiple templates across several different platforms, utility tools between each step, and hoping everything holds together. One issue somewhere during the process was enough to break everything. Instead, Workflows consolidates everything into one coherent process, all in your dashboard.
Once you’ve set the process up and connected to input data, your Workflow just runs. Without tool-switching and step-rebuilding for every small change, there’s much less to worry about.
The built-in utilities—video resizing, image overlays, transcriptions, transitions—are purpose-built for multi-step automation, so you get capabilities you might not find on a platform that isn’t created for the same priorities. Responsive templates, segment transitions, and burned-in subtitles—Workflows handles it all.
How to Set Up a Bannerbear Workflow
Here’s what a fairly simple multi-segment video generated with Workflows looks like:
This example joins a title animation with a framed video clip—a branded framework you can keep reusing. Now let's look at how to build it.
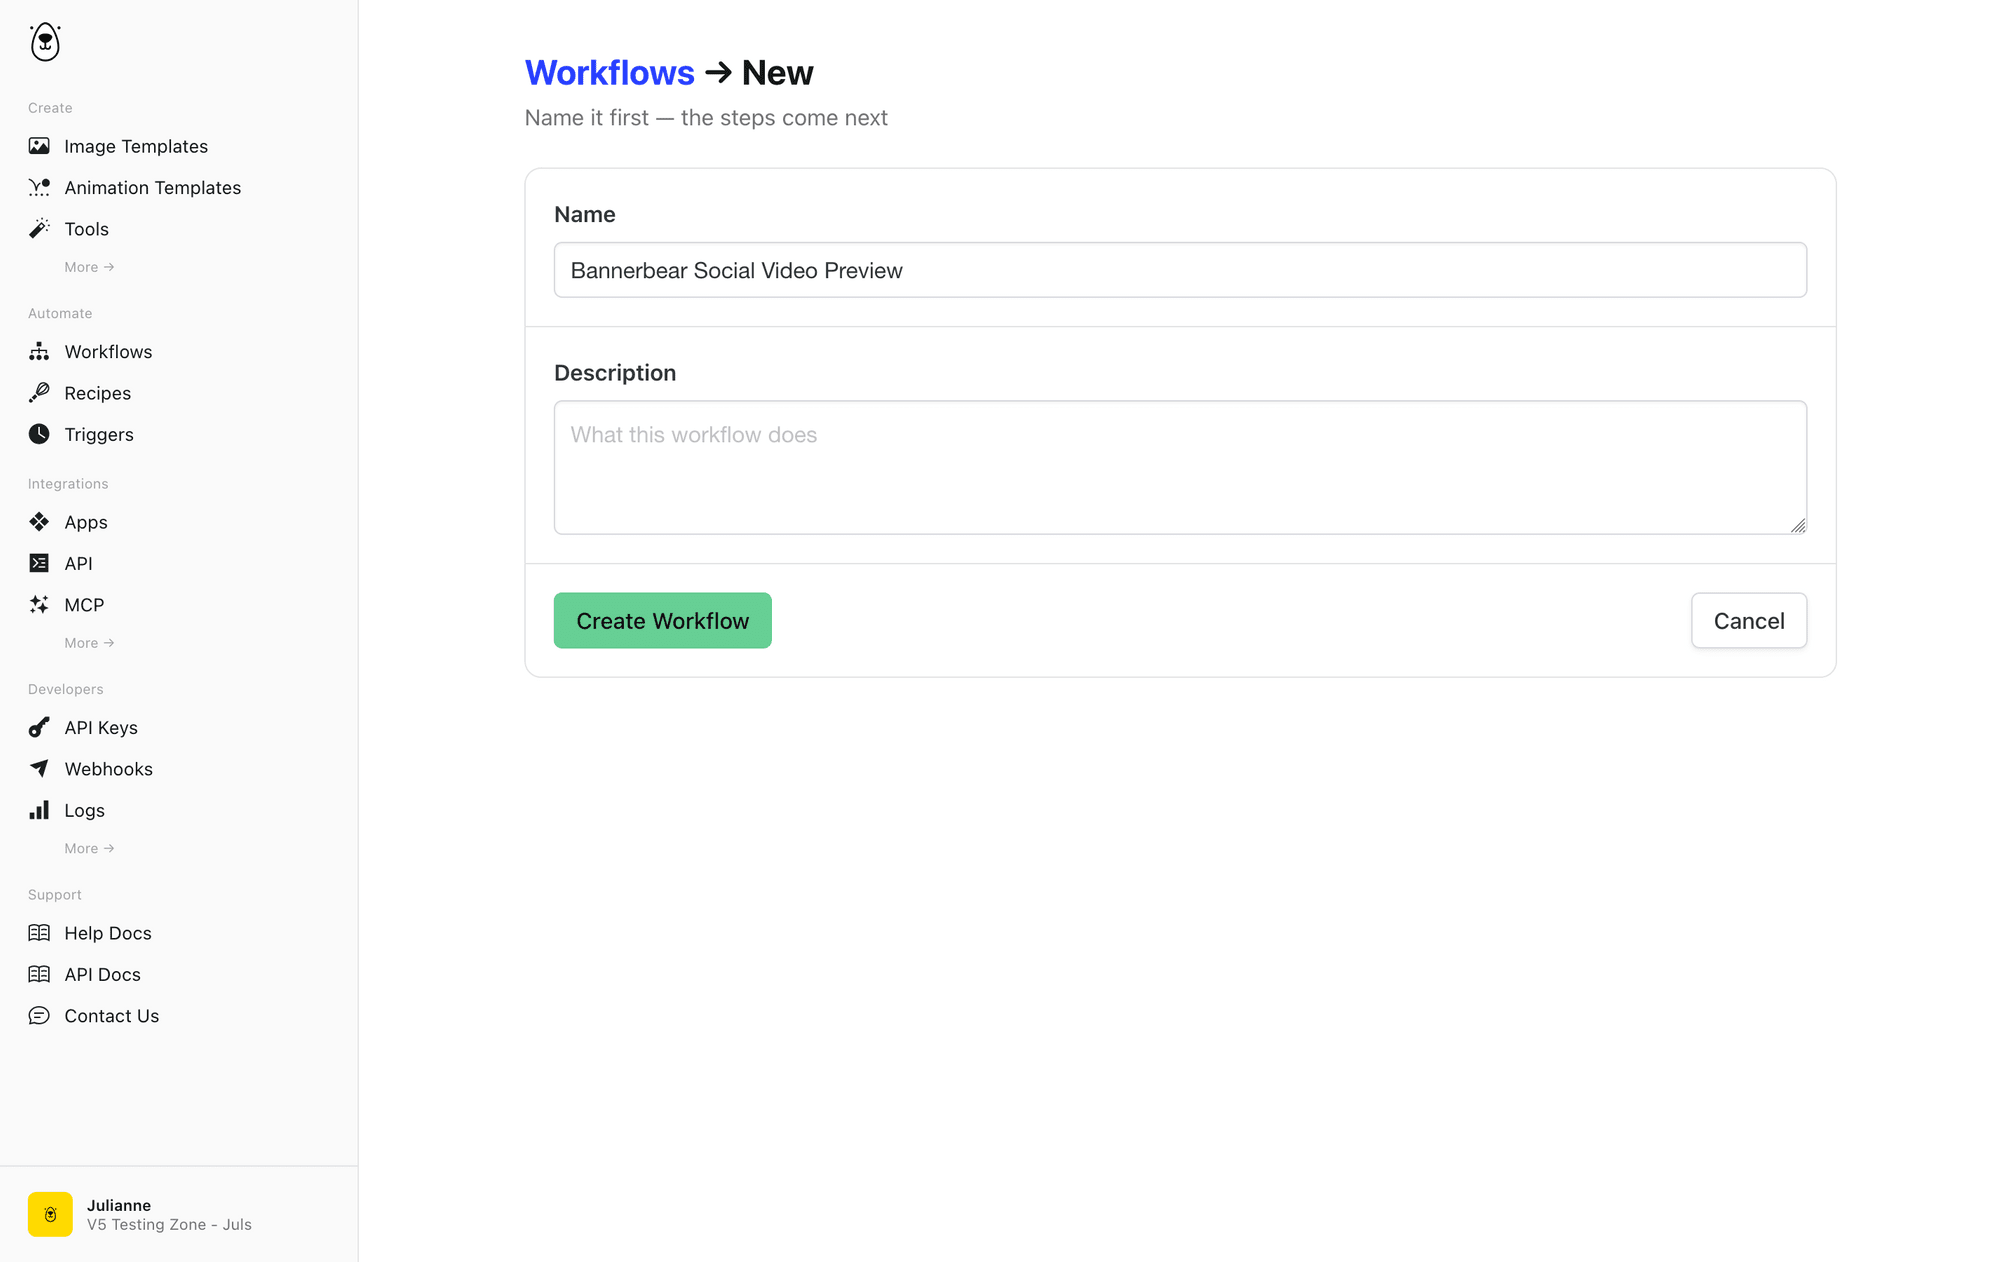
Step 1 - Create a New Workflow
Go to Automate, click Workflows, and give your new project a name and description.
Step 2 - Define Input Values
Next, define your inputs. These are the data fields that will feed into your workflow. We’re using video URL, title, overlay image, and episode number.
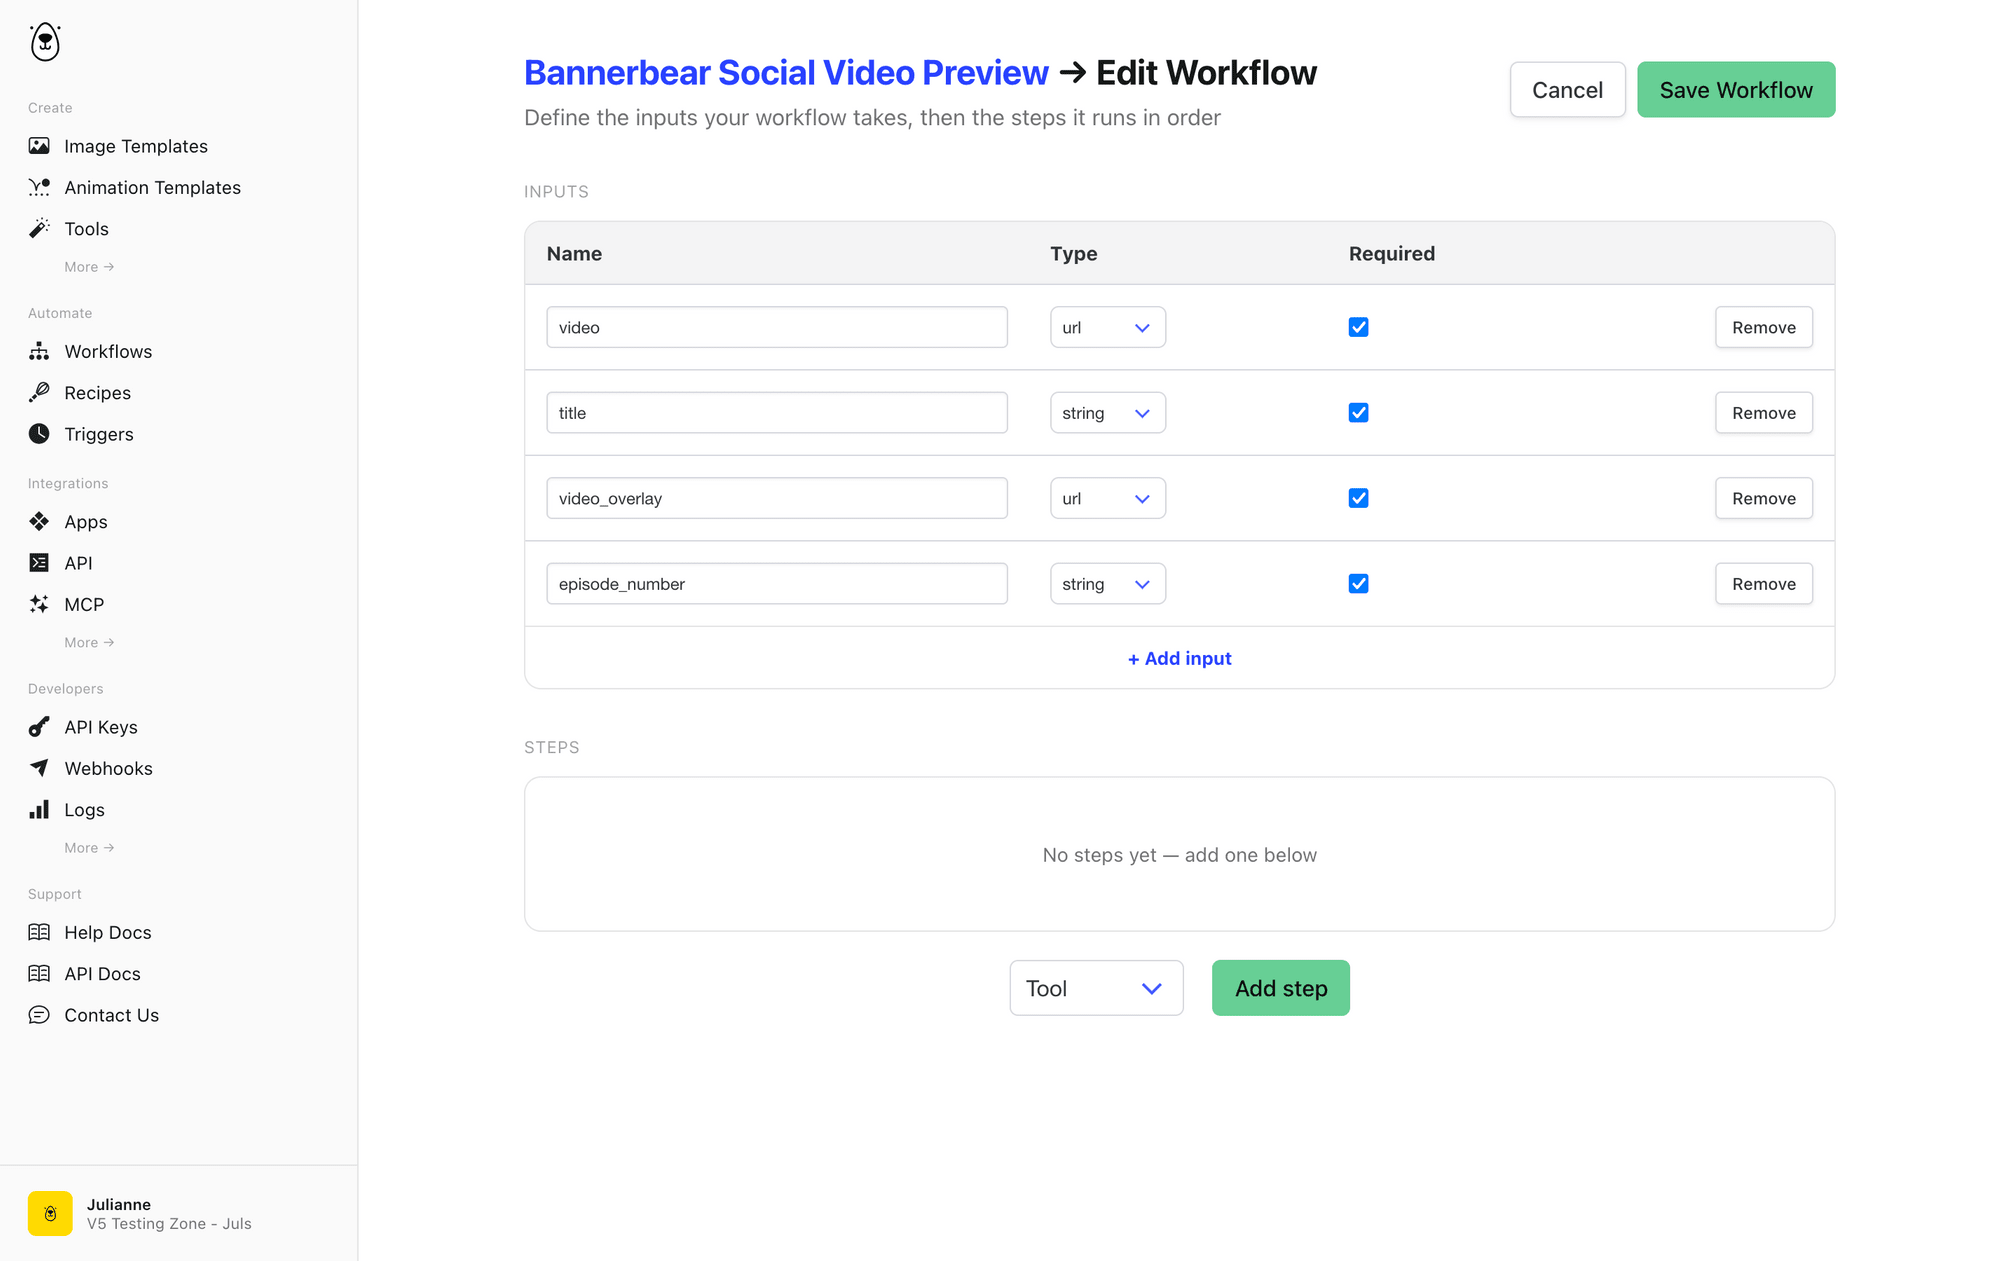
Be sure to also specify the type for each one: string, URL, number, or boolean value.
Step 3 - Set Up Steps
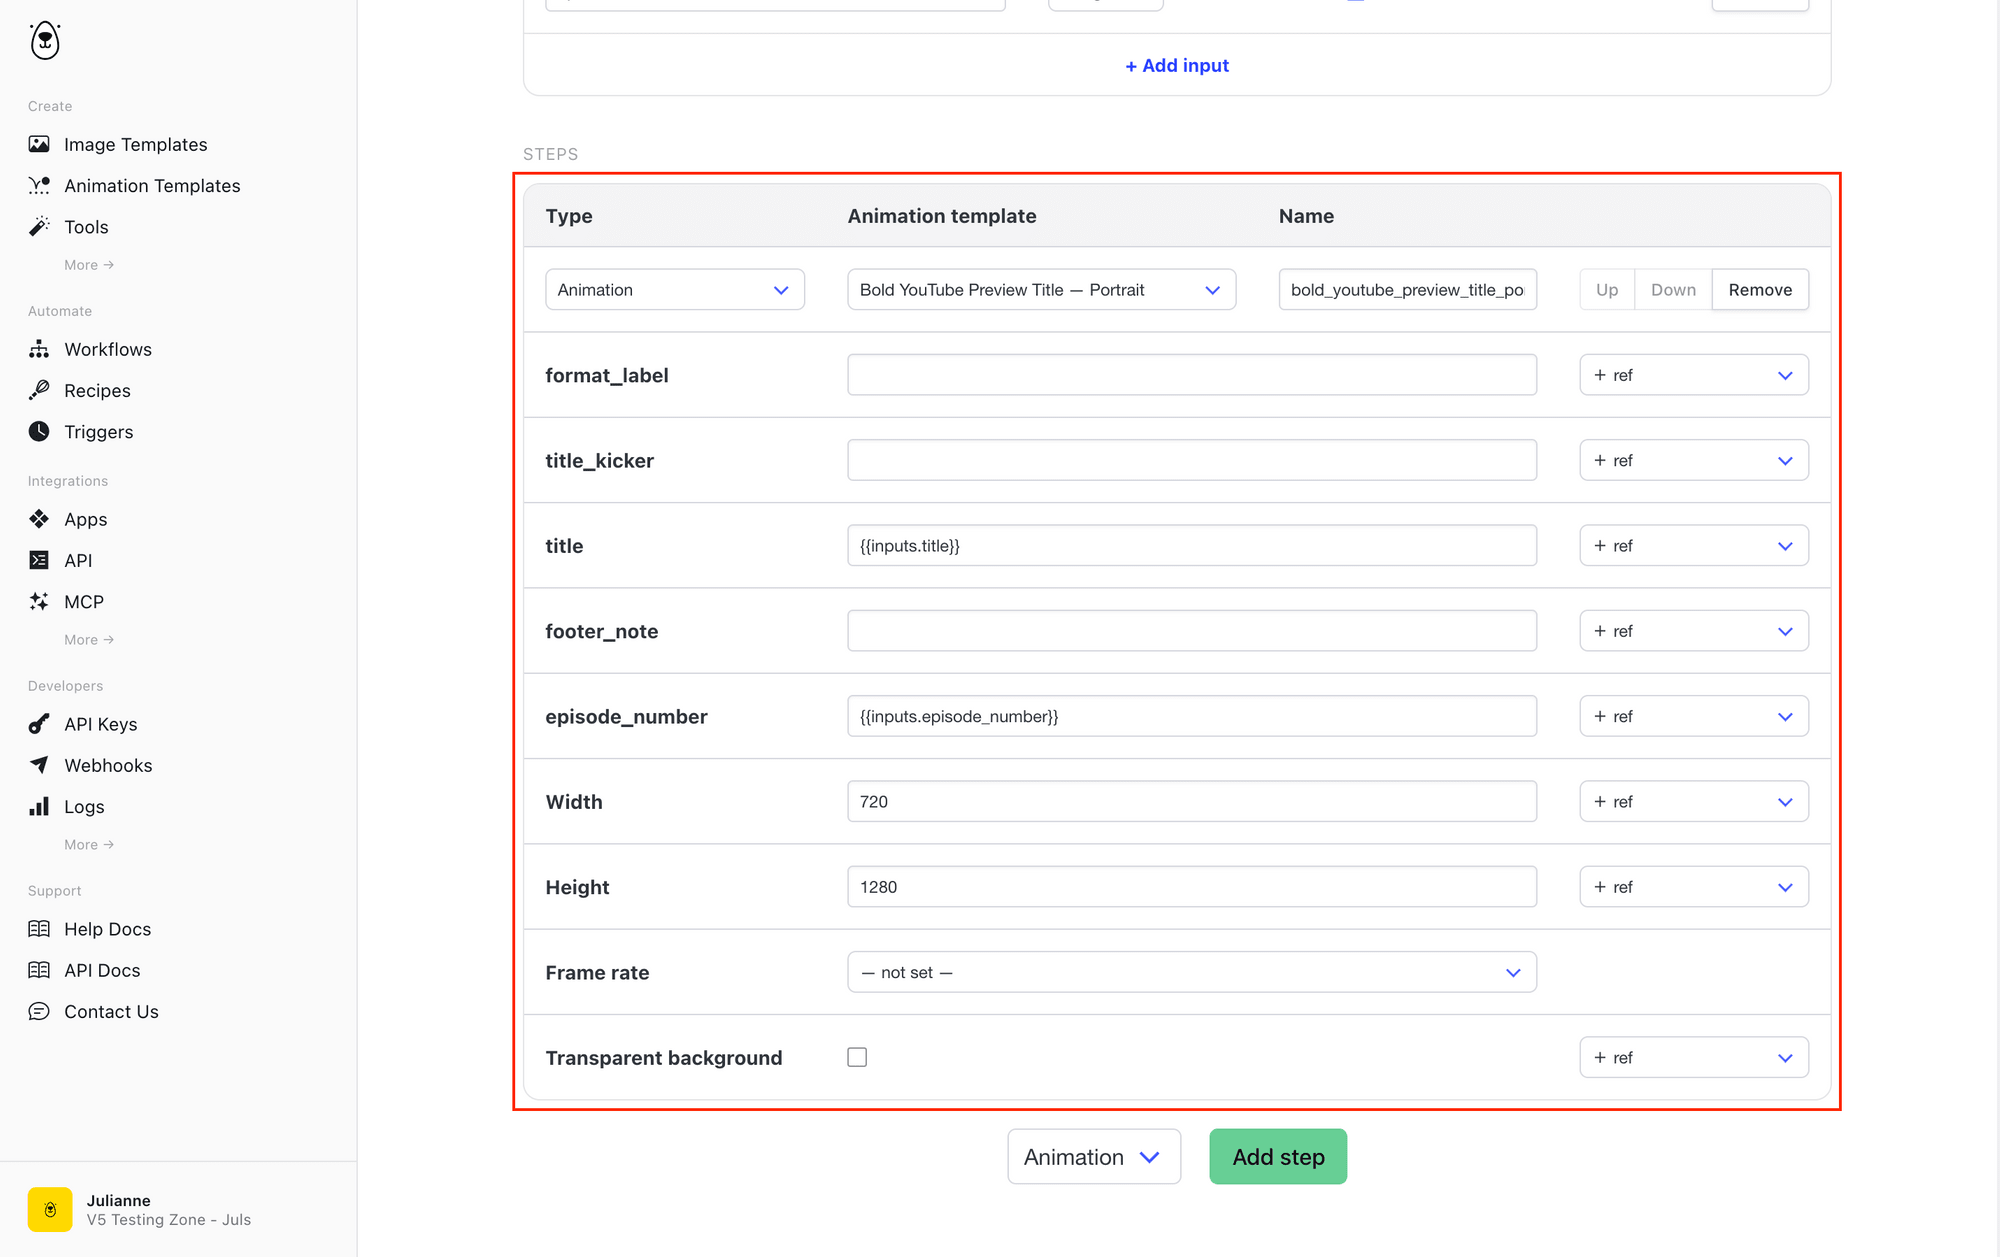
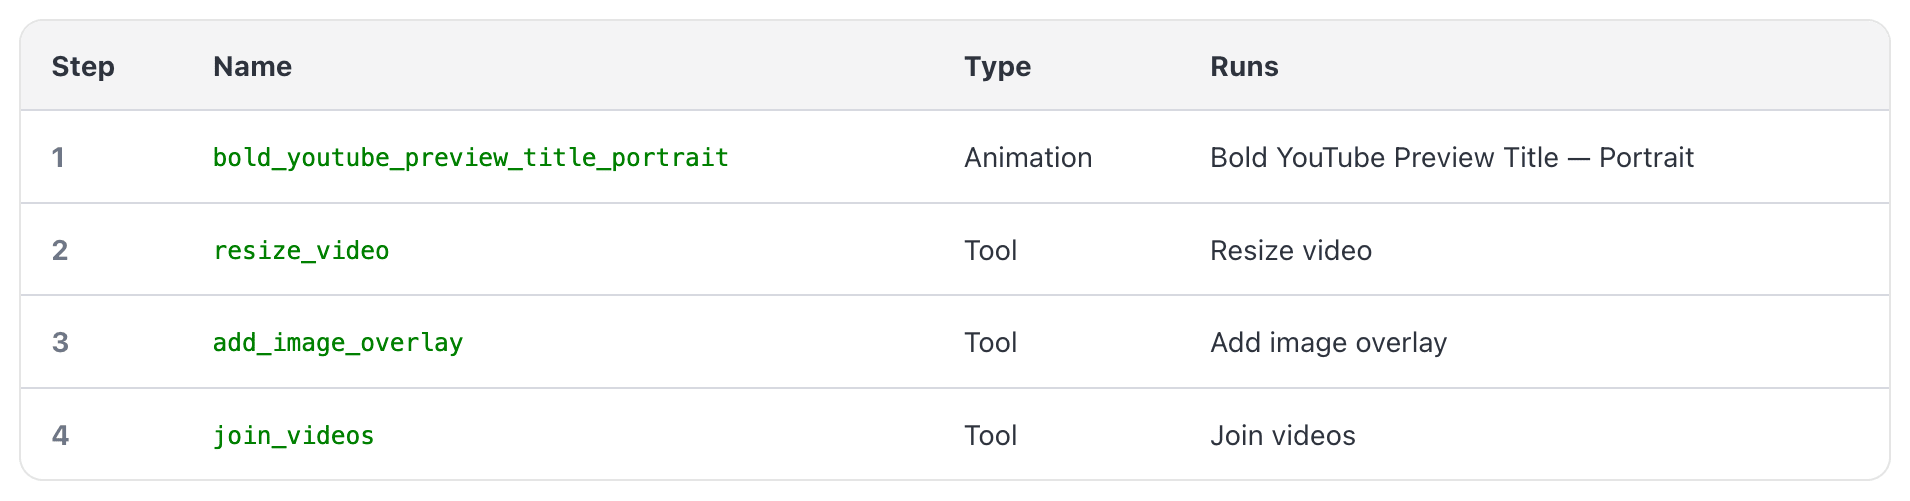
Now, let’s build the actual steps of the process. Start with an Animation action to generate your title segment. Map in your inputs—static info goes directly in the field, and dynamic data comes from the + ref inputs list.
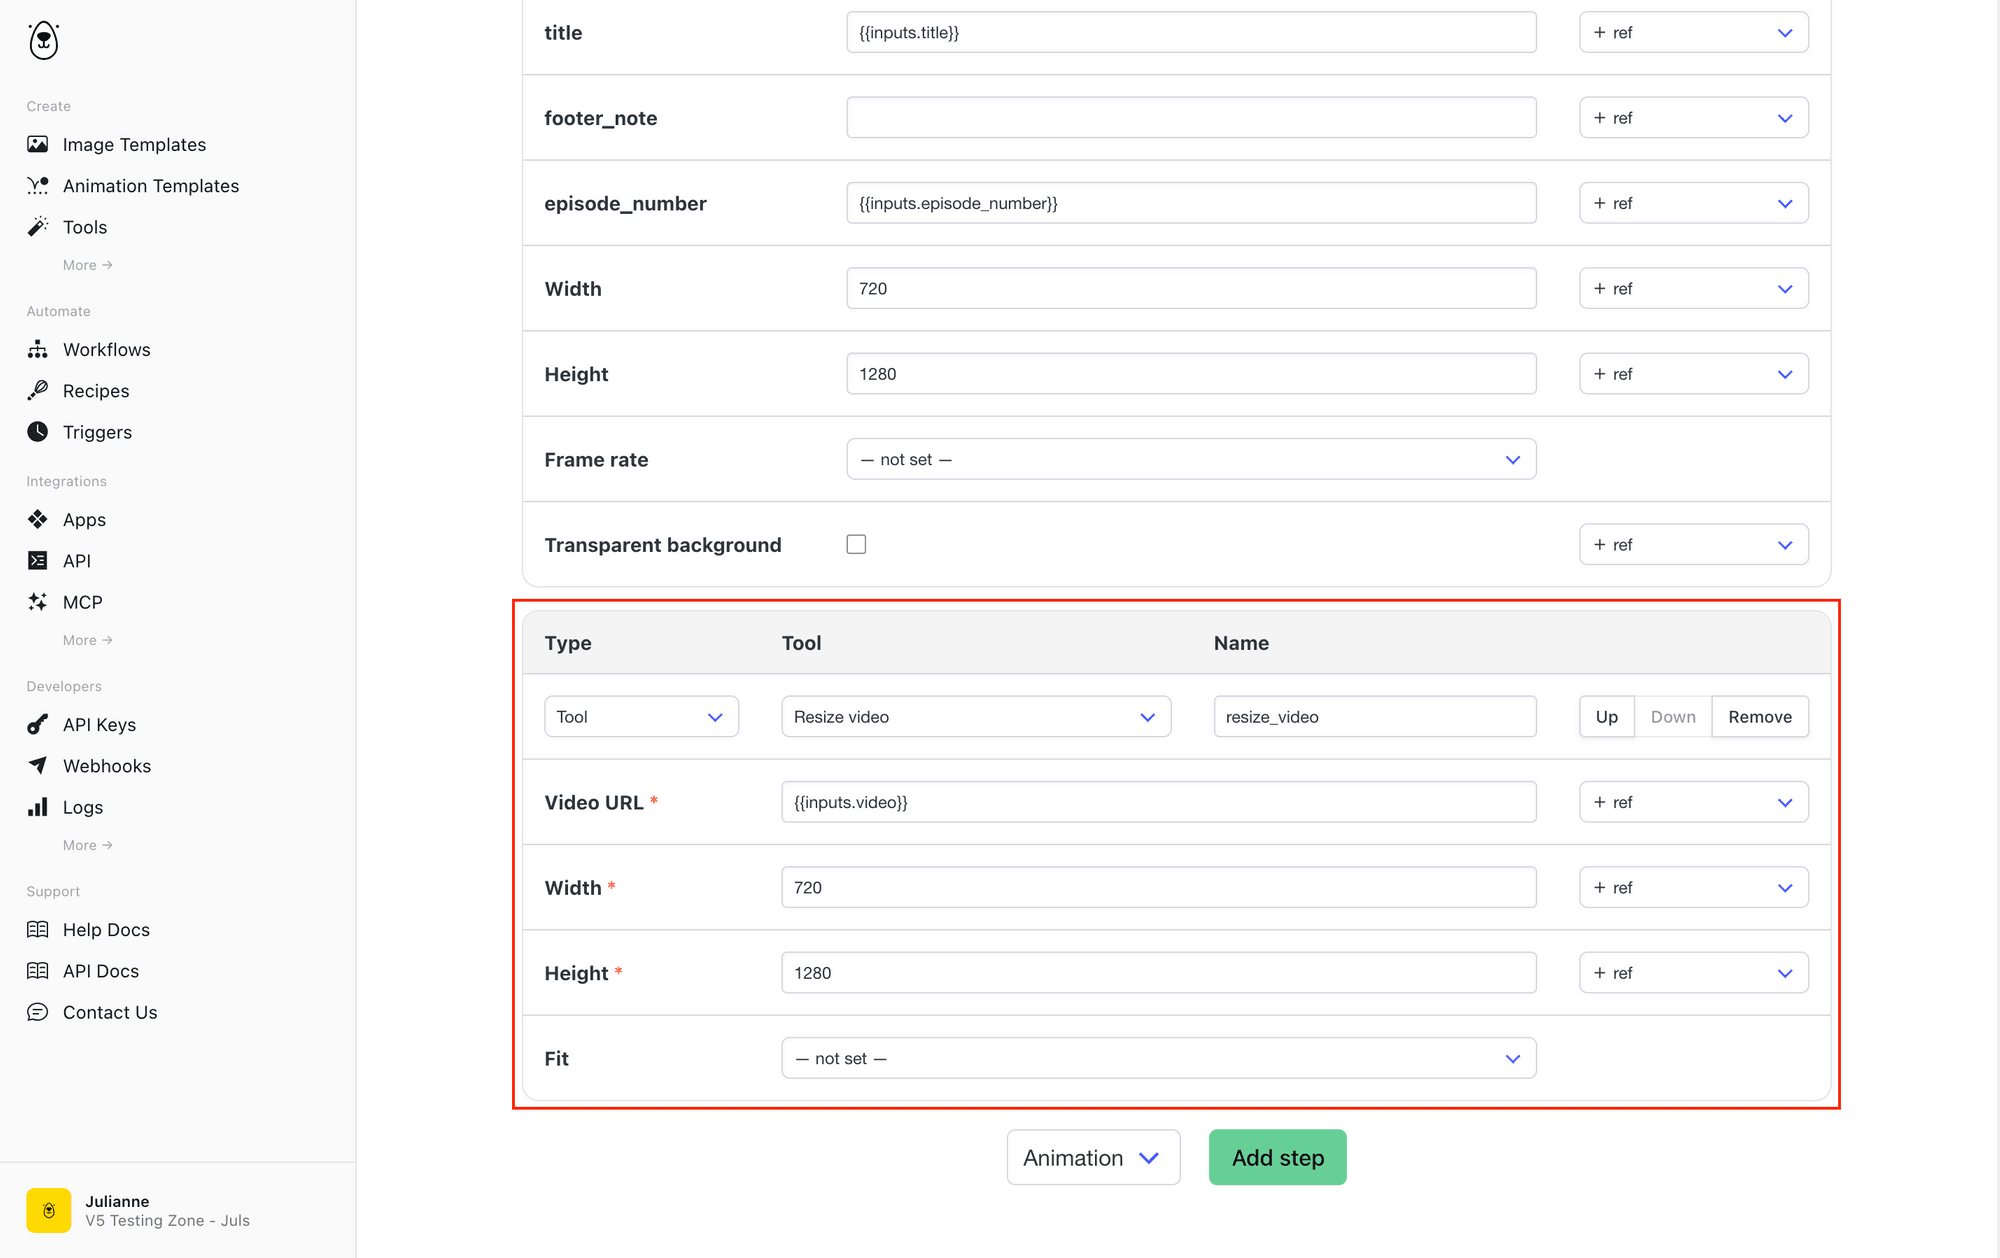
Since the source video has a different aspect ratio, let’s use a Tool step to Resize the media.
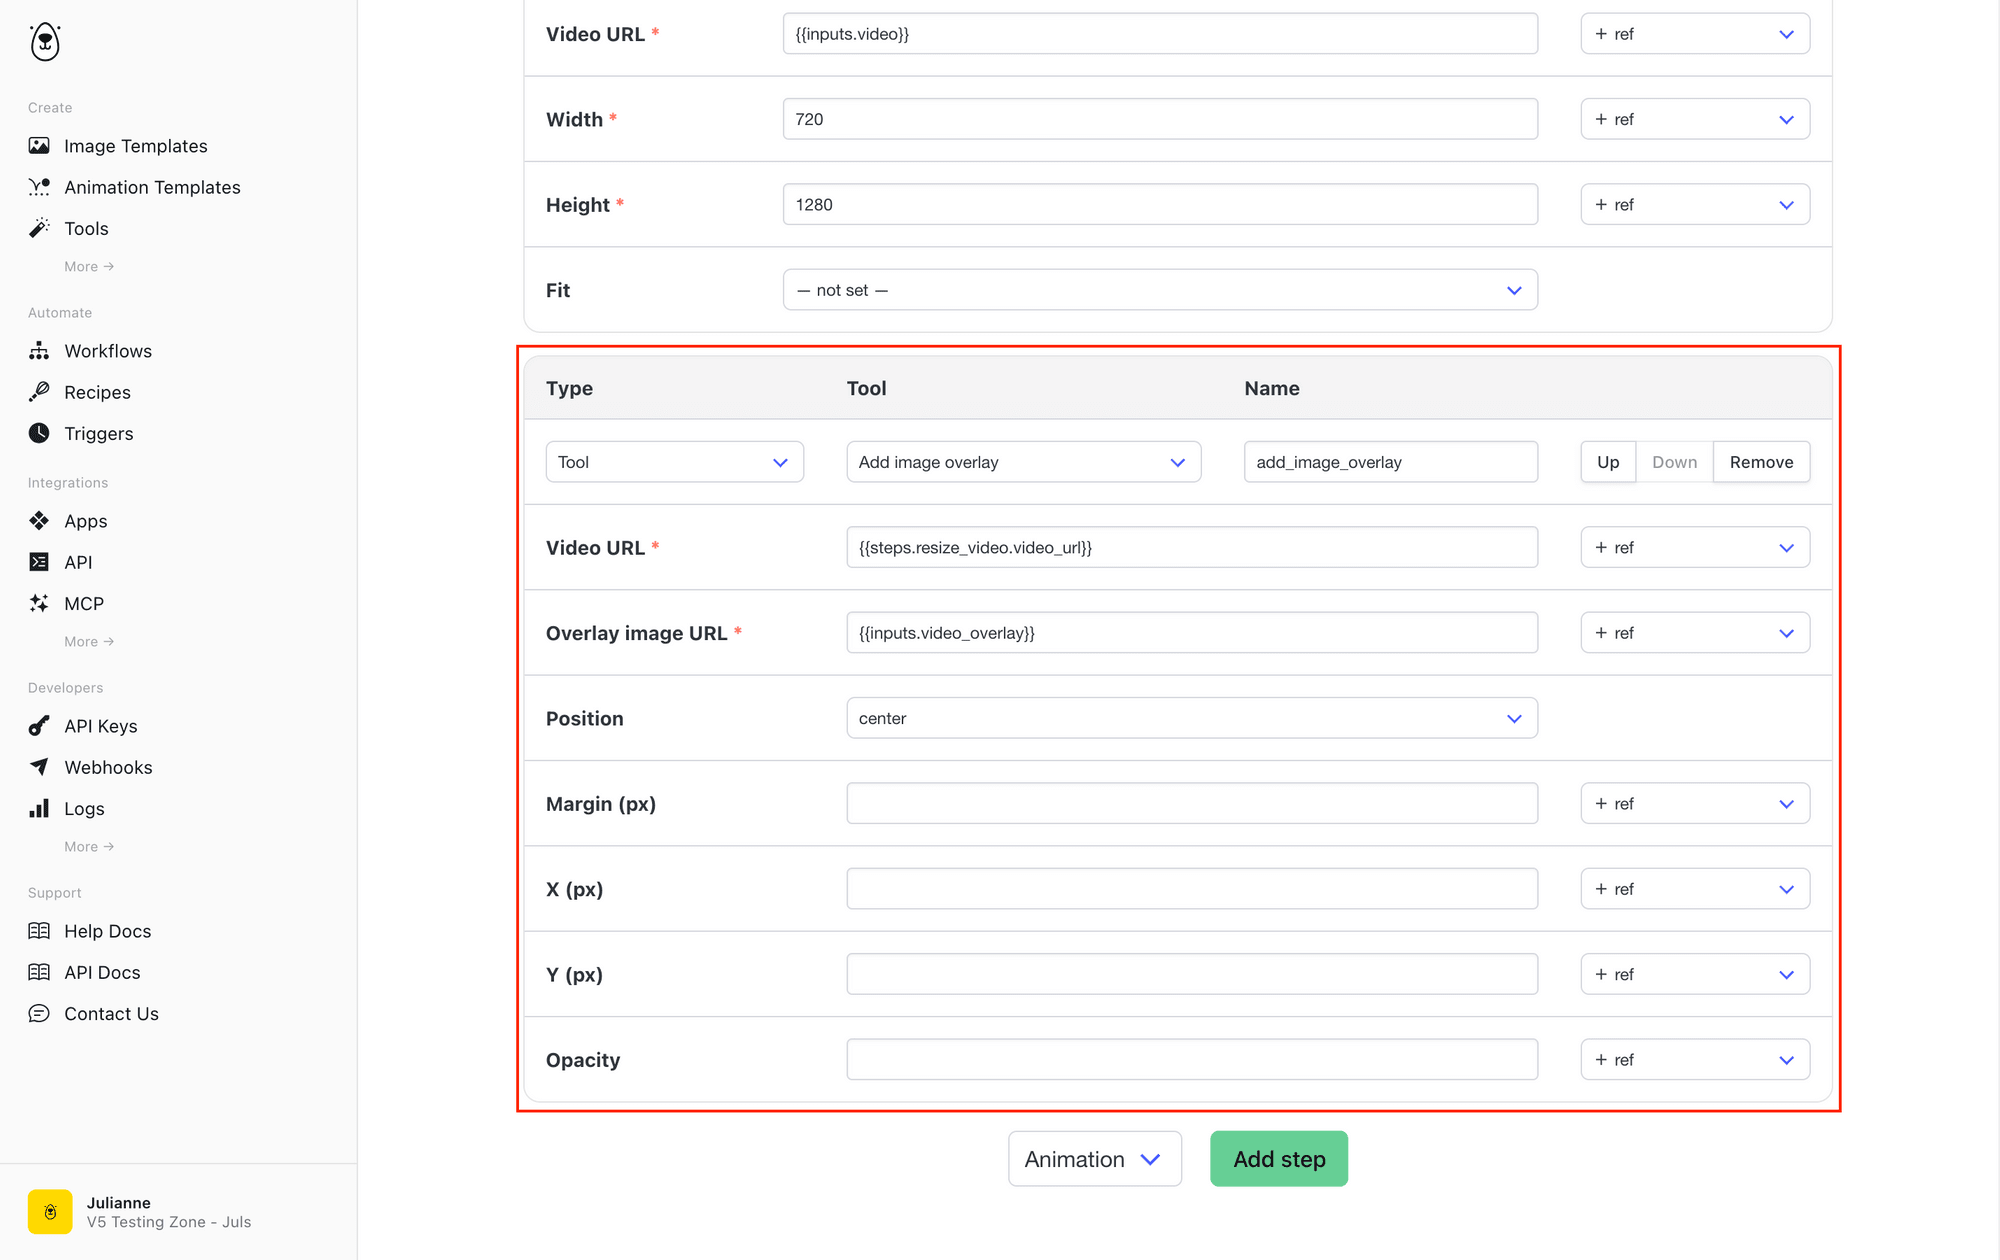
Add another Tool step to Overlay a static image on top for some branded framing.
Finally, join everything together with a Tool step that combines both segments and adds a transition.
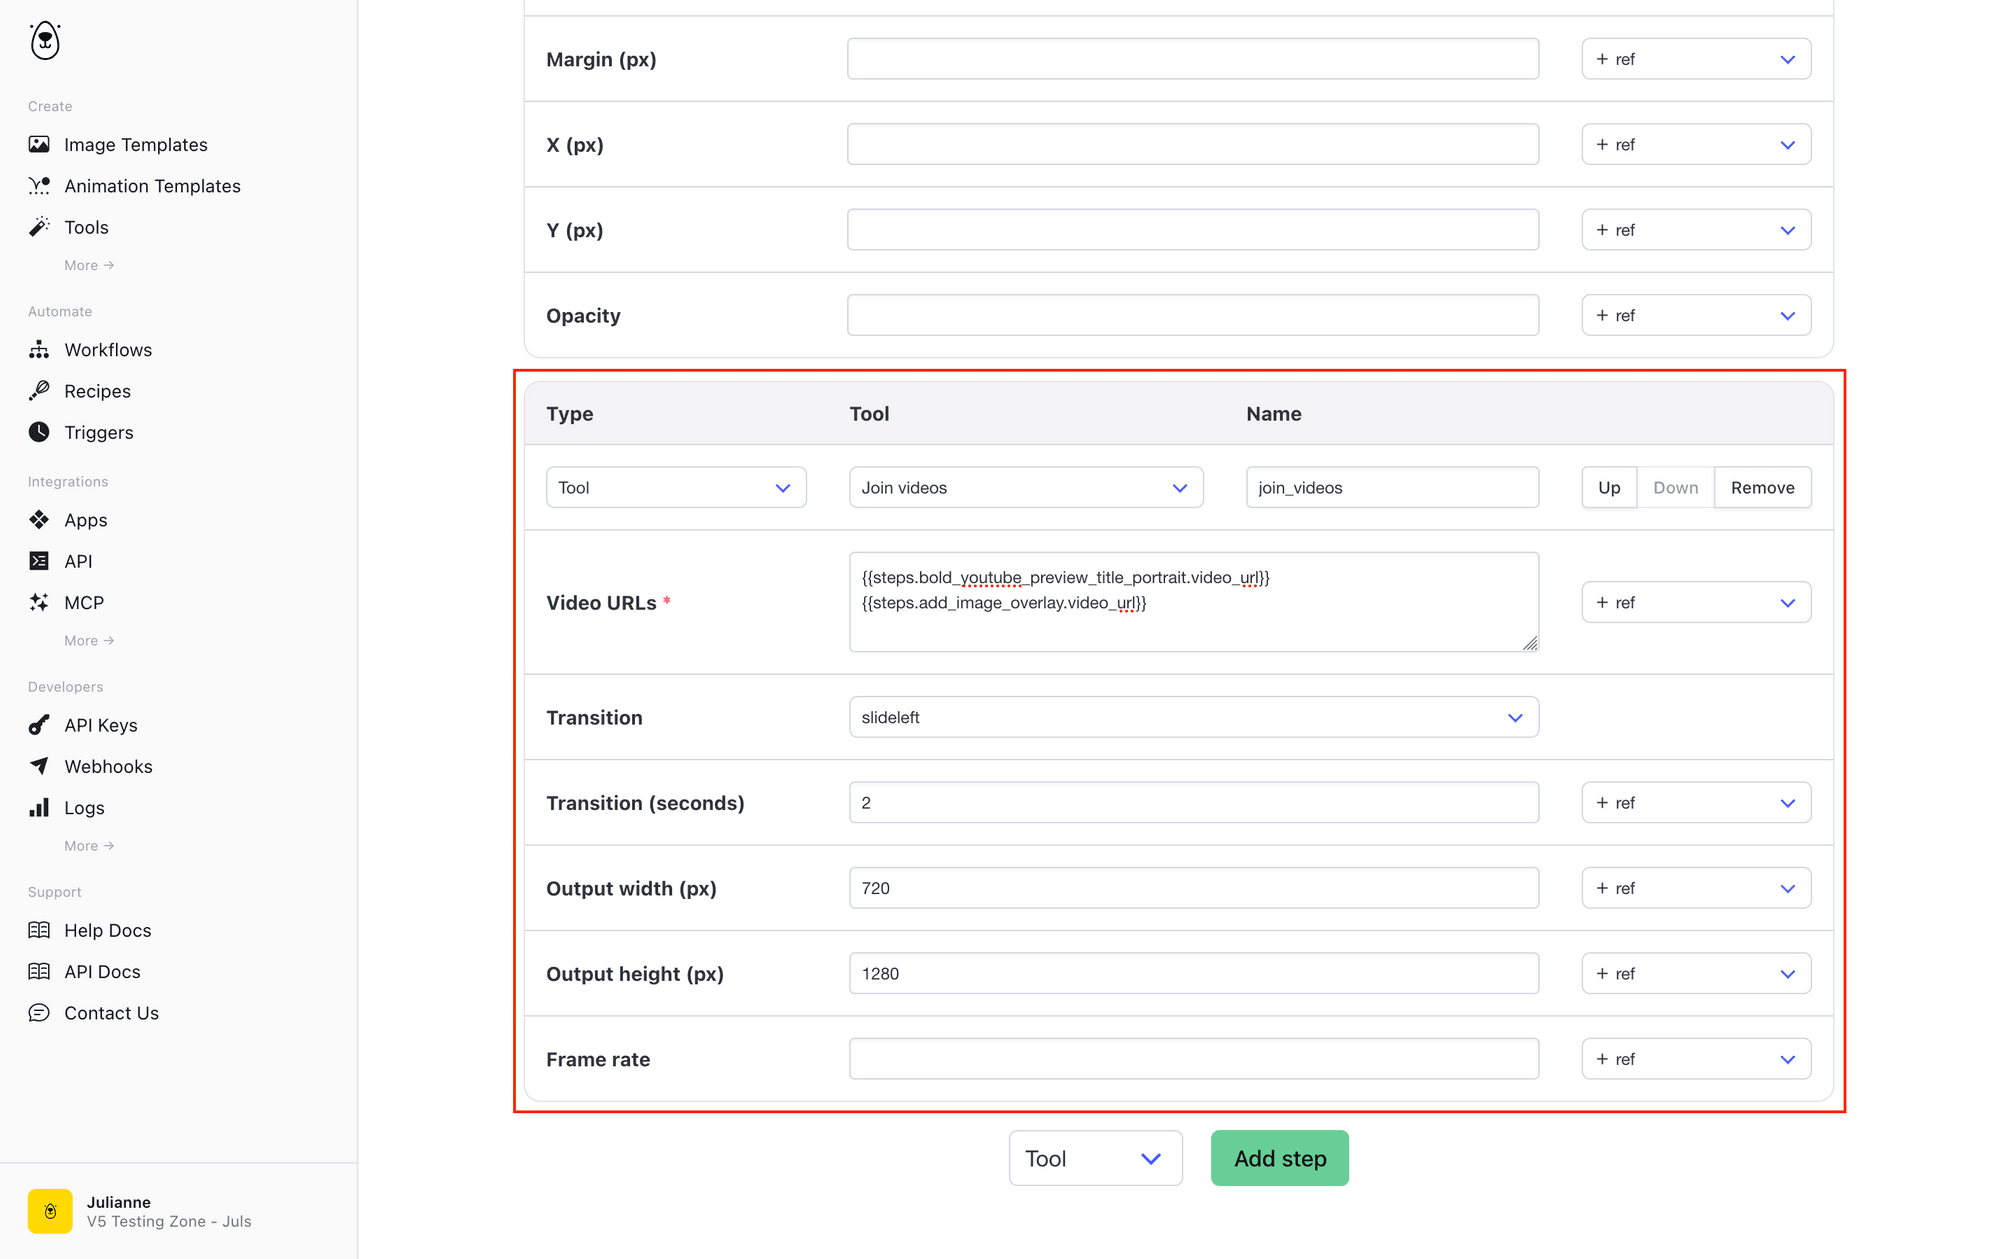
The final Workflow looks something like this:
From here, you can keep building. You can add subtitles, or layer in more segments. Making each template responsive allows you to future-proof by generating at any size. Your automated videos just got a major upgrade—you don’t have to sacrifice style and versatility.
Conclusion
With V5, you’ve got new ways to access Bannerbear features without code. You can still generate via Zapier when you need to connect with other tools. But when you want to iterate fast, AI chat is an option.
Workflows supercharges your image, video, and animation needs by chaining multiple steps into one cohesive process—no tool-switching.
And there’s plenty of other great quality-of-life upgrades to make your Bannerbear experience even better. So start exploring!