
Every new Shopify product creates a need for fresh marketing. Product pages alone aren’t enough—customers need clear, attractive visuals to notice and buy. You could design promotional posts by hand, but it quickly eats hours you could spend managing your shop. That’s why automating them is a smart play: the data is consistent, your templates stay reusable, and everything scales beautifully. With a workflow properly set up, you can turn raw product details into polished images with minimal ongoing effort.
If one or more of the following resonate, automation might be just what you need to transform your e-commerce brand’s approach to new product launches:
- You’re short on time and need faster marketing material turnarounds
- You don’t have a marketing team to create assets manually
- You manage a wide product portfolio that needs promotion
In this guide, we’ll walk through how you can build an automation that pulls product data from Shopify, cleans image backgrounds and other details, and generates a ready-to-post social carousel.
What You Will Create
This nocode setup turns every Shopify product into a ready-to-post social carousel. It’s easy to scale and can be customized for wherever your audience lives. The data is already in Shopify—you don’t have to re-enter anything. Use Bannerbear to house your templates and image formatting tools, and let Zapier trigger Bannerbear whenever a new product is added. The result: polished carousel images generated automatically, with AI background removal keeping products consistent and visually prominent.
Here are the tools we’ll use:
- Bannerbear : To design and render social posts at scale
- Shopify : To manage products and store information
- Zapier : To connect apps and automate image generation
Once the process is set up, the workflow generates a carousel each time you add a product. It’s fast, reusable, and comes with minimal maintenance.

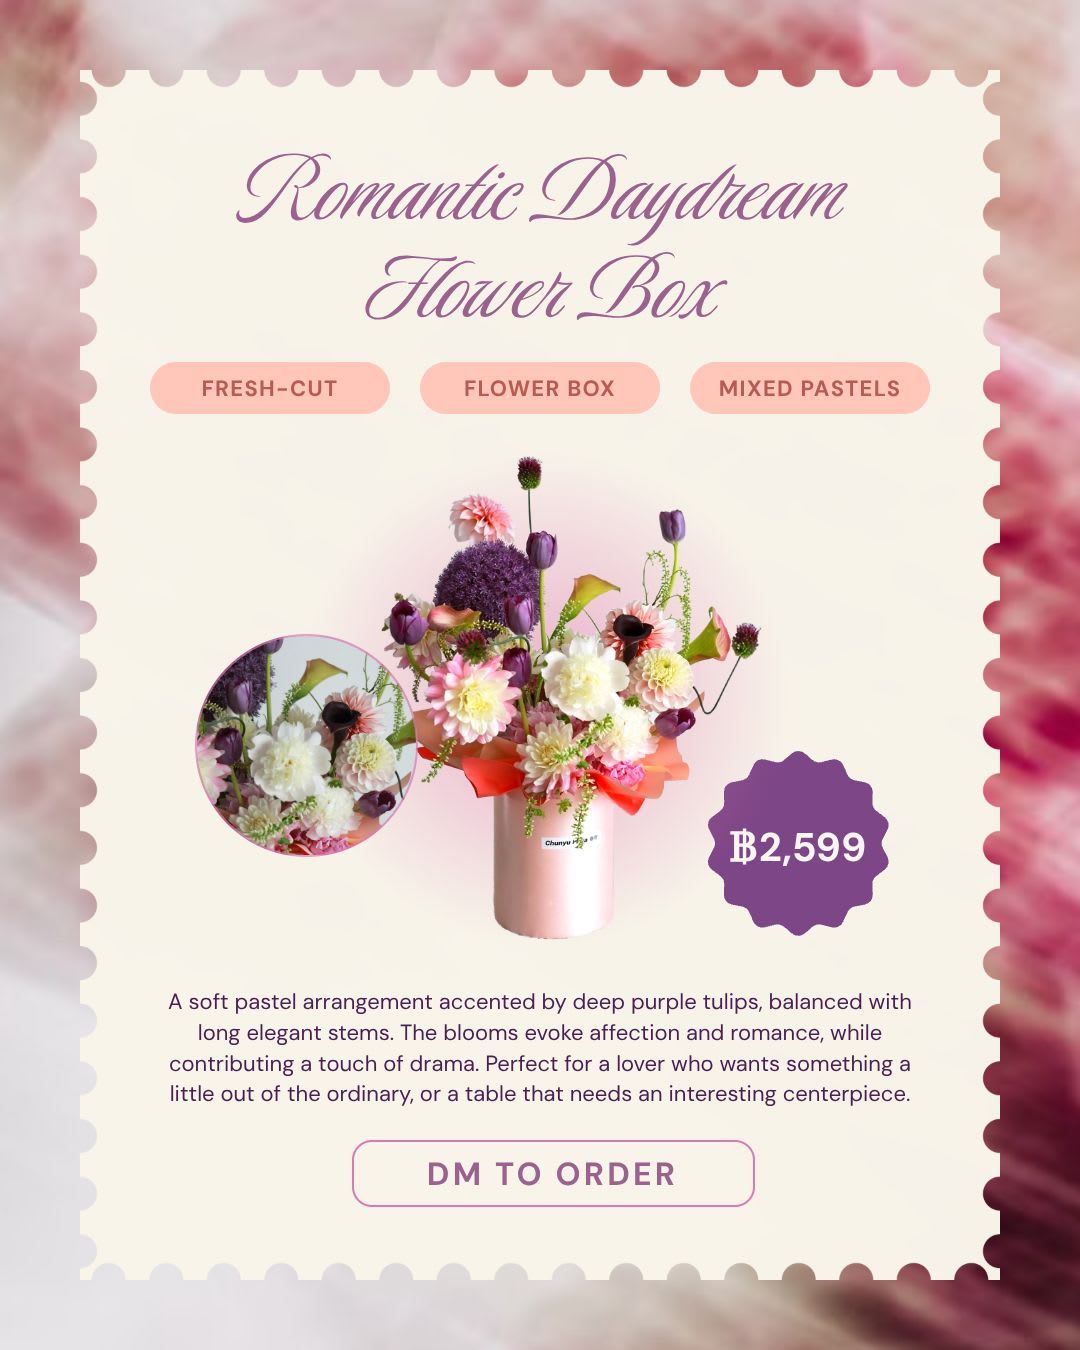
Stock photos with thanks to Andy Lee via Pexels
Let’s set this up.
3-Step Guide to Generating Social Carousels From Shopify
Setting up a process that formats Shopify data and generates an entire carousel of e-commerce marketing images can be set up in an afternoon, and reused infinitely. You can also stack it with other workflows with similar data to build a solid content generation pipeline. Every time you add a new product, you’ve got an entire set of marketing materials, ready to go!
Follow these steps to set it all up:
1 - Design Your Bannerbear Templates
Image templates are the backbone of your design—create them with the final platform and size in mind.
Log into Bannerbear and either start from scratch or pick a base from the template library.
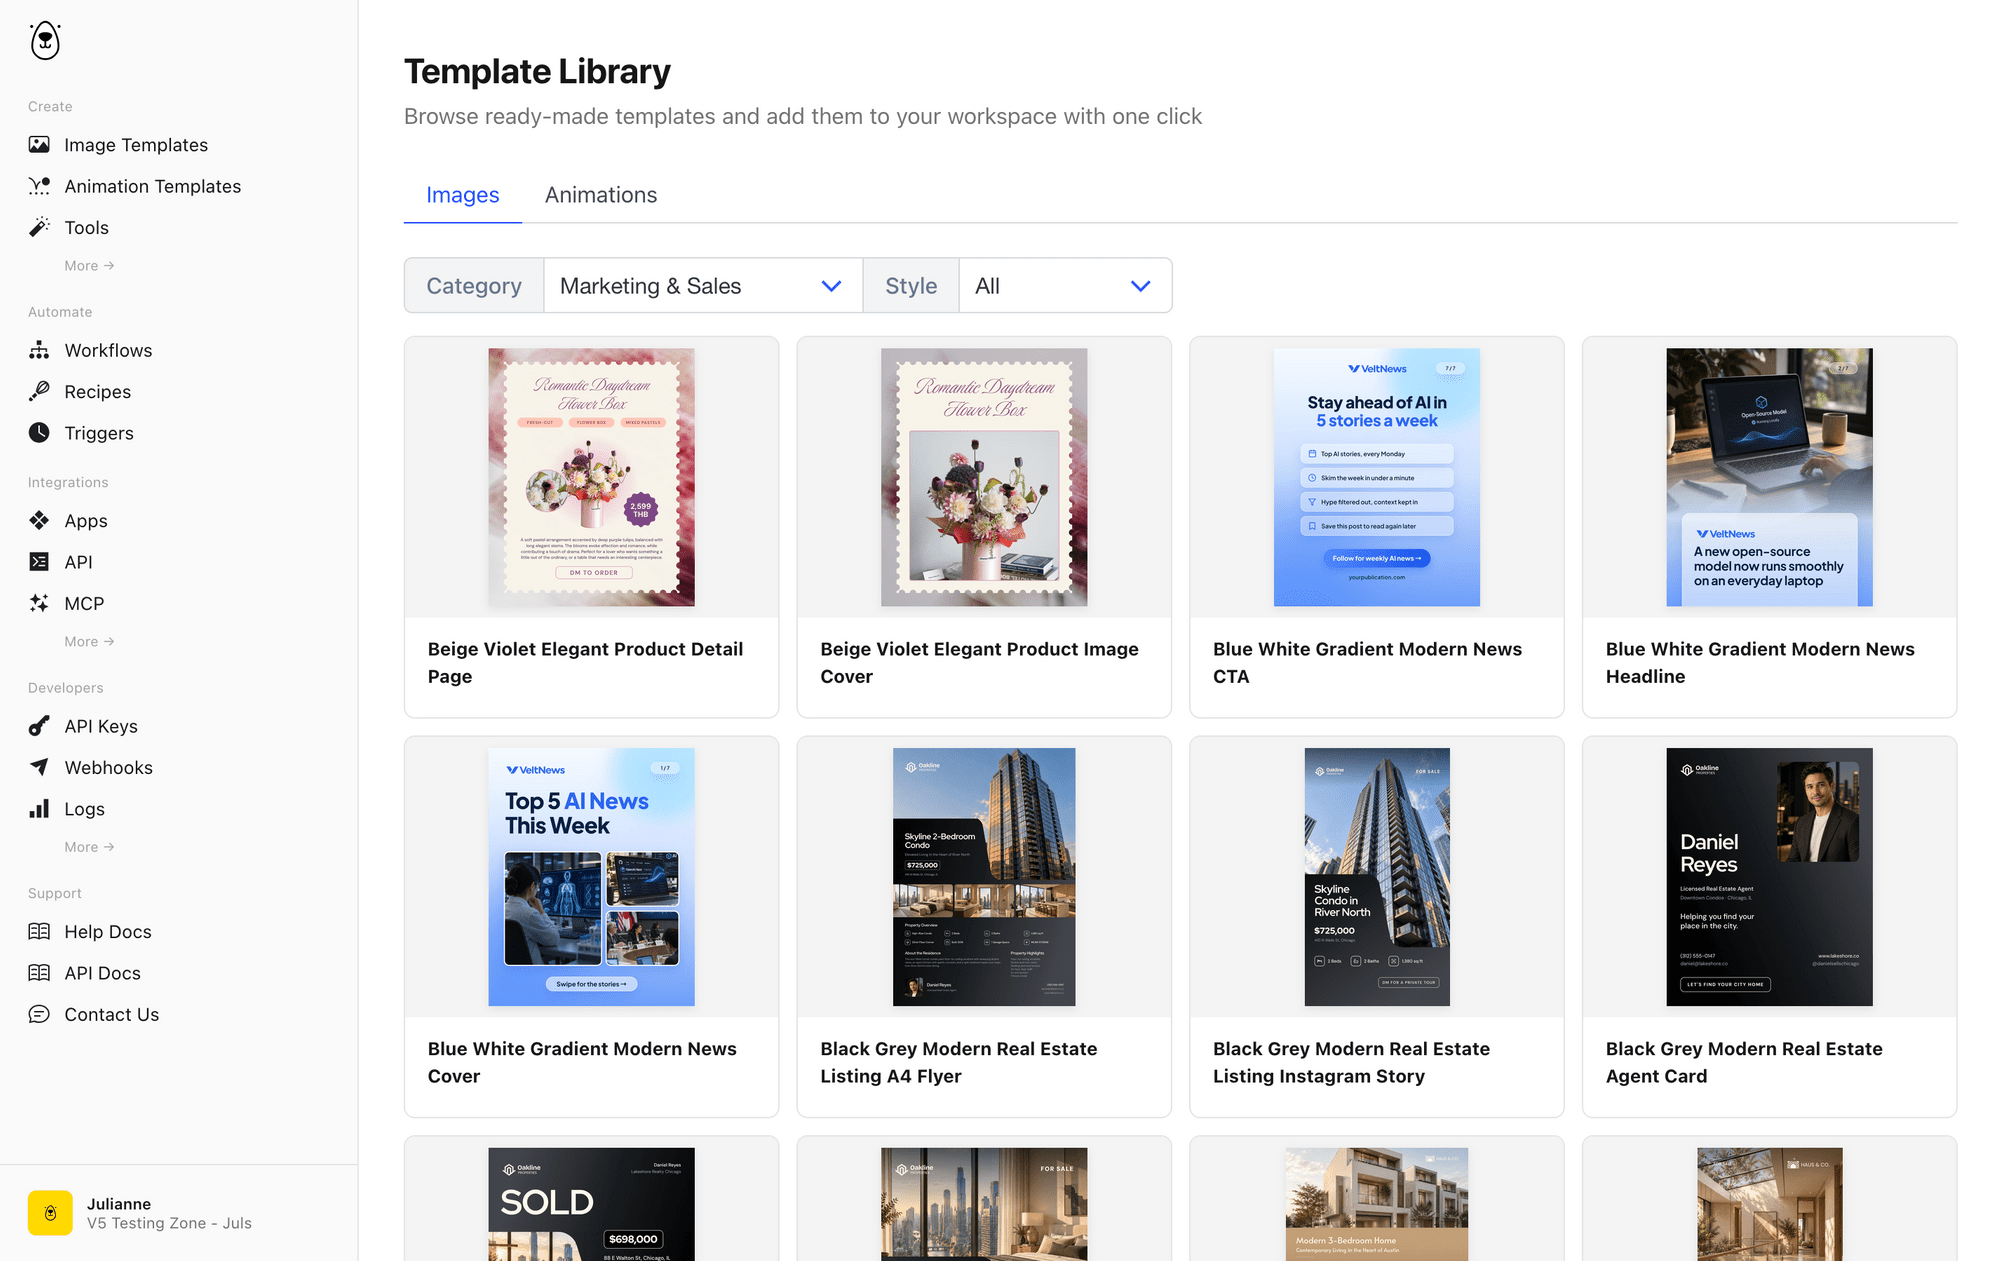
Once you open a template in the editor, add layers for every element you’ll populate automatically: product names, images, descriptions, and more.
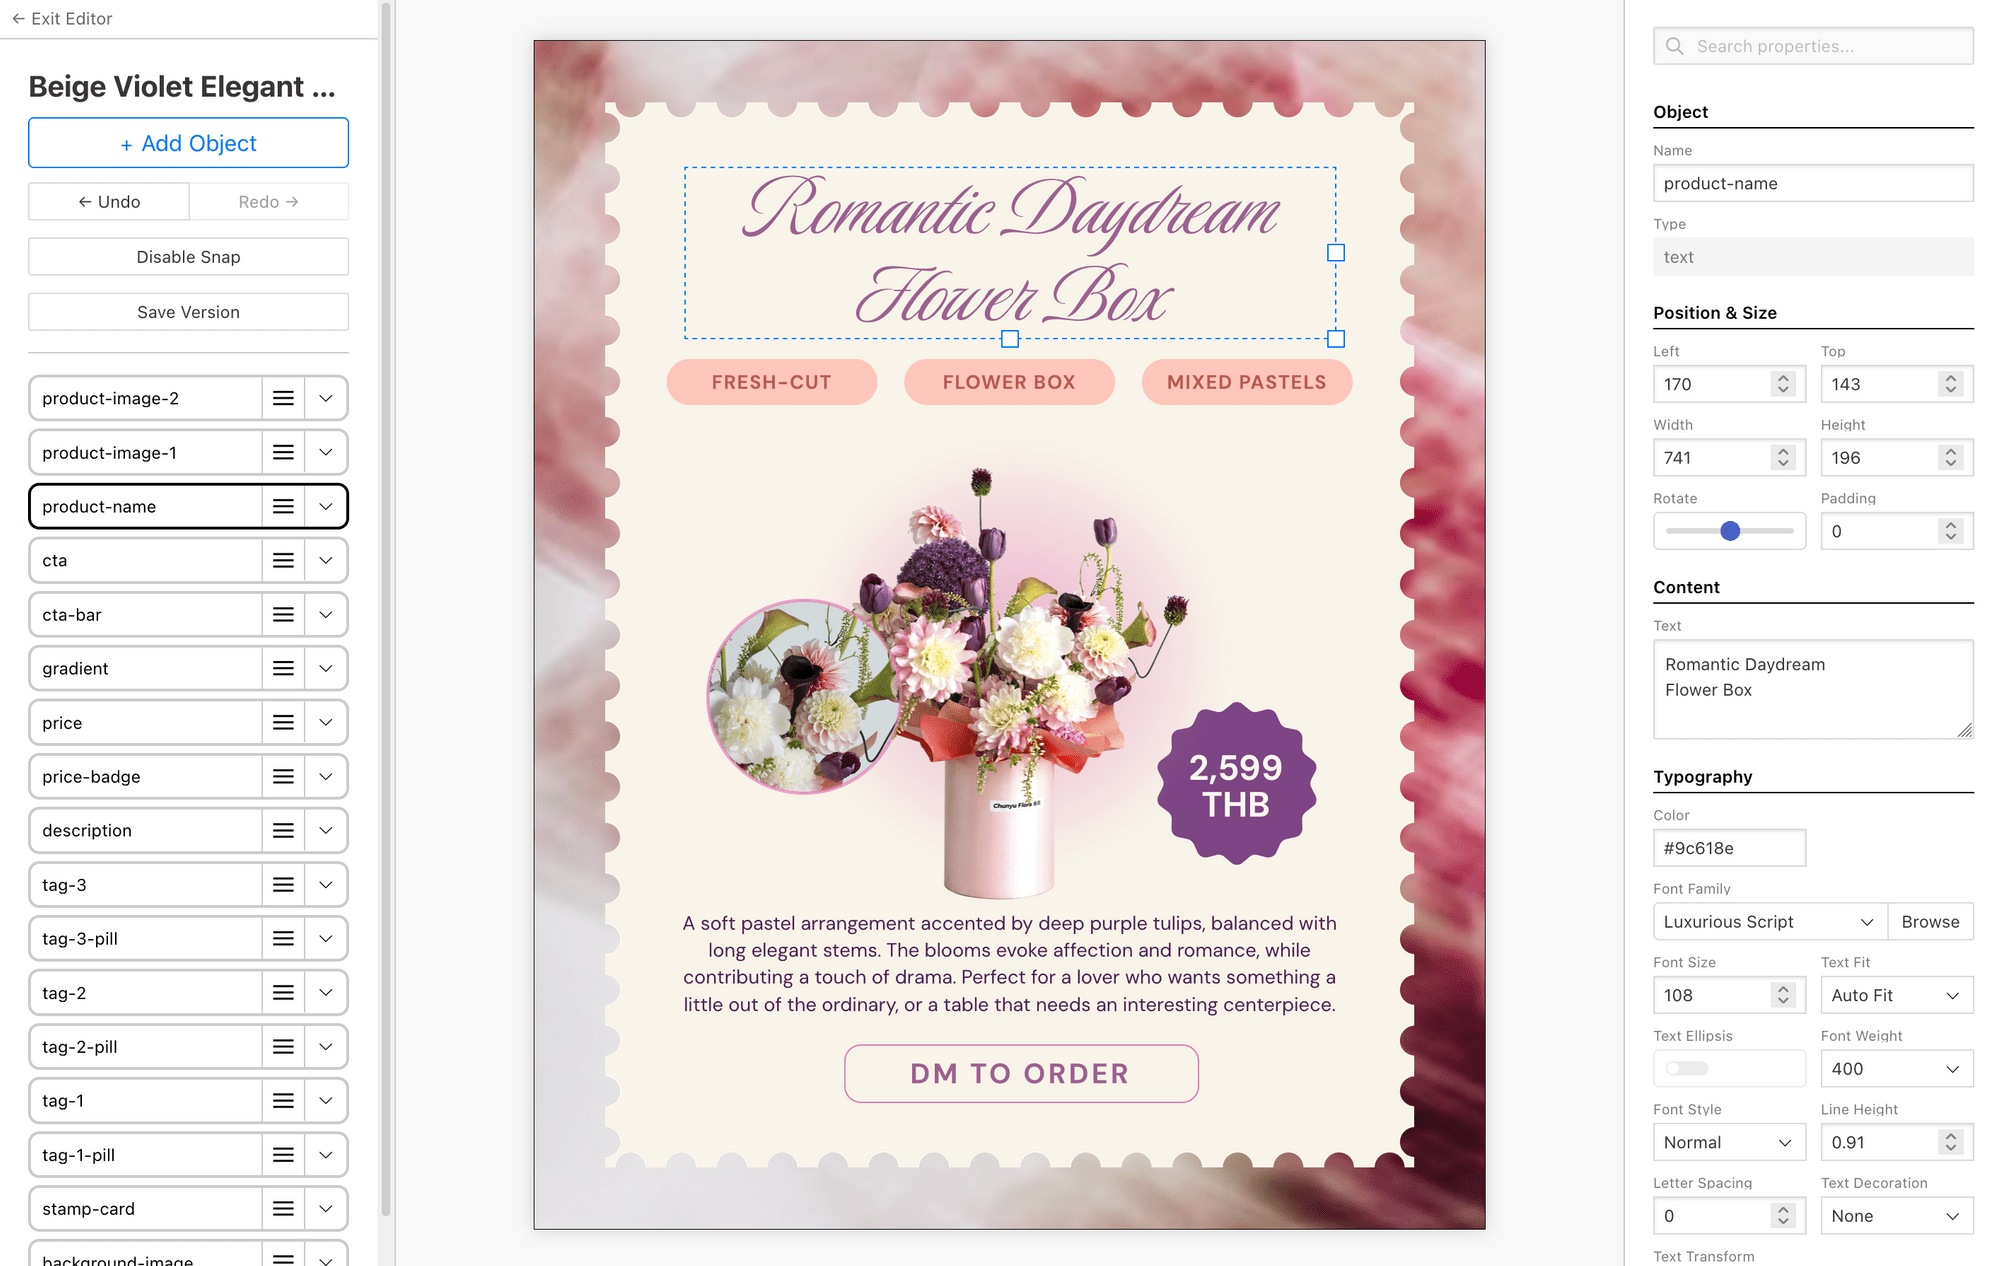
You can add static elements as well—logos, brand taglines, shapes, and more.
Because you’re building a carousel, design one template per slide you want to publish. For the simple setup we’re illustrating in this guide, start with two templates: a product cover image and a product detail slide.

Label each template field clearly (for example: product_name, product_image_1, price) so they’re easy to map later in your workflow.
2 - Create a Bannerbear Workflow
Bannerbear Workflow chains image, video, and animation actions into one single pipeline. We’ll use one to remove product photo backgrounds, then generate the carousel slides designed in the previous step.
Start by creating and naming a new Workflow. Define the inputs that your generated images will need. We’ll use:
product_name(text)product_image_1(url)product_image_2(url)description(text)tag_1,tag_2,tag_3(text)price(text)cta(text)
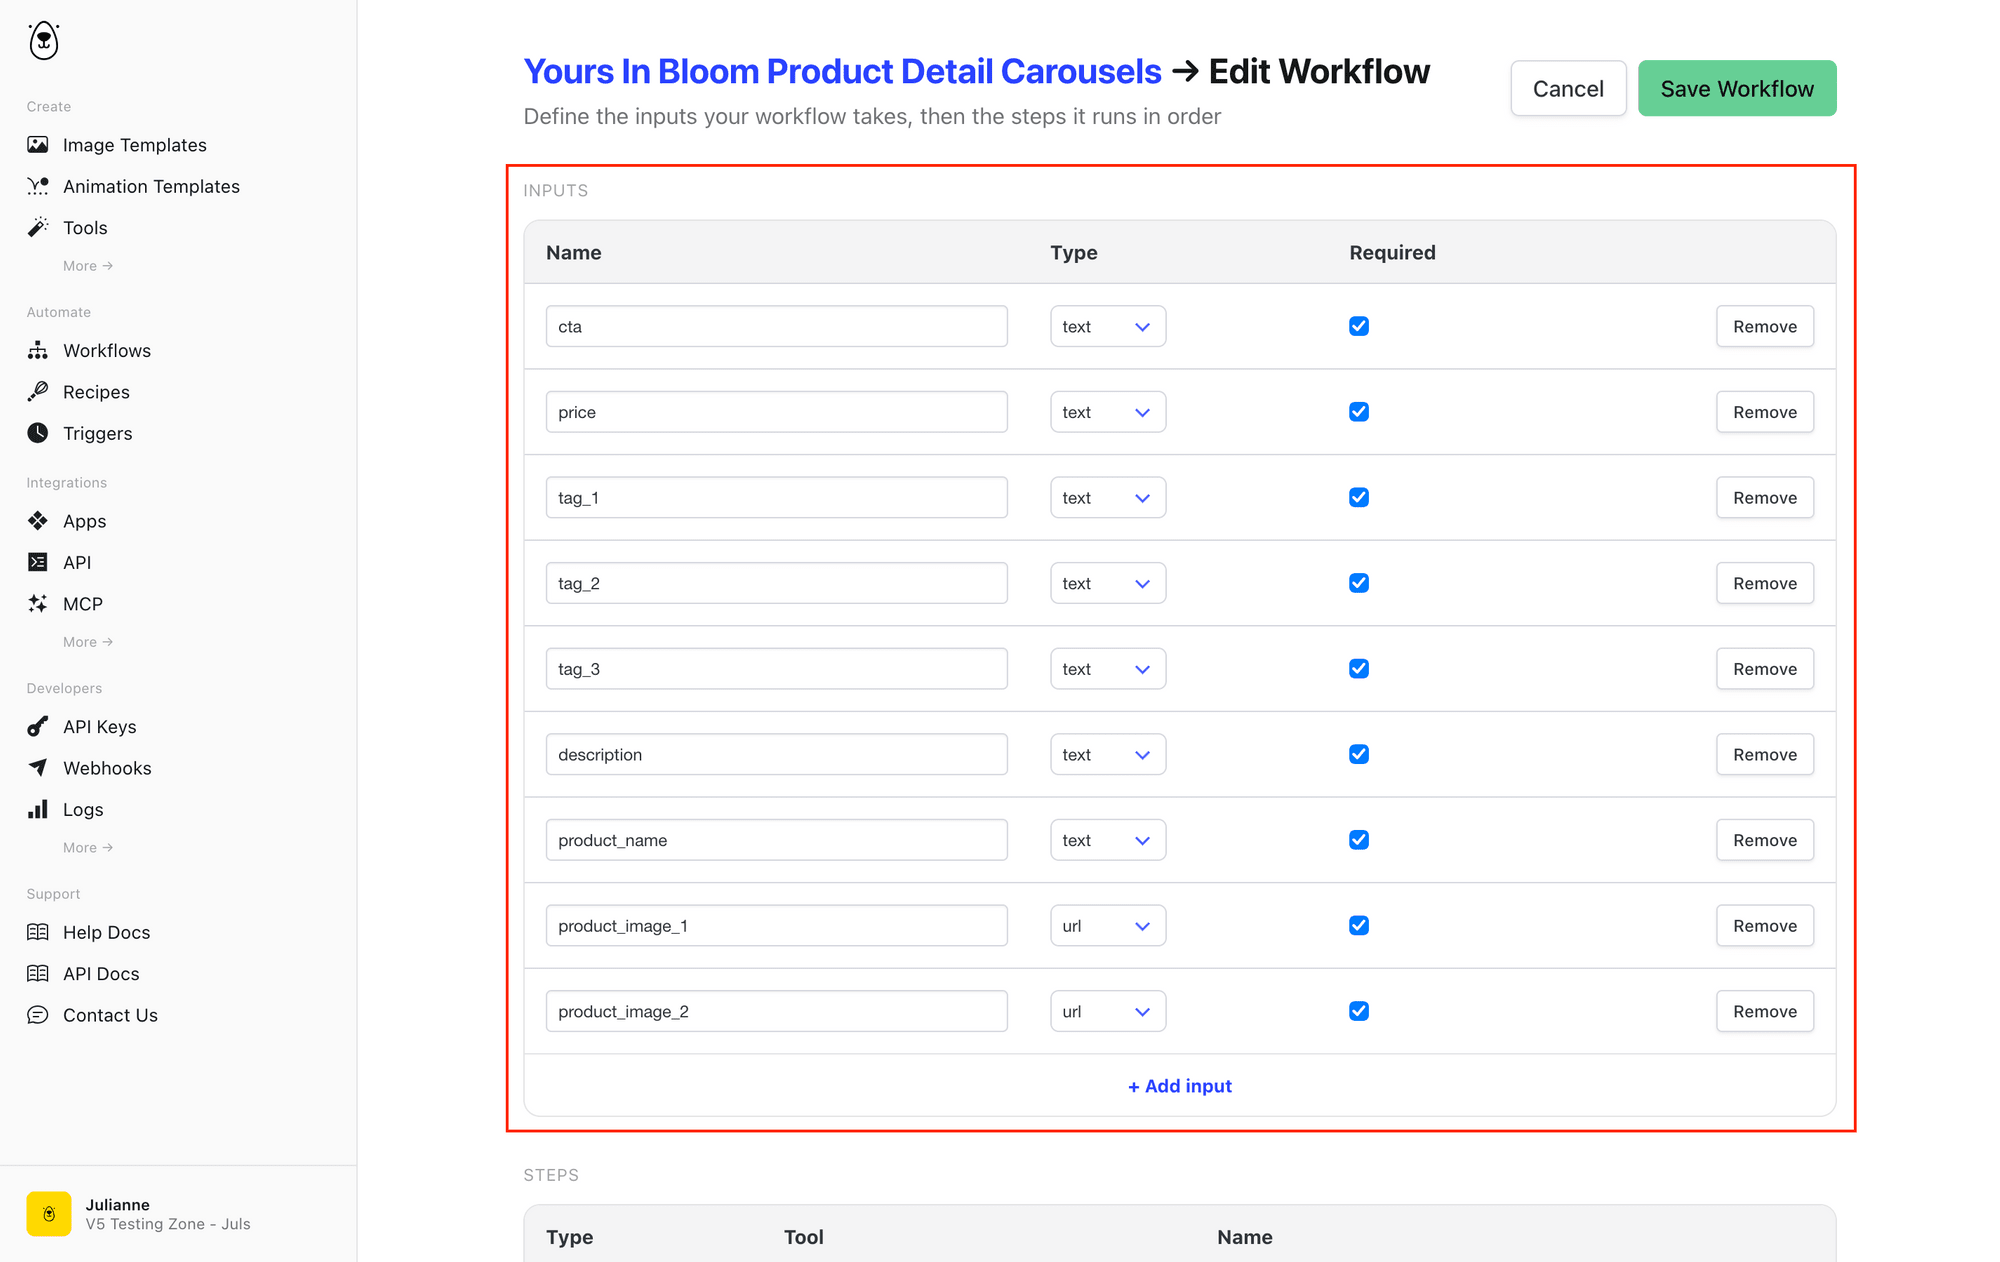
With those inputs in place, add the steps that will process the data and render your images.
Step 1 - Remove Background From Product Photo
Add a Remove background tool step to your workflow. Reference the product image you want to highlight.
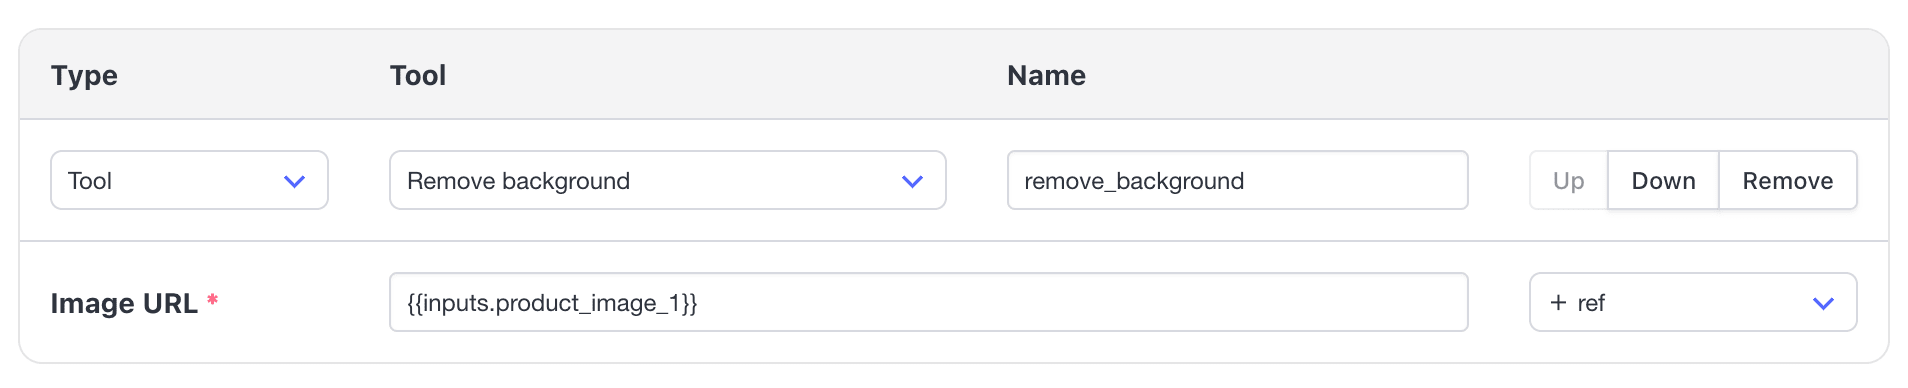
This ensures the product sits cleanly on whatever composition you design for the slide.
Step 2 - Generate Product Cover Image
Add an Image generation step to your workflow, and select the template you built for the carousel cover. Rename the step so it’s easy to identify later.
Reference the data points included in this template—the product name and image. Choose an output format.
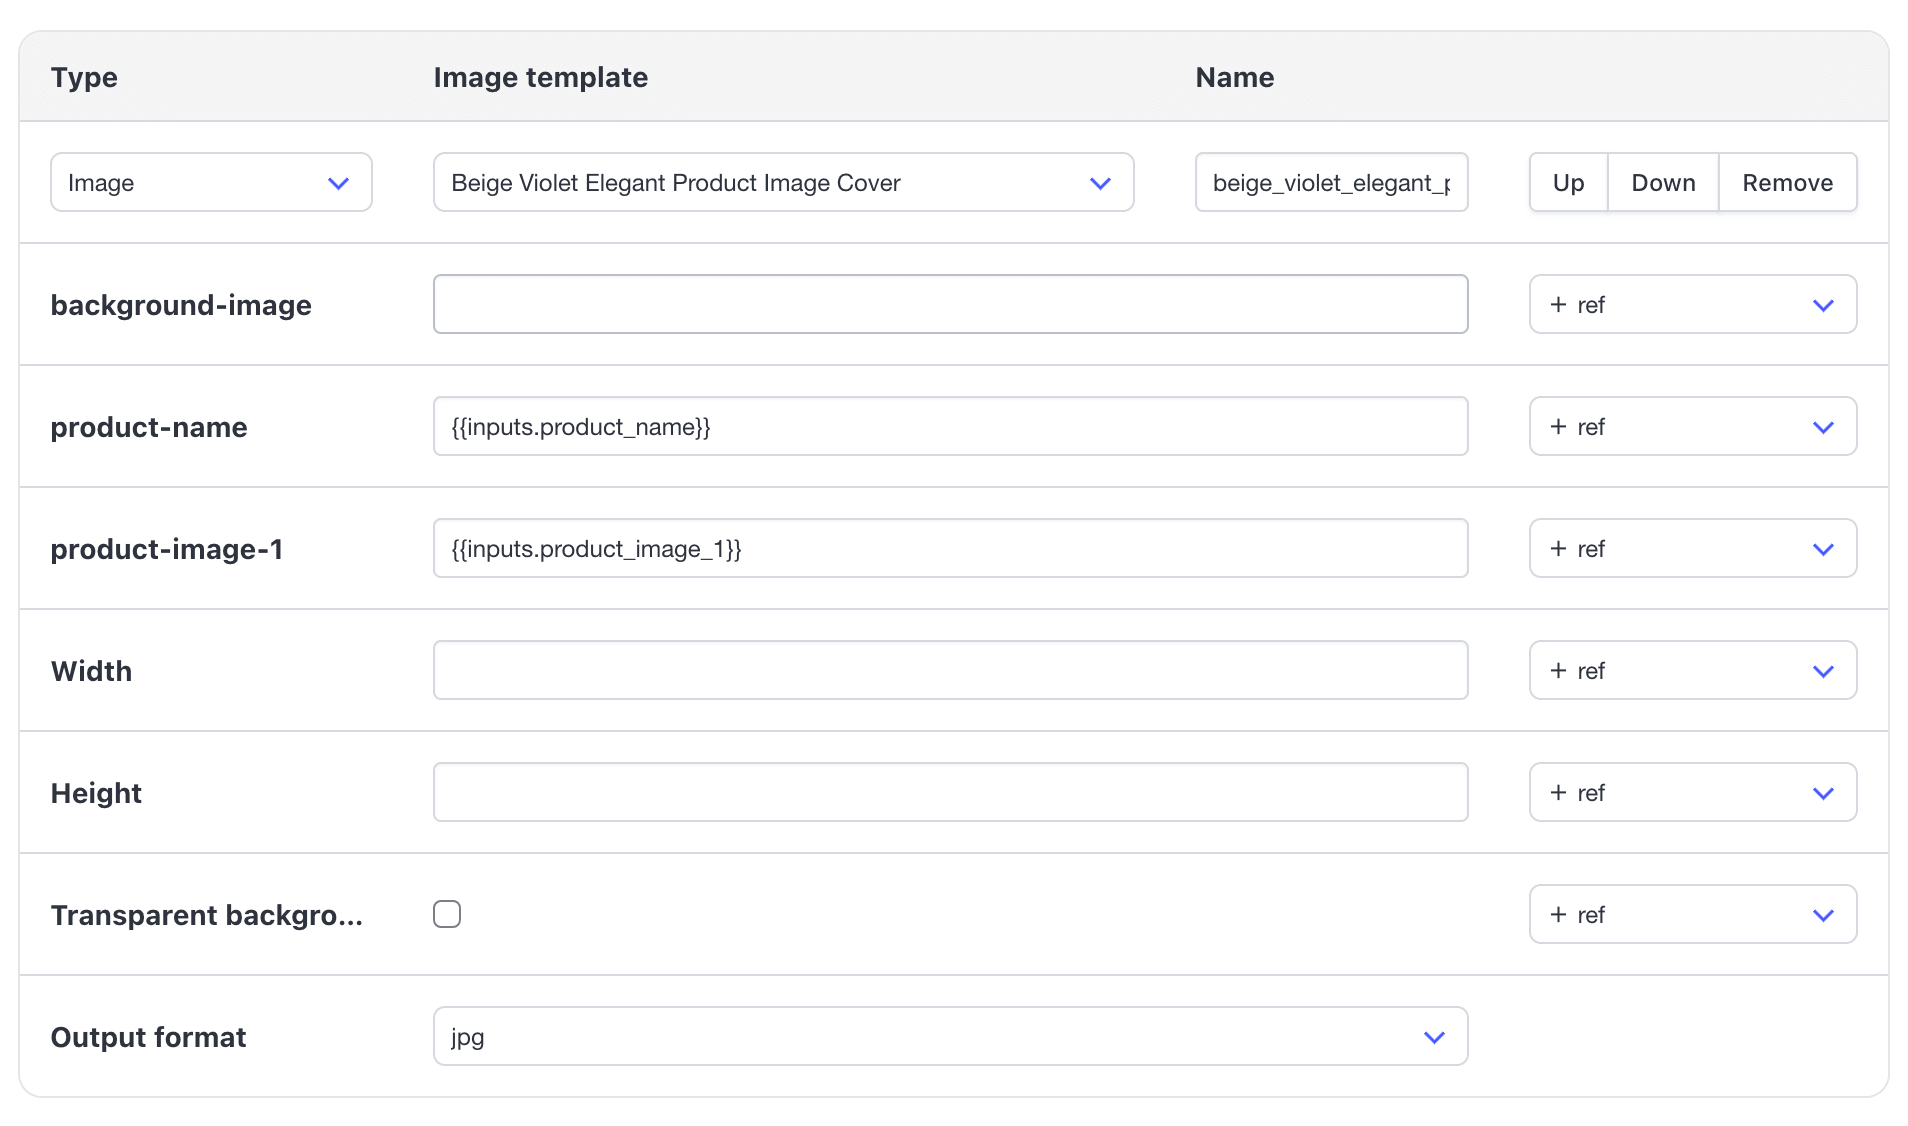
Step 3 - Generate Product Detail Image
Add another Image generation step to your workflow to render the product detail page. Rename it if needed.
Map all necessary inputs—product name, images, tags, descriptions, etc.—to their matching fields. If you have any input data that will remain the same, insert it directly into the field. Choose an output format.
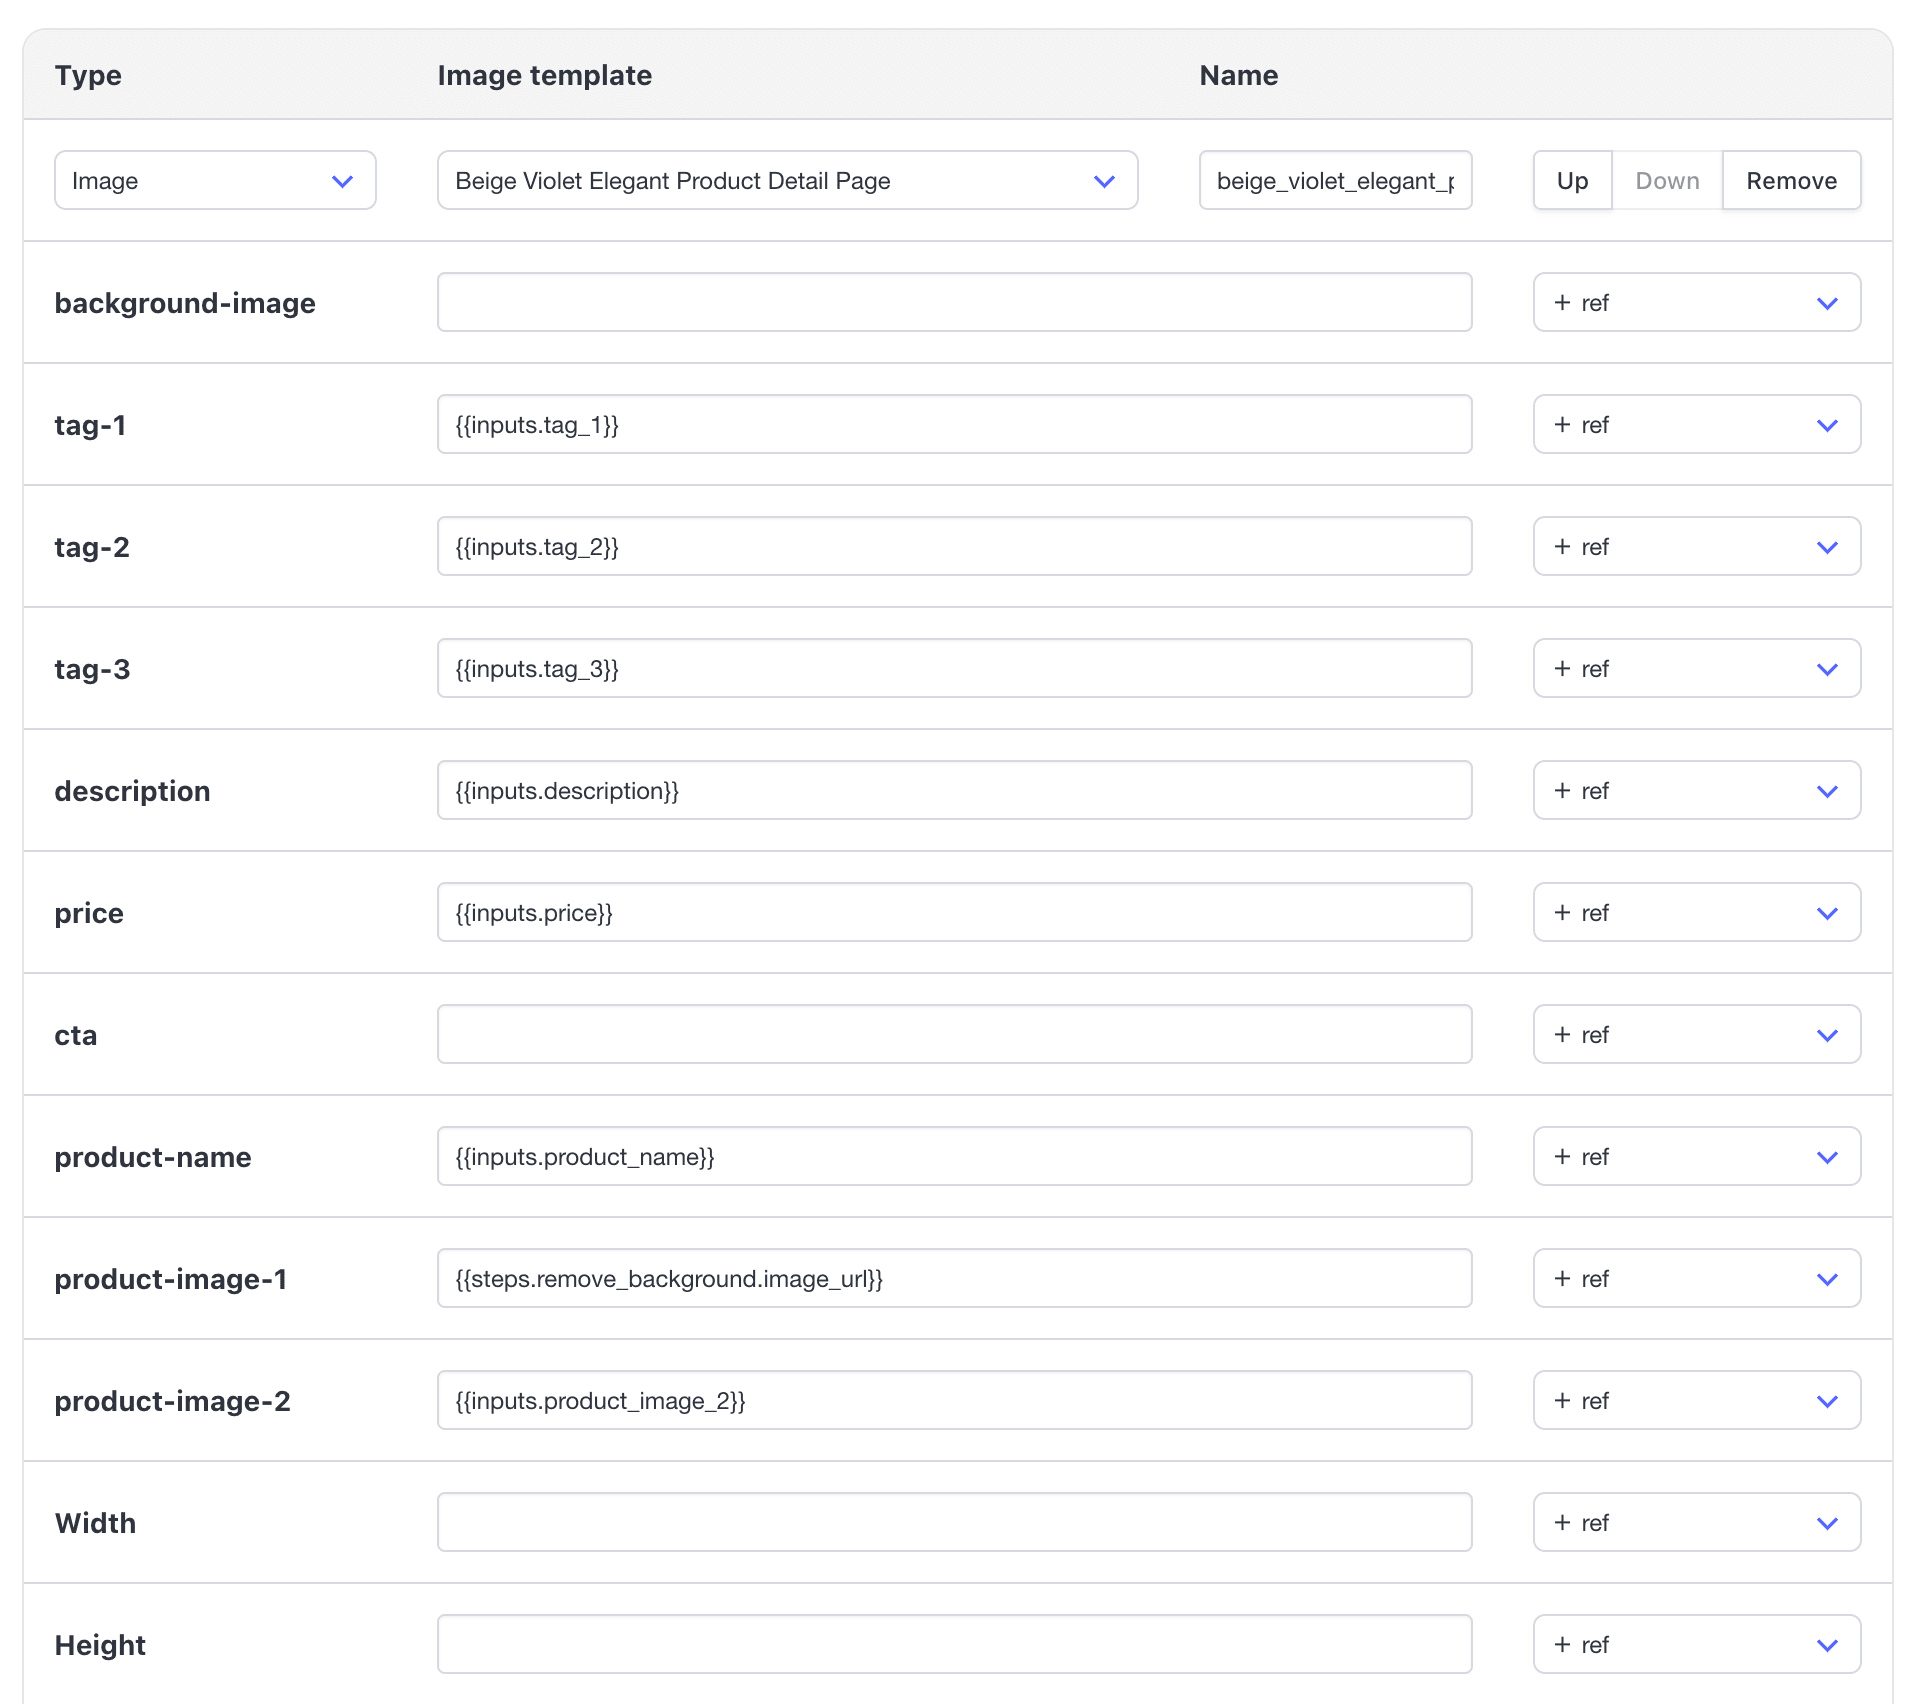
Bear Tip 🐻: Posting on LinkedIn? Add a step to create a multi-page PDF so your images stay in carousel form.
Repeat the image step process for as many slides as you need in the carousel. You can showcase your product in other interesting ways, such as lifestyle shots, feature callouts, size charts, and so on.
3 - Set Up a Zap to Connect Shopify to Bannerbear
With your Bannerbear workflow ready and Shopify holding the product data, Zapier will be the glue that brings everything together.
Create a new Zap and set up the following steps:
Trigger: New Product in Shopify
Add a Shopify trigger with a New Product event. Connect your account if needed.
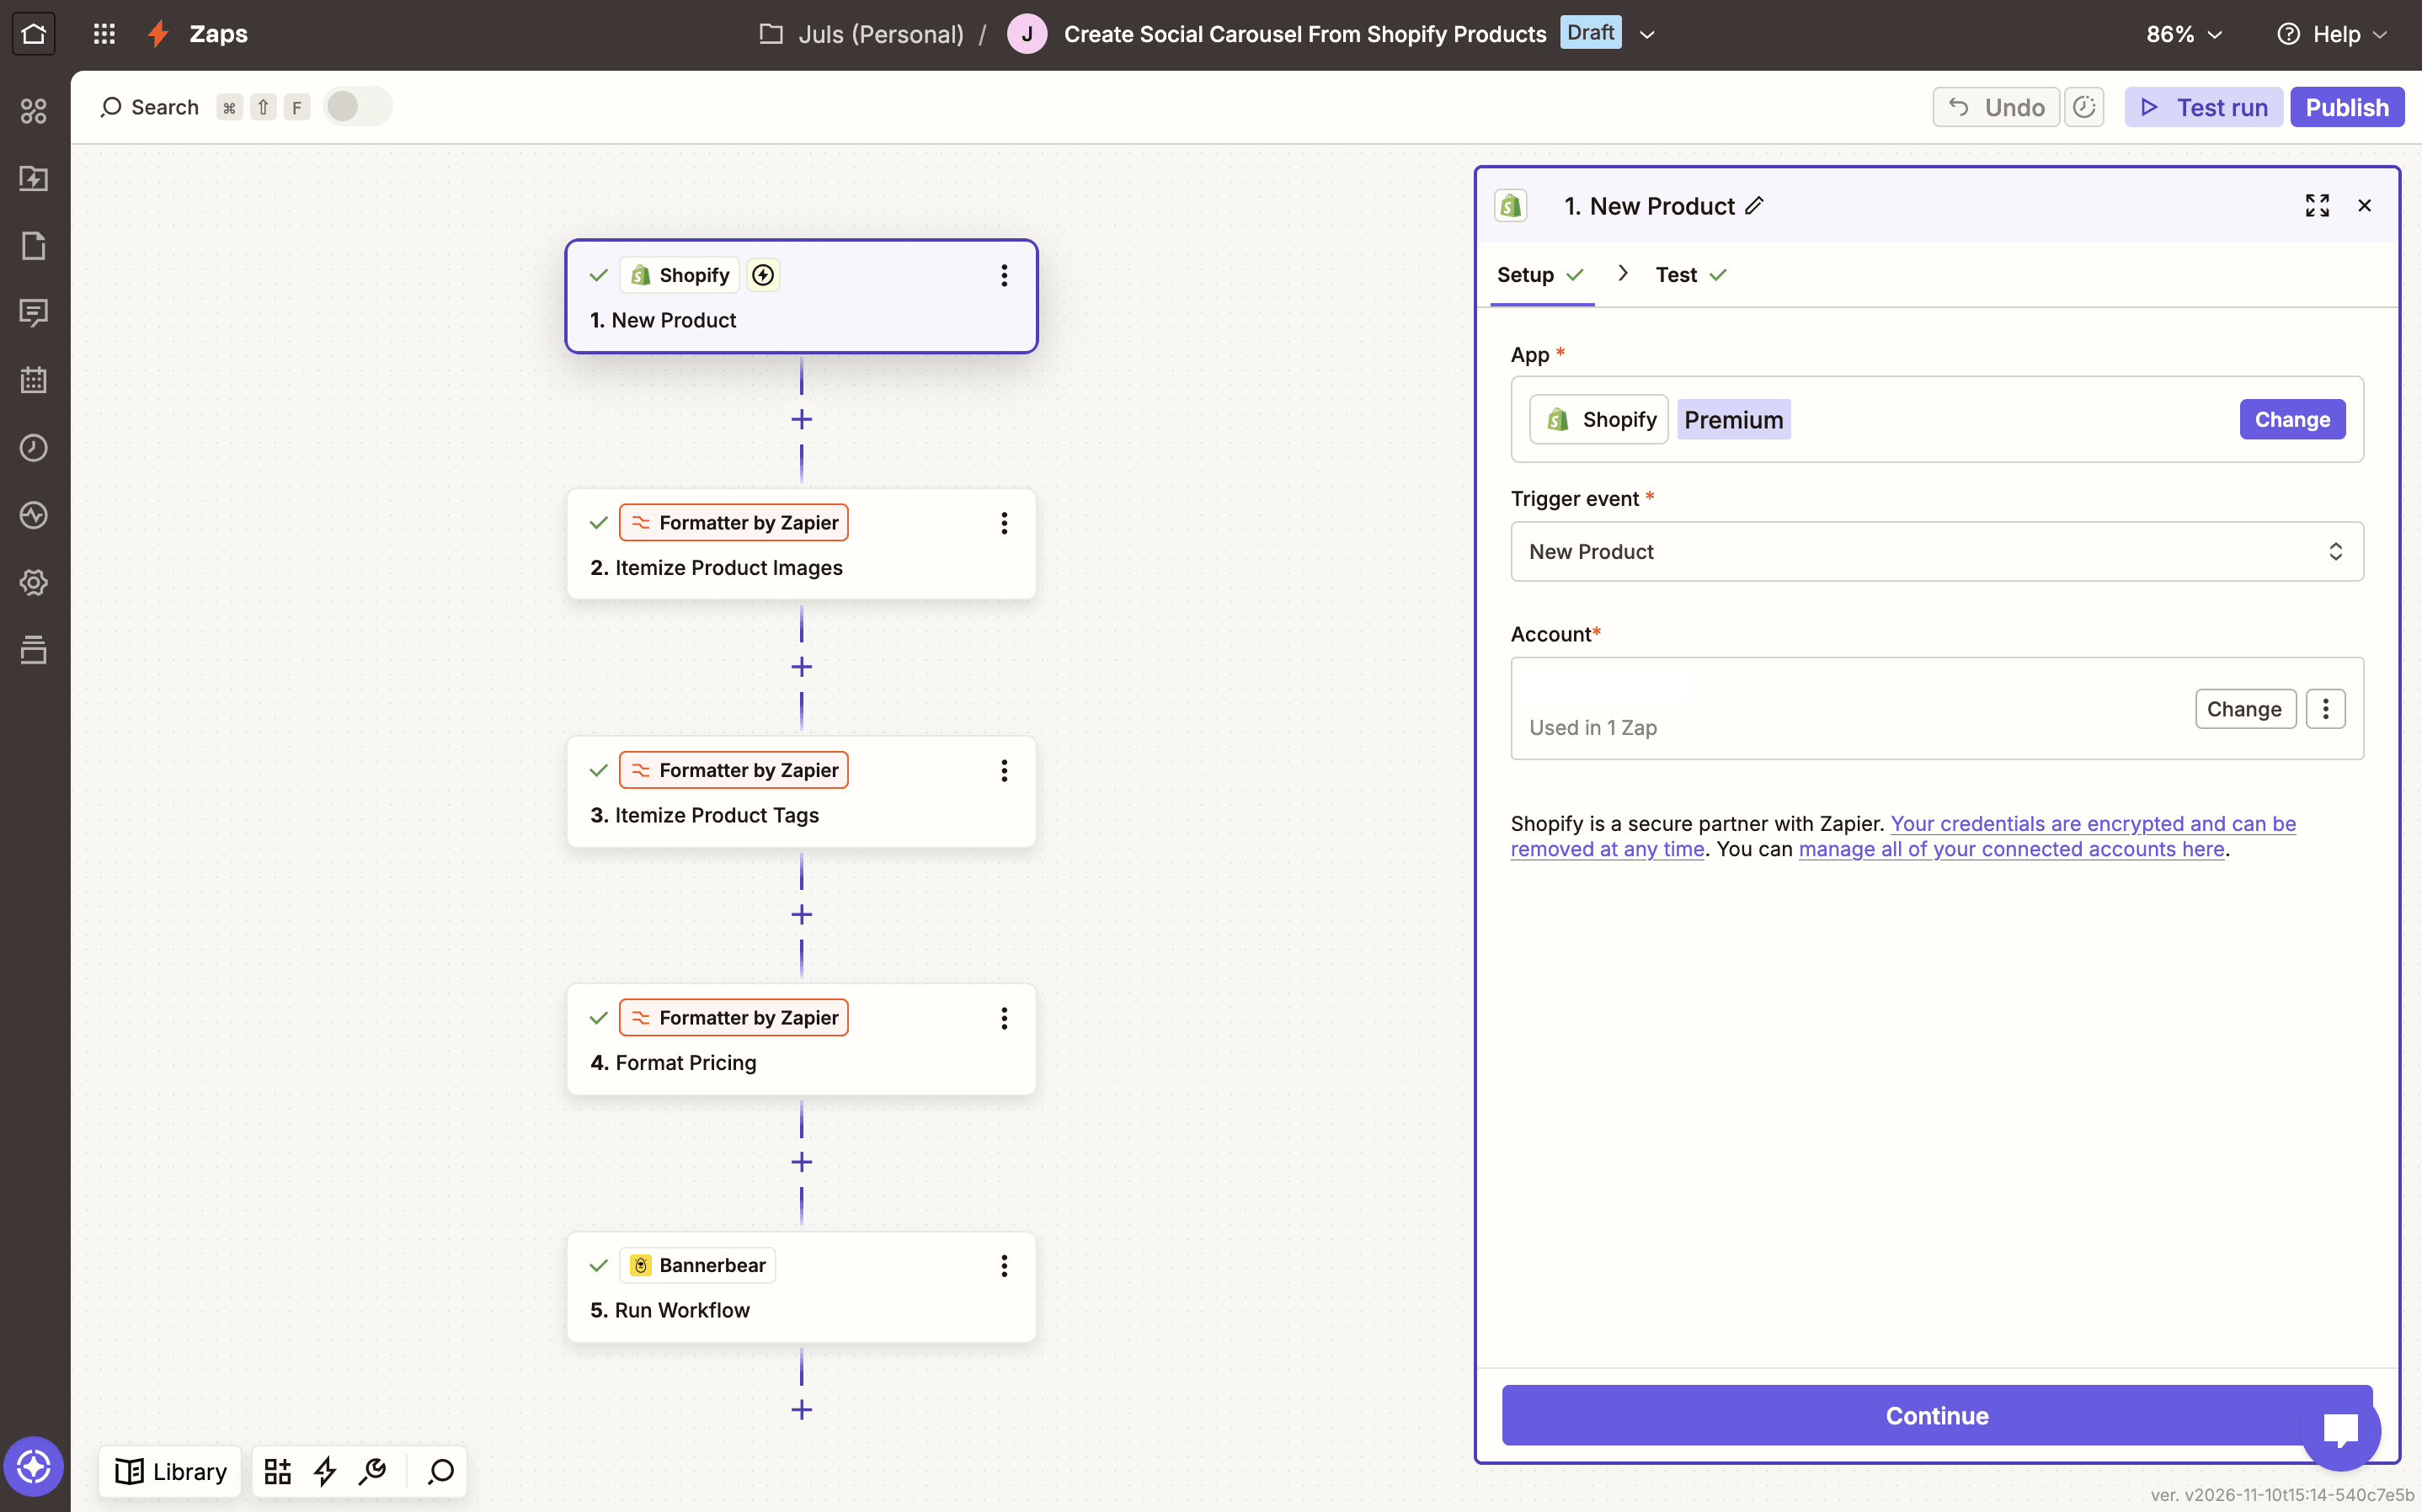
Test the trigger to make sure Zapier can pull a product record complete with all the fields you plan to use.
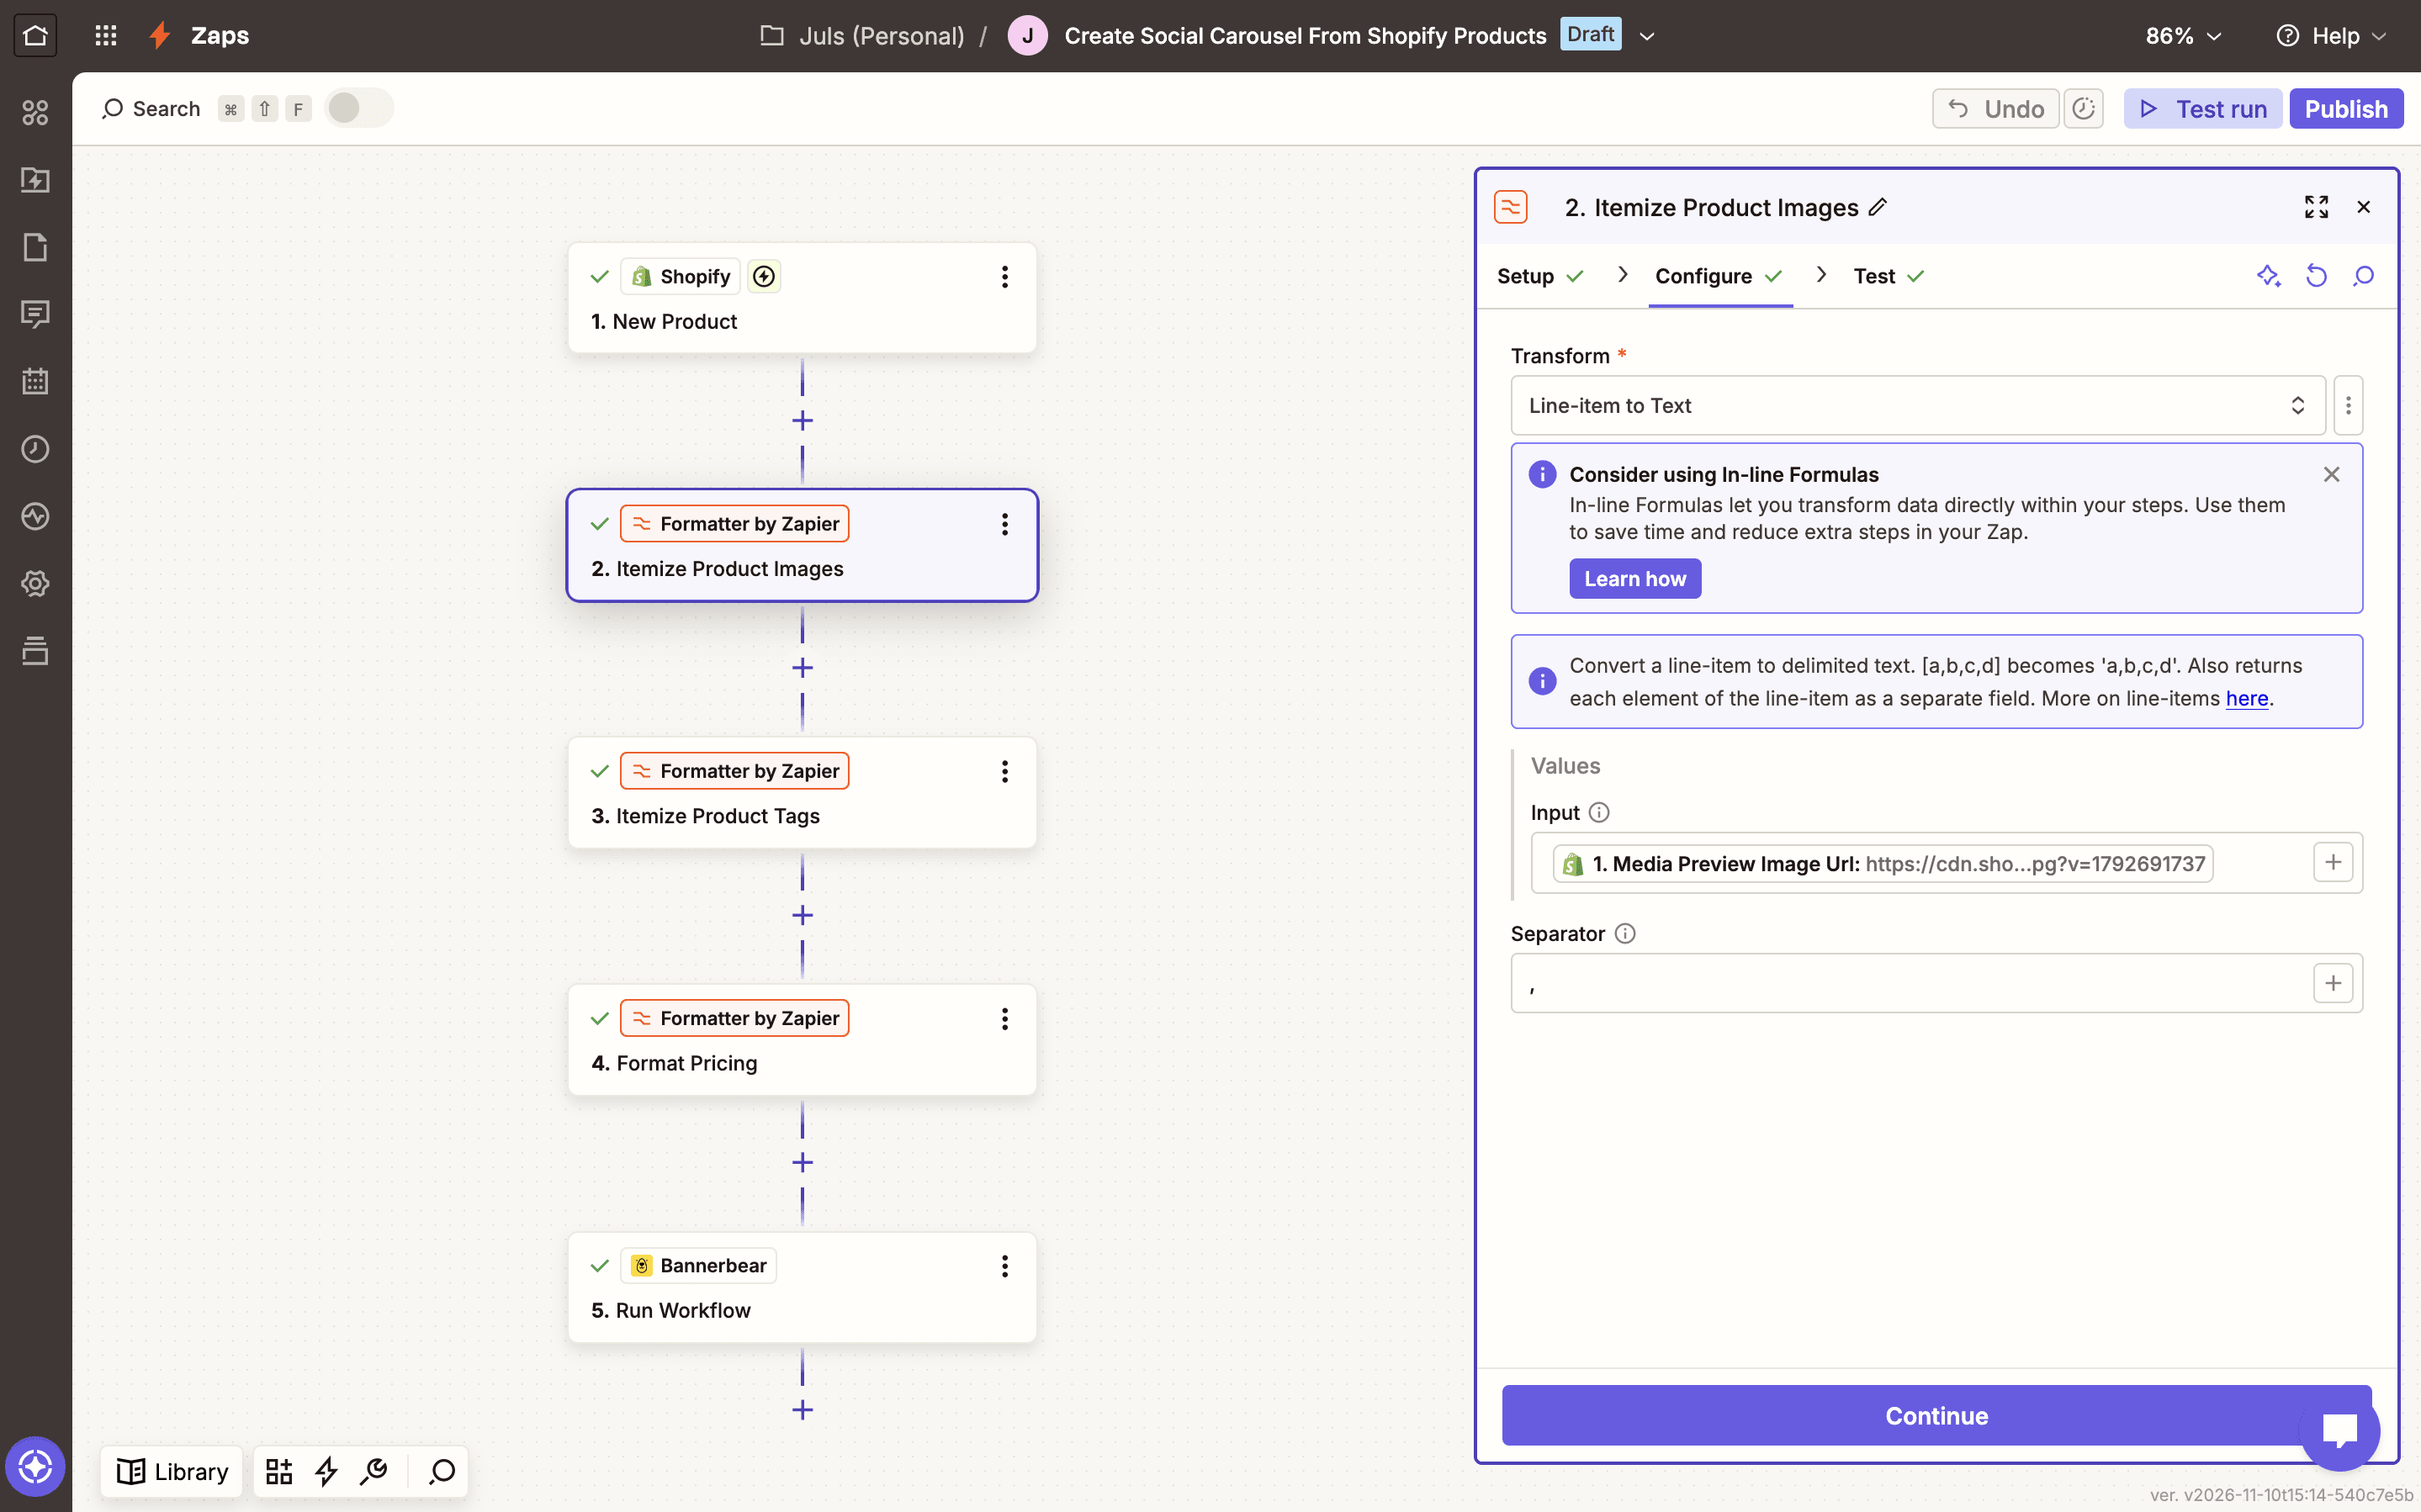
Action: Itemize Product Images with Formatter by Zapier
Since we’re pulling data directly from Shopify, there are a few items that need to be processed before they’re used for generating marketing materials.
Add a Formatter by Zapier step with a Utilities action event.
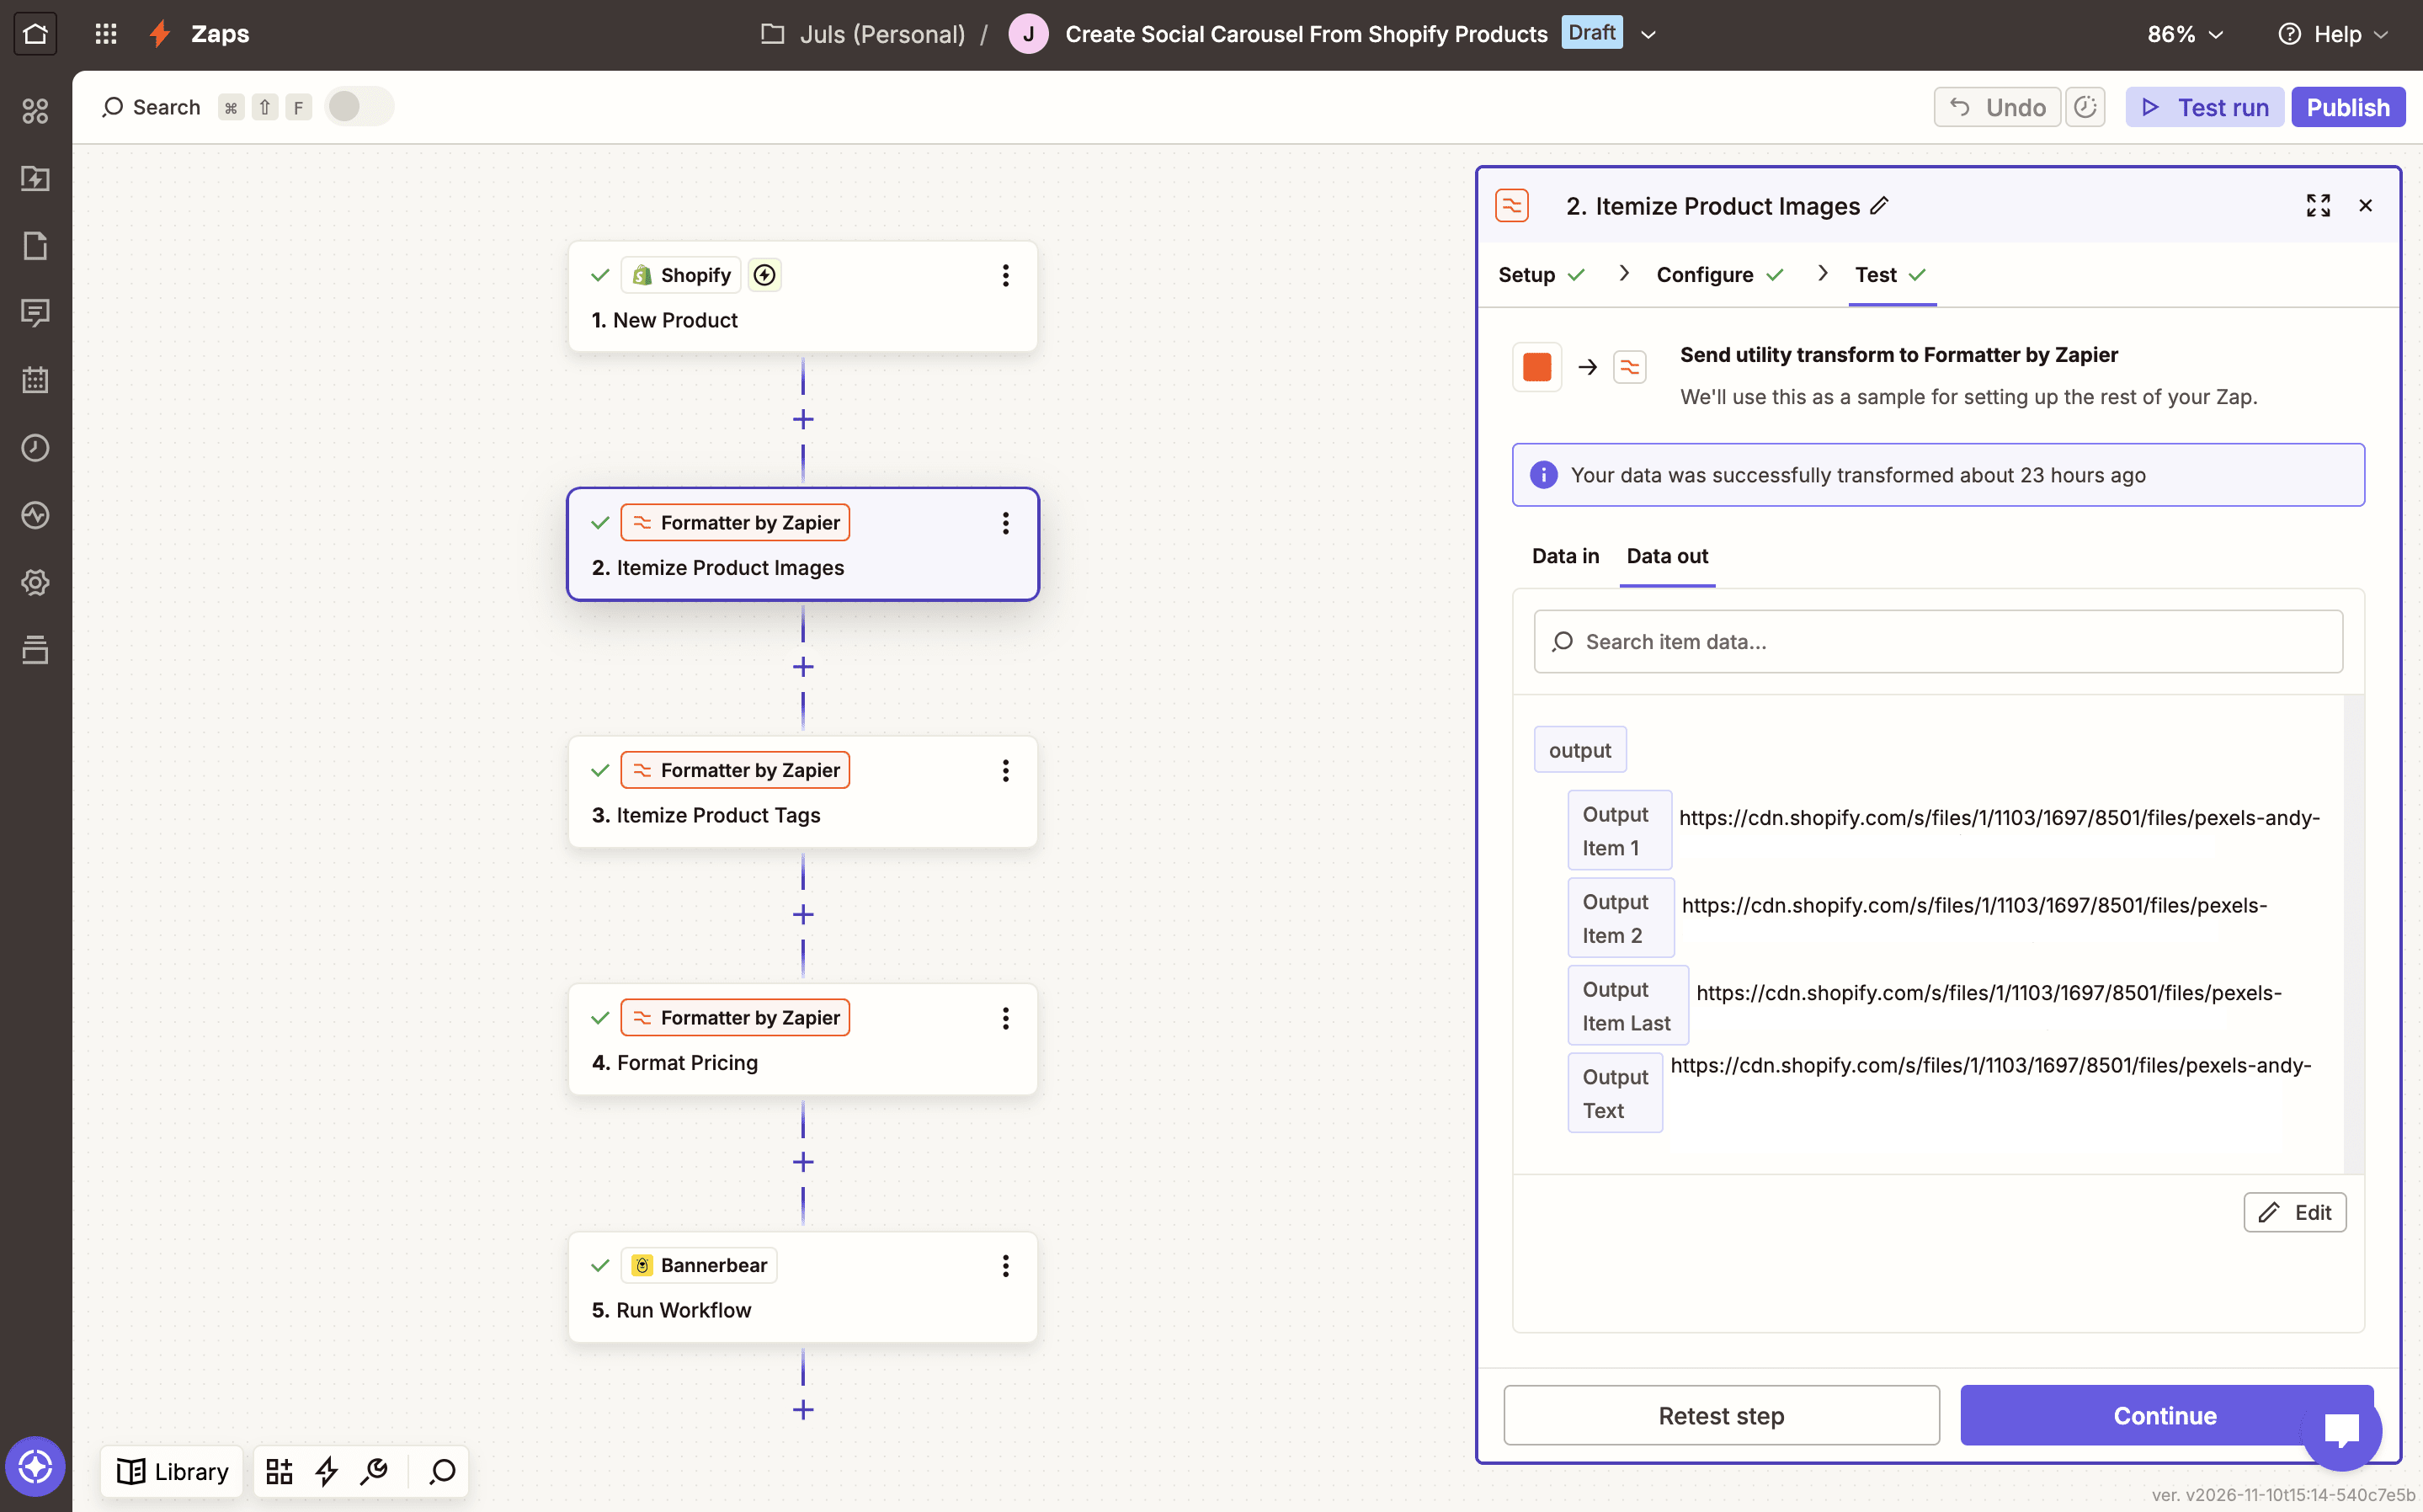
Using the Line-item to Text transform action, use Shopify’s media preview image URLs as input and a comma (,) as the separator.
This will separate the array into individual items that you can map to different fields in your image template.
Bear Tip 🐻: When you have many similar Formatter steps, renaming the events to describe the process more accurately will help you better visualize it.
Action: Itemize Product Tags with Formatter by Zapier
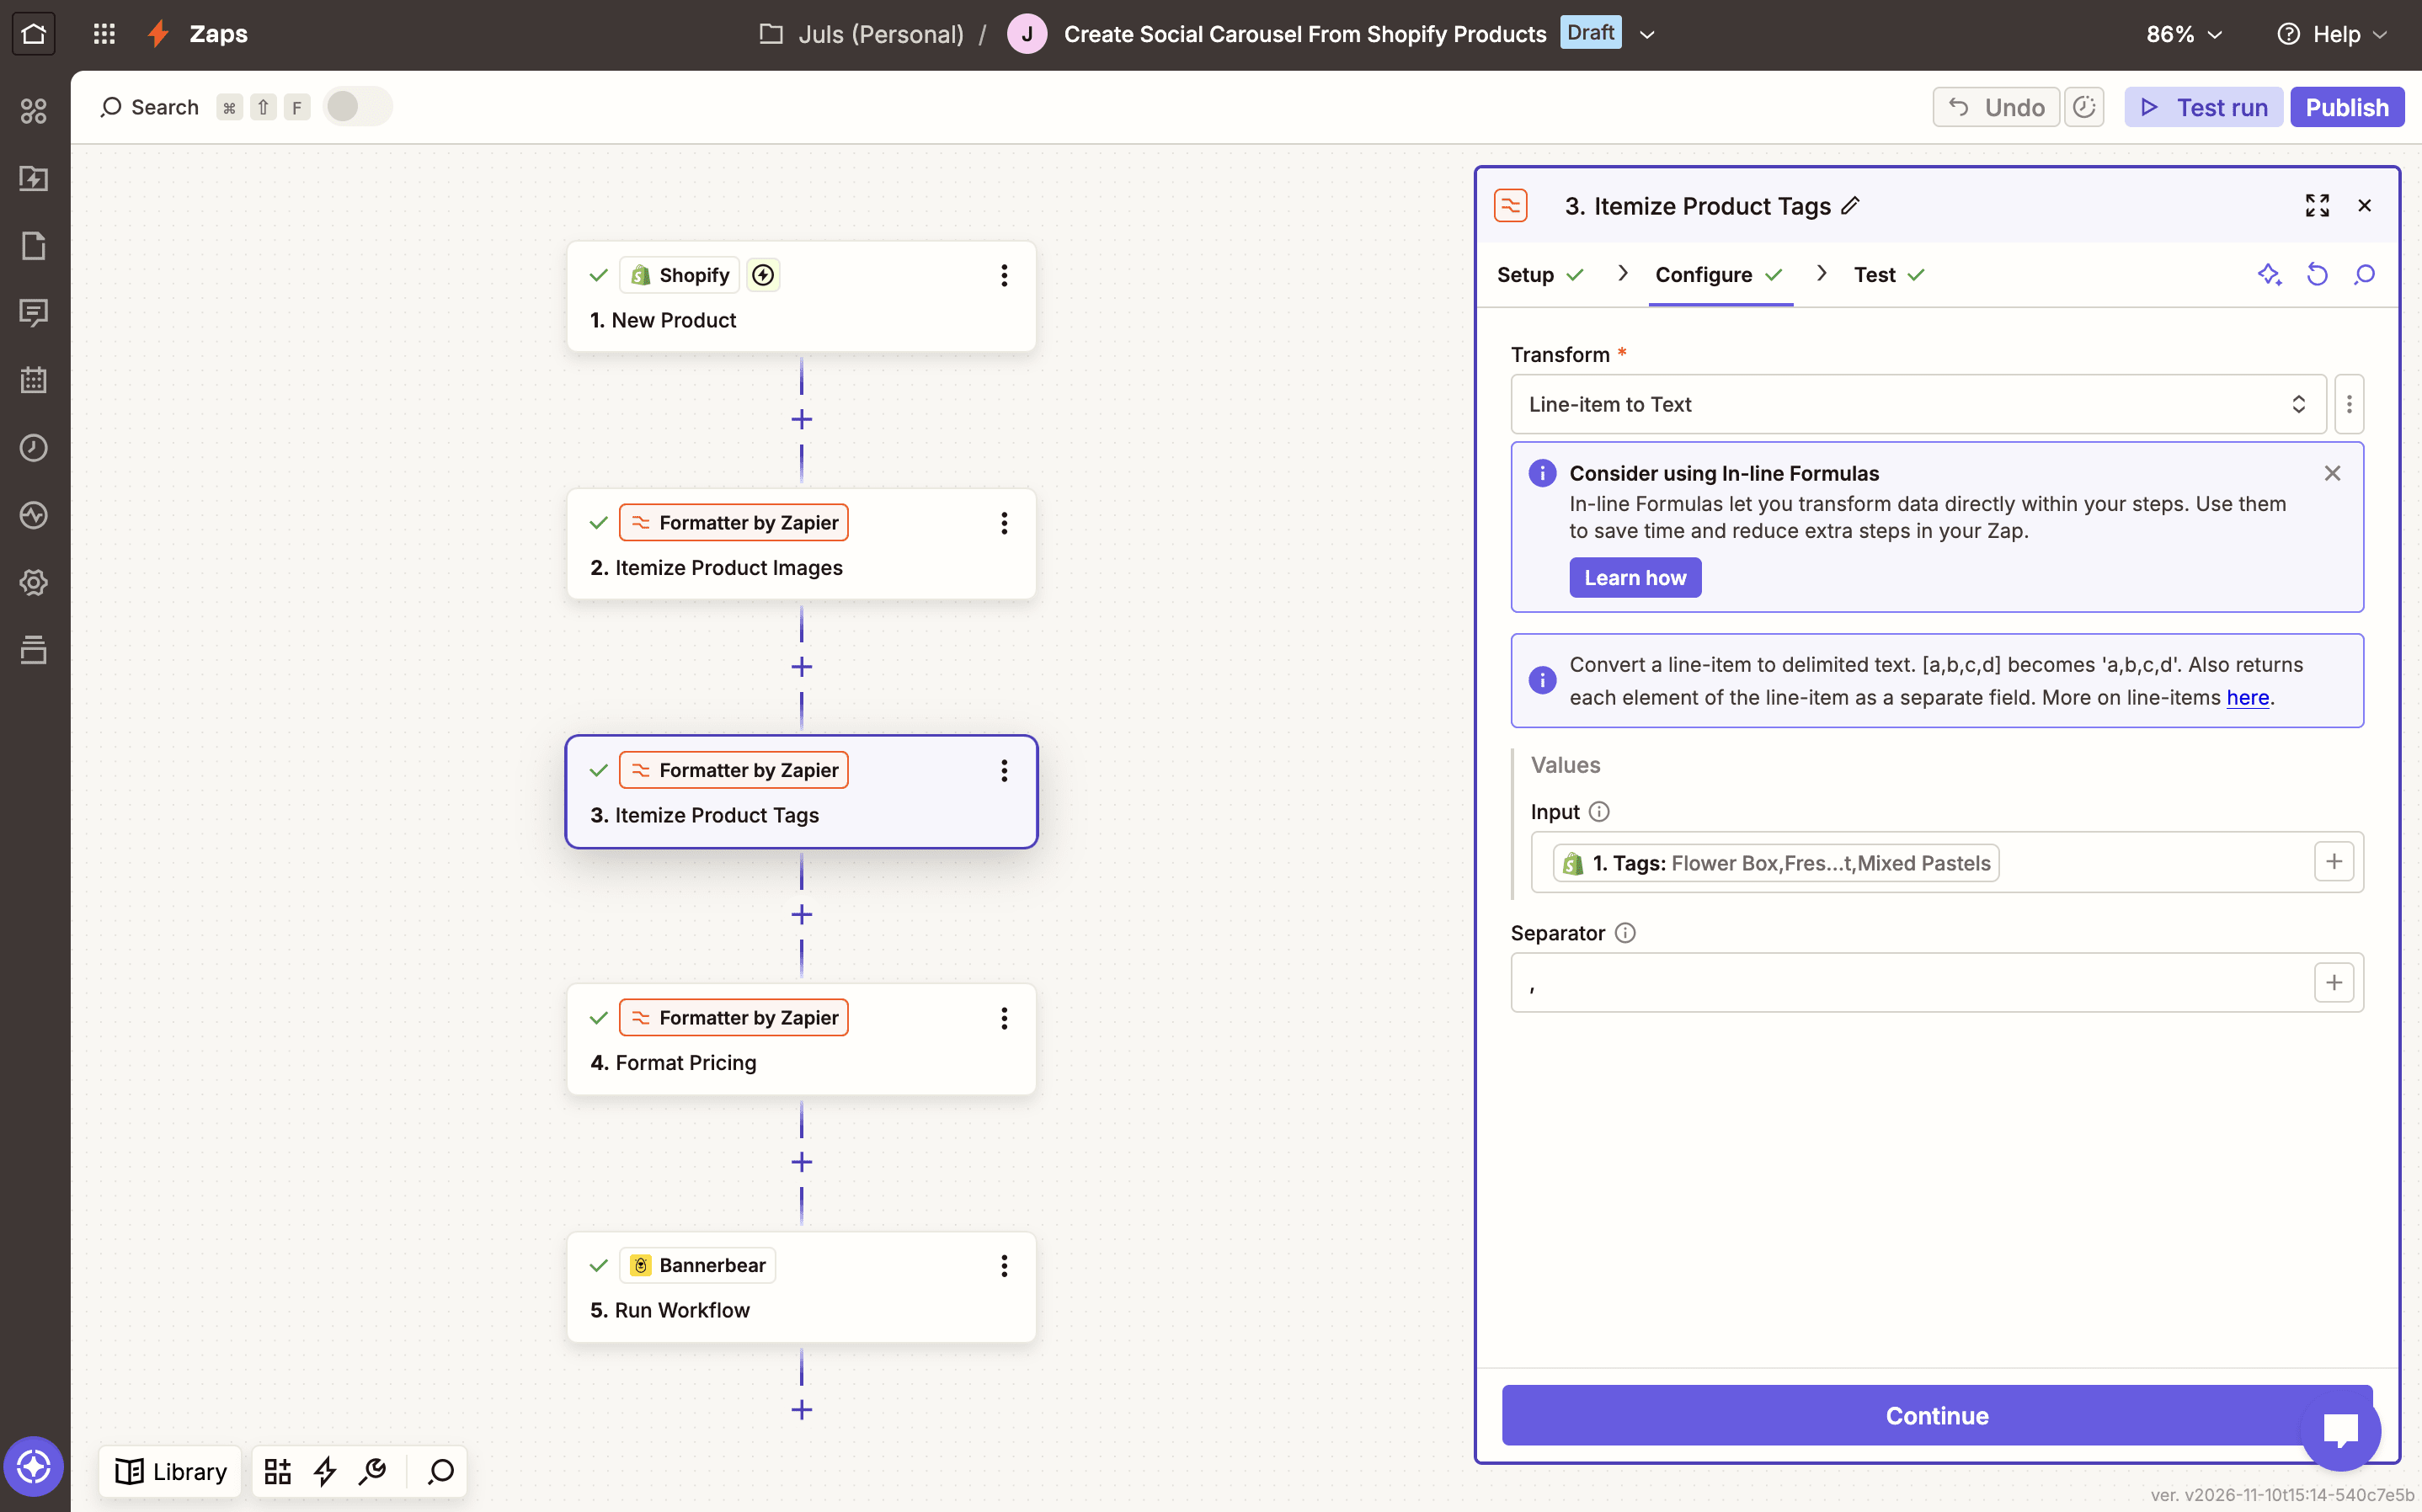
Tags are also presented in an array, so let’s use another formatting step to separate them.
Add another Formatter by Zapier step with a Utilities action event.
Use the Line-item to Text transform, and insert Shopify’s tags as the input. The comma (,) will be the separator.
Action: Format Pricing with Formatter by Zapier
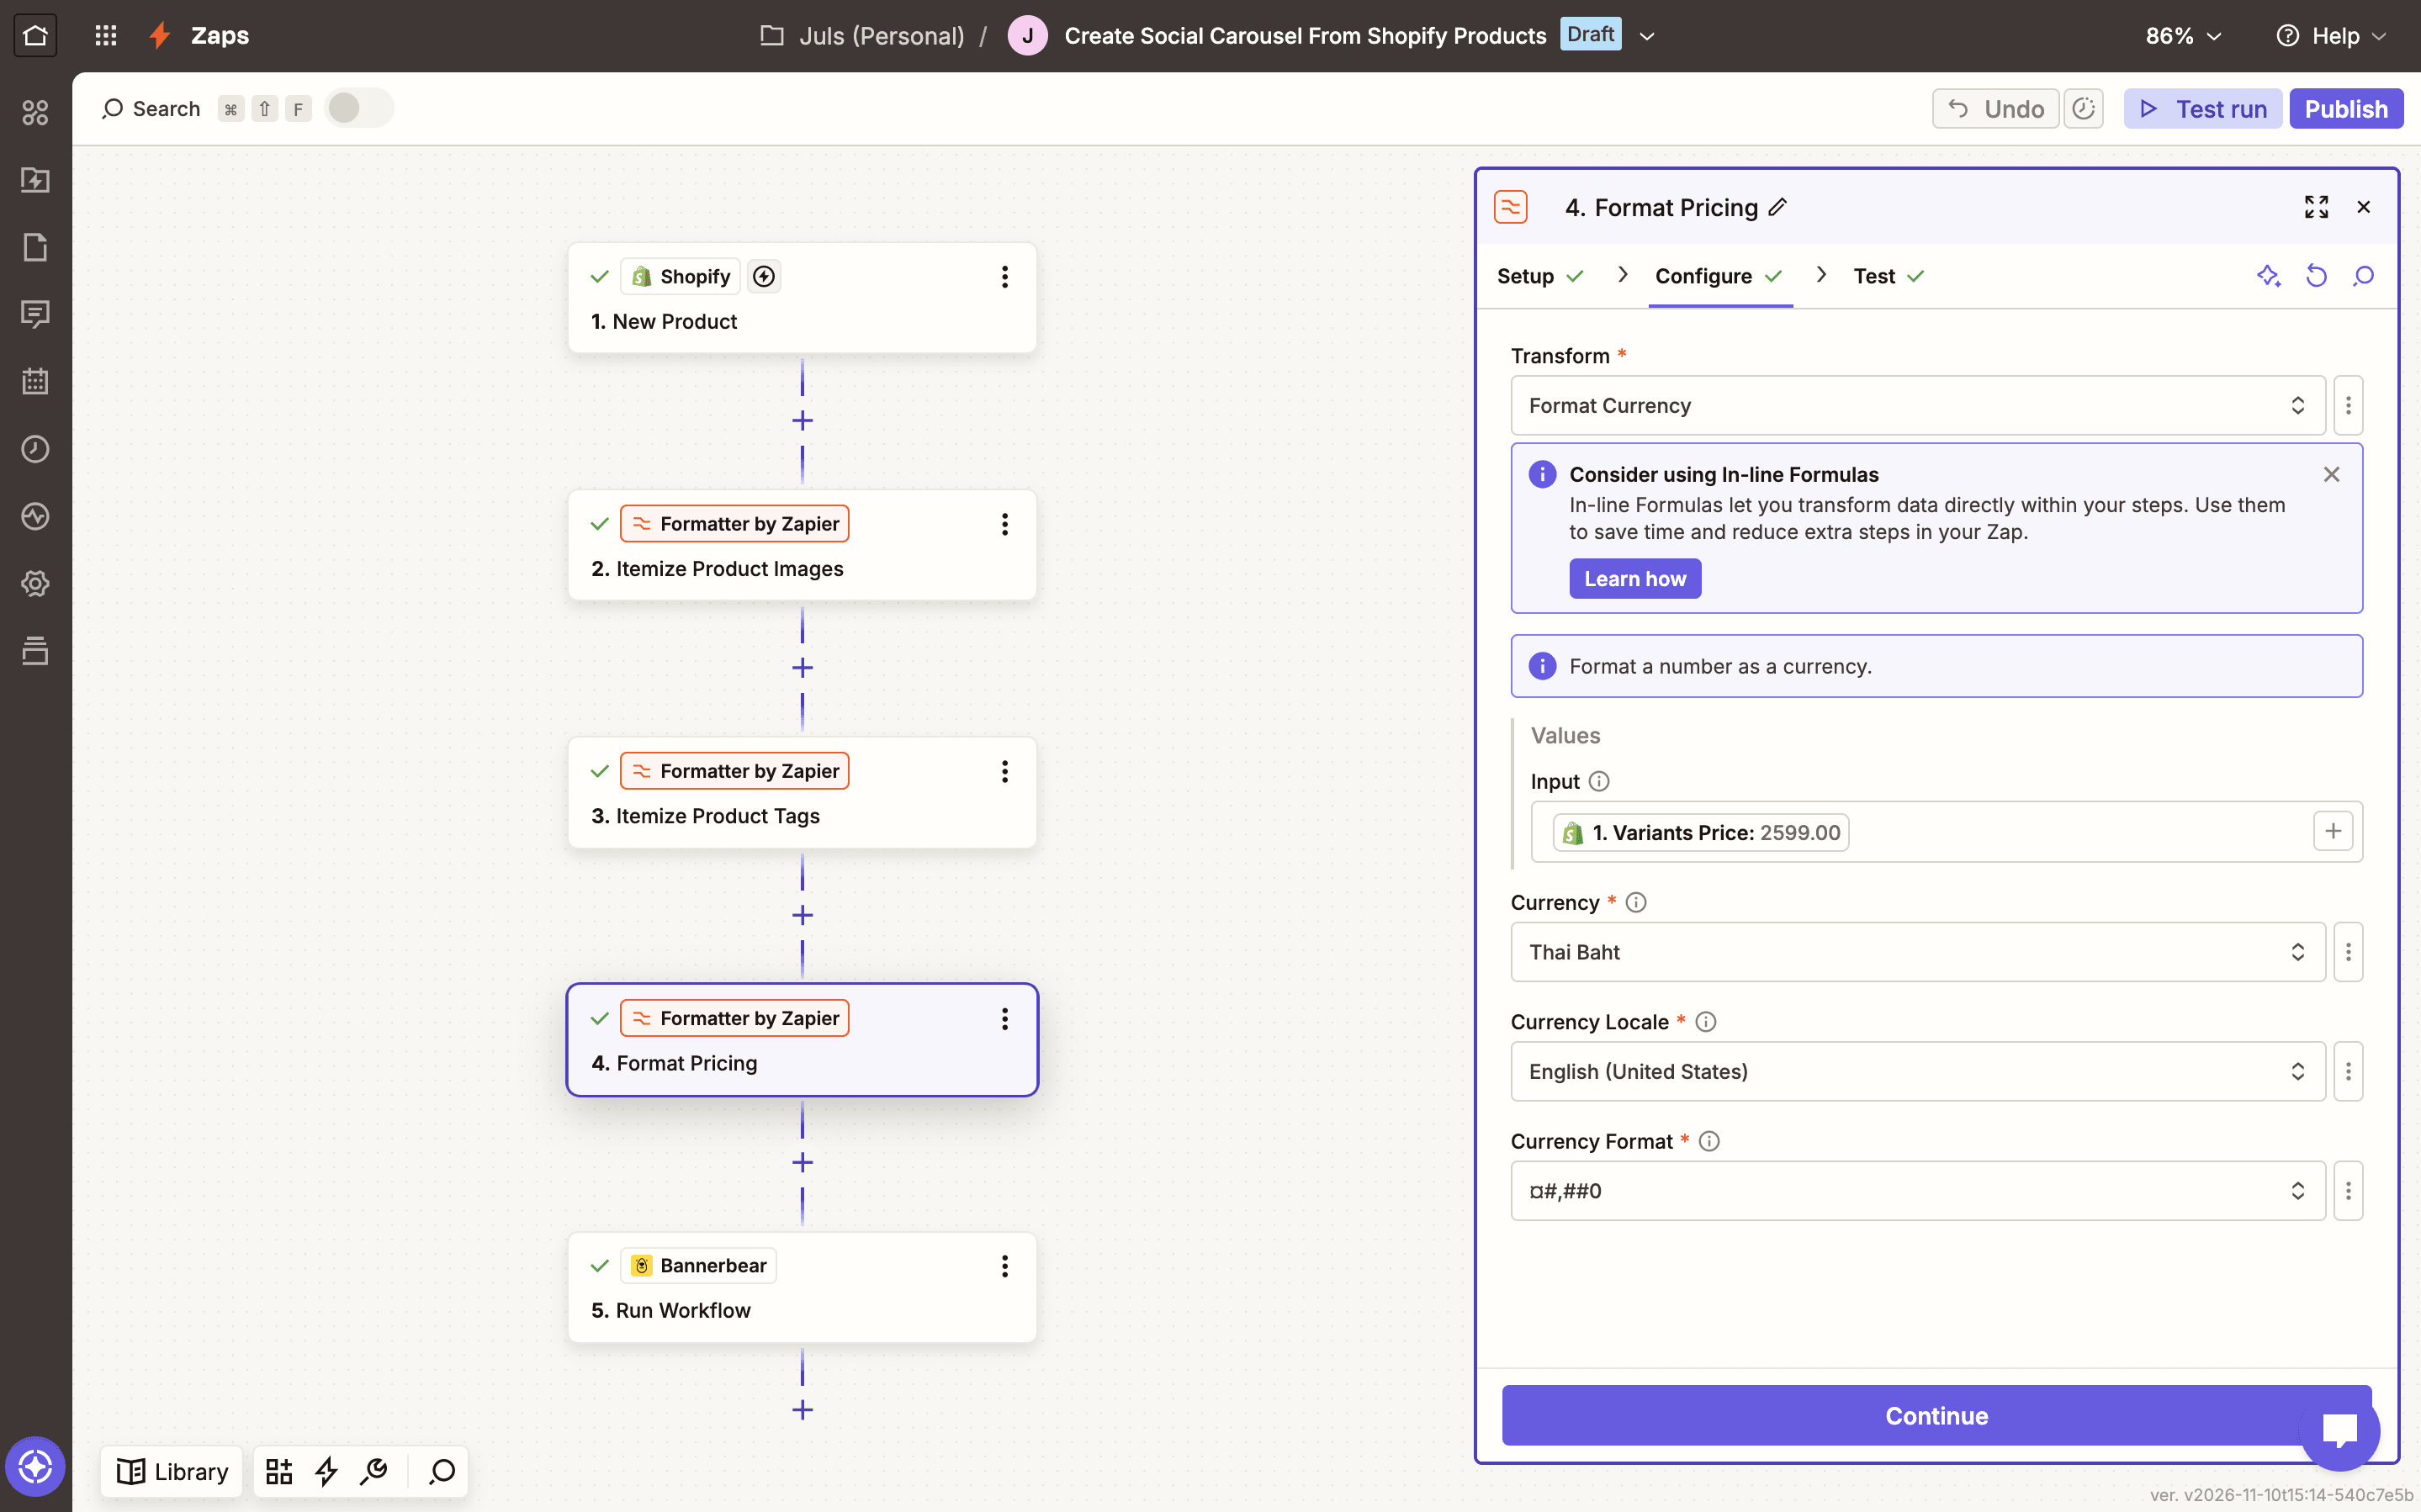
Next, let’s clean up the pricing. Add a Formatter by Zapier step with a Numbers action event. Use Format Currency as the transform type.
Put the pricing into the input field, and select a currency and format.
Action: Run Workflow in Bannerbear
Now that all the data is in the correct forms, the last thing we have left to do is kick off the workflow.
Add a Bannerbear action and select Run Workflow. Connect your account with an API key if you haven’t yet.
Select your workflow, then map each data point to its matching Bannerbear input field. Some will come from your previous formatting steps, and others will come straight from Shopify.
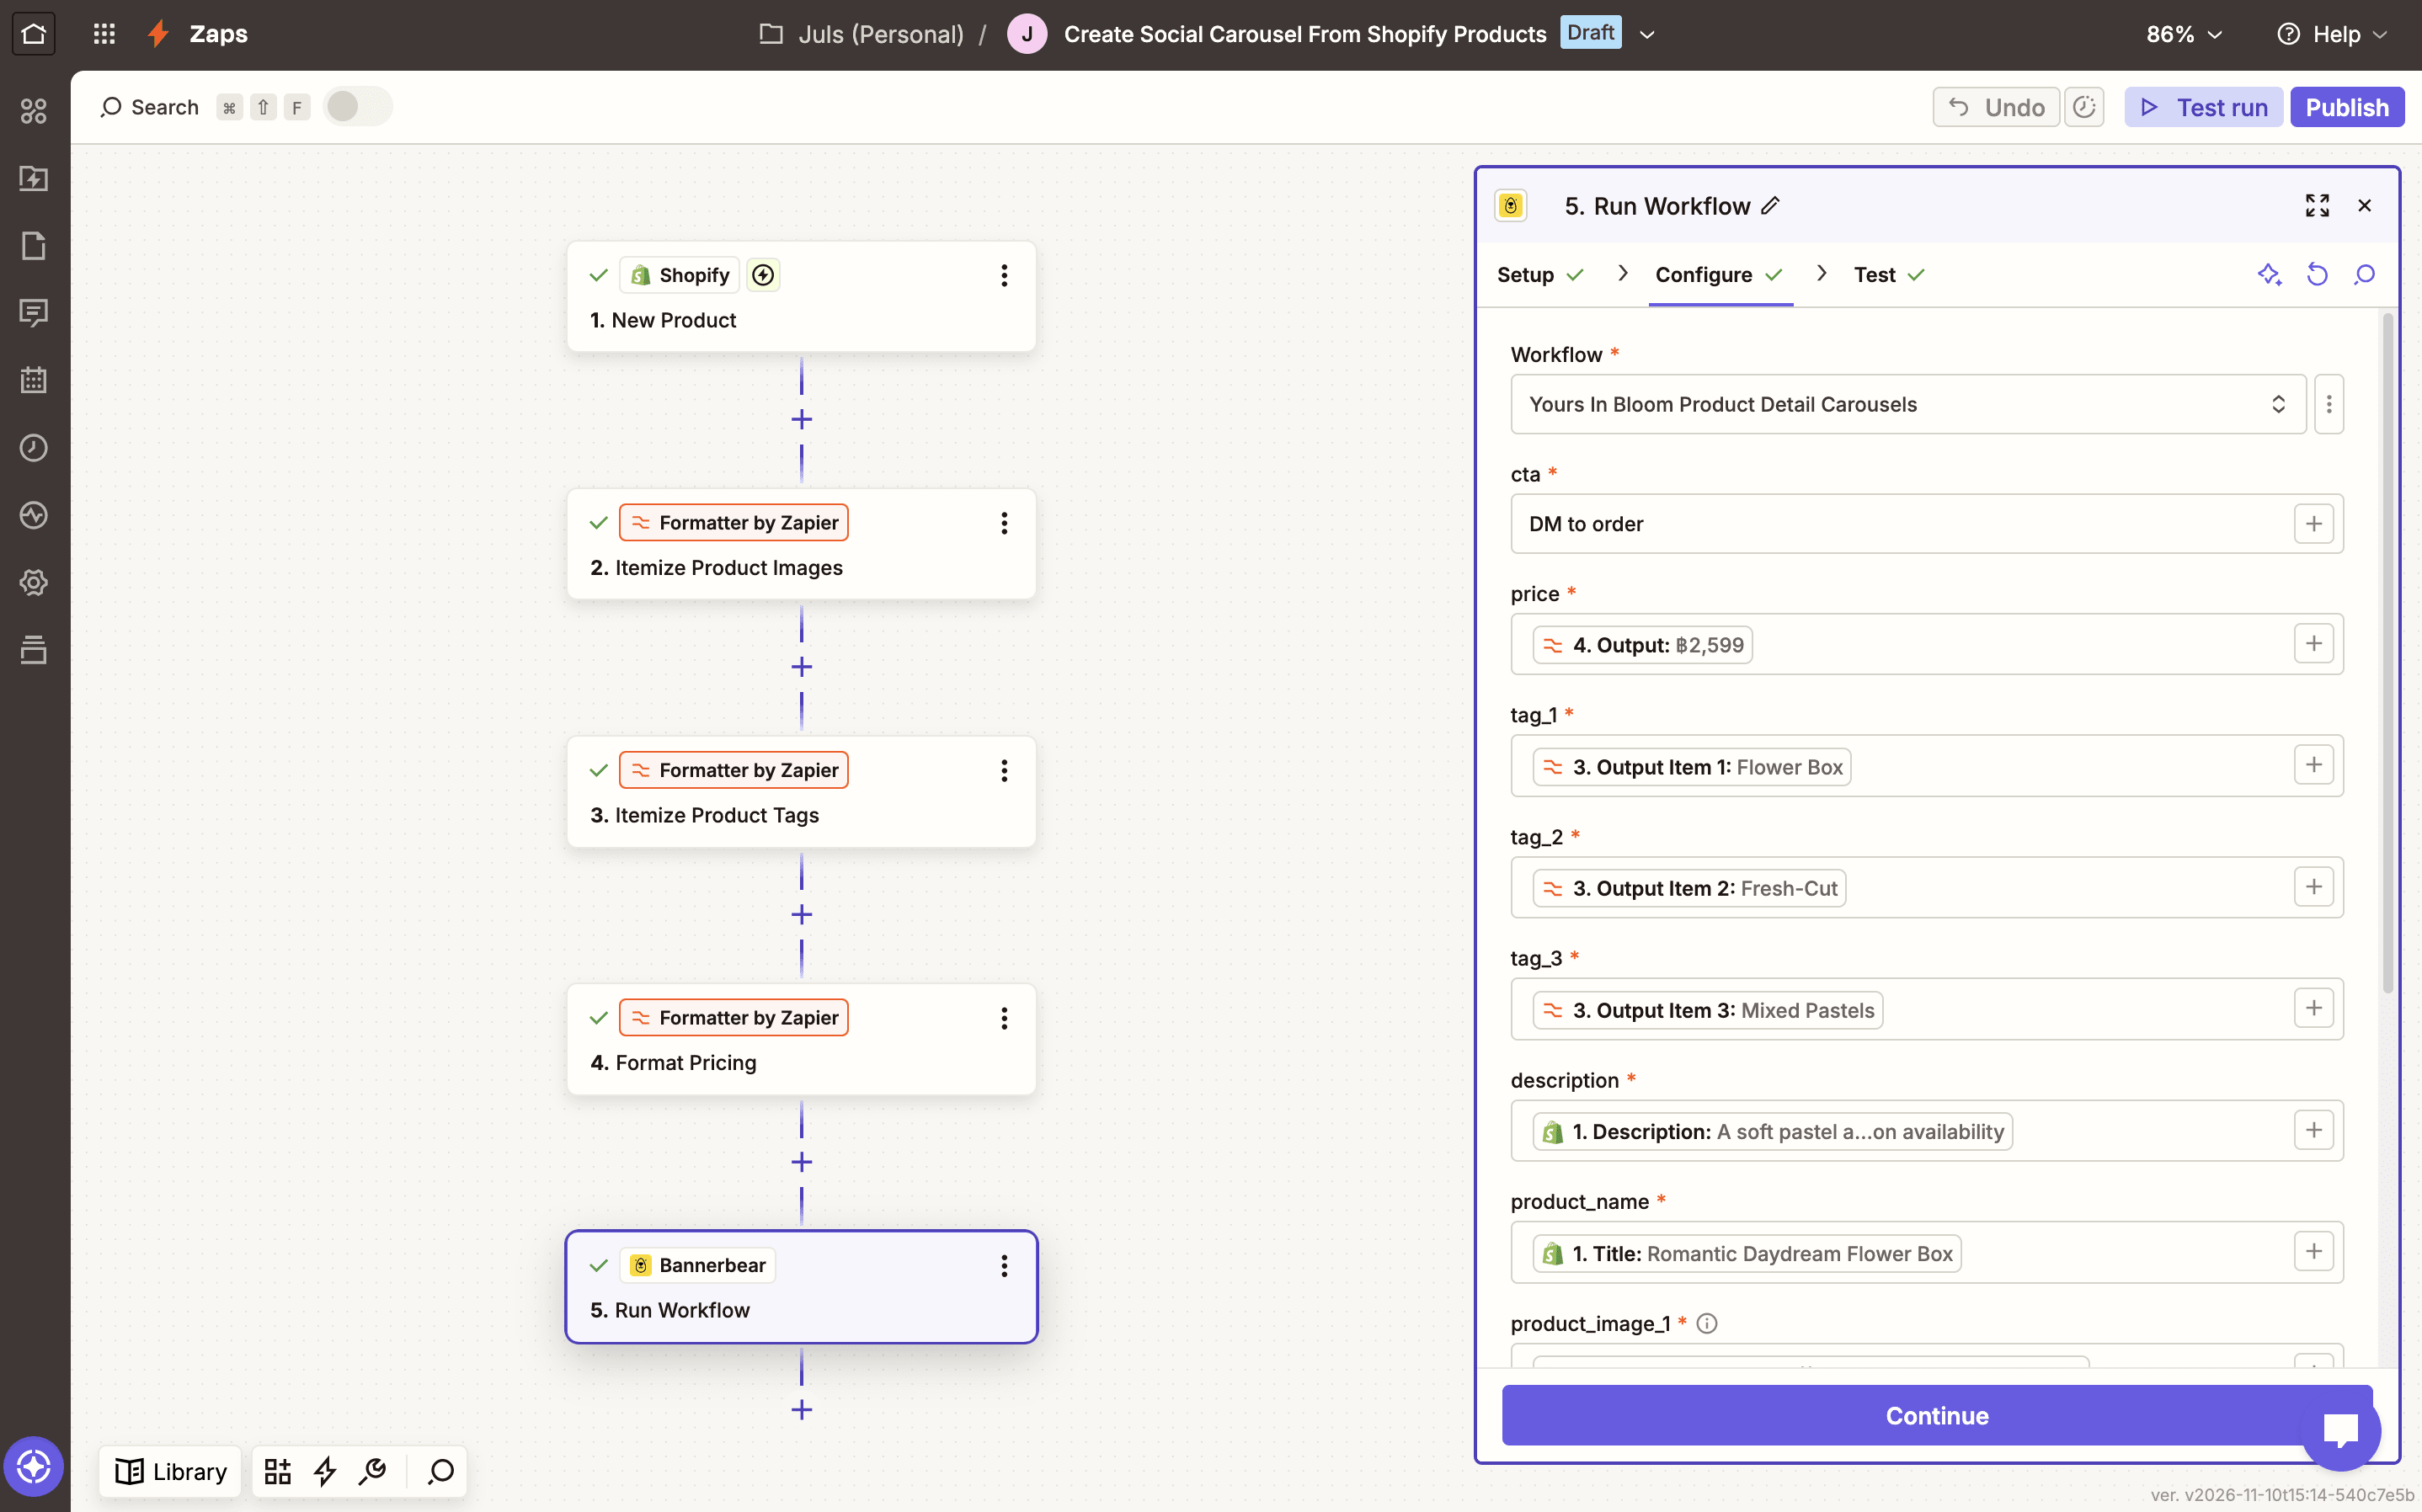
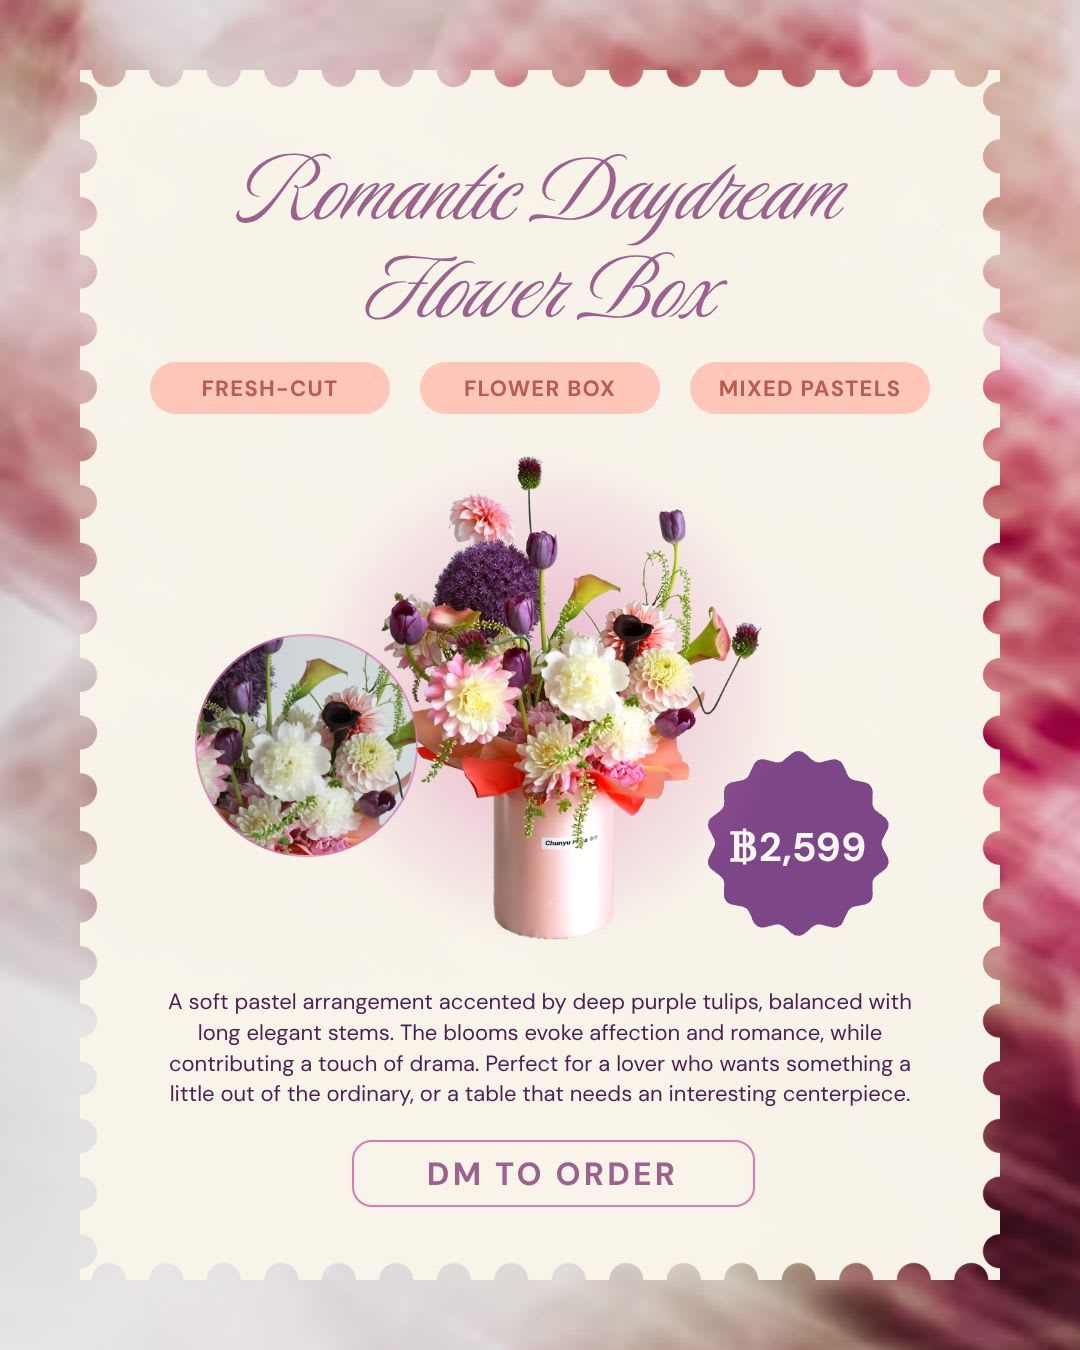
Test and check your logs to see the output. You should see a set of product carousel images, ready for publishing!

Conclusion
Automating the process of social carousel creation turns each new Shopify product into ready-to-post marketing assets without adding hours to your to-do list. Once your Bannerbear templates and Zapier workflow are in place, you’ll get consistent, on-brand images with AI background removal every time you add a product.
As you add to your e-commerce product portfolio, tweak templates and workflow inputs to learn what performs best. When you’ve cracked the code, sit back and let the system scale your content creation!