Use Workflows to overlay an animation onto a video as a picture-in-picture, using an Animation template and the Overlay Video tool. For this example, we'll use the "Blue Yellow Simple Lower Thirds" template from our Template Library.
Workflow
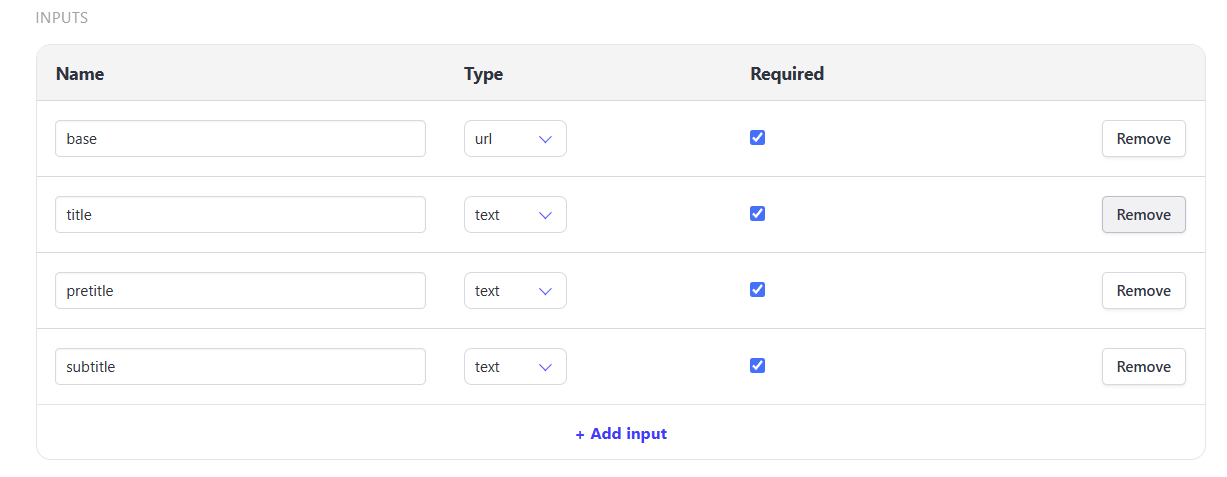
With a fresh Workflow, add your inputs in the Inputs section. These are the values for your workflow's declared inputs, keyed by name. Each input contains the following:
- name - used as references in your workflows and API requests
- type - the type of input you're supplying
text(string)url(web url)number(integer)boolean(true/false)
- required - determines whether a run must supply this input
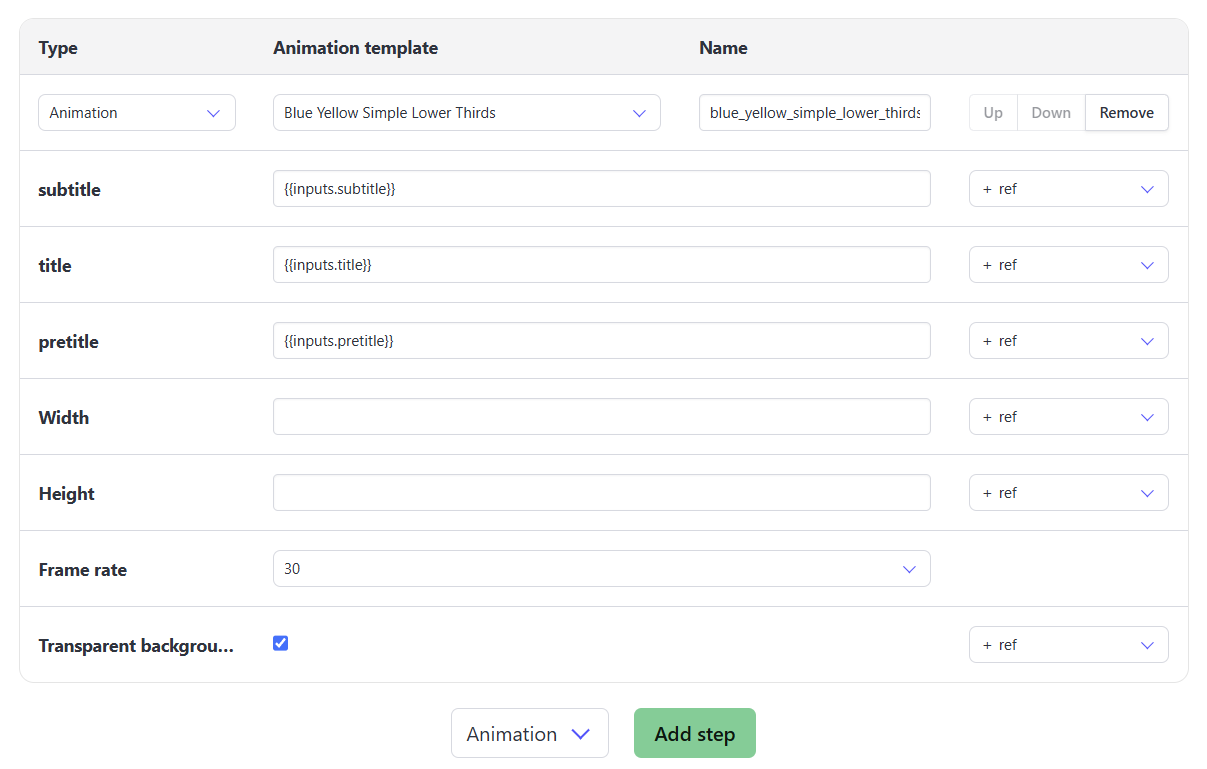
Add an Animation step and select your Animation Template from the drop-down menu. Use the + ref button to select the appropriate references (your inputs in this case).
** Important ** Select the Transparent background check-box to ensure your animation has a transparent background.
Add a Tool step and select Video Overlay. Use the + ref drop menu to reference your Base video input {{inputs.<name>}} (the url input for the video we're layer onto), and the Overlay video output {{steps.<key>.<output>}} for the animation.
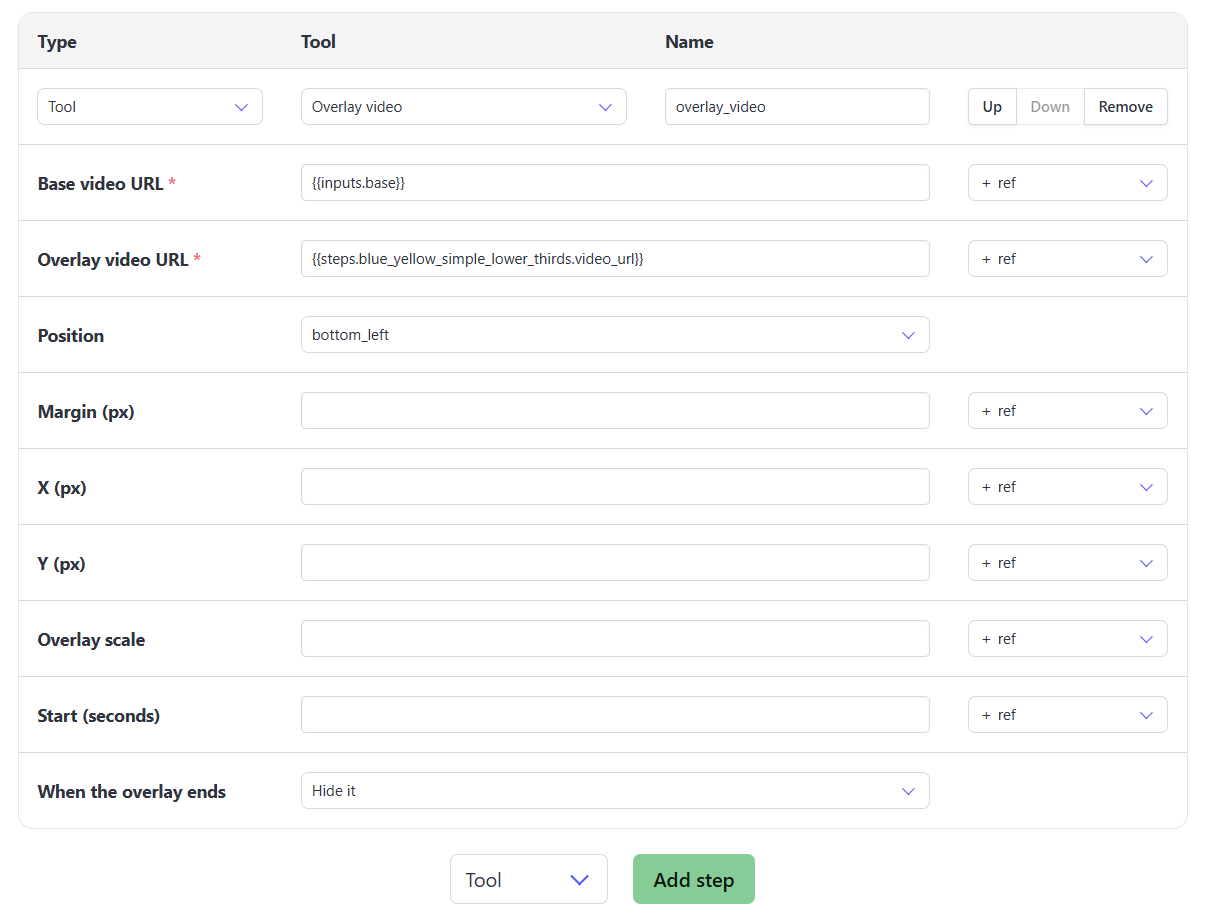
Note: The Position presets and X/Y options must not be used together. Use either, not both.
API Workflow Run
Send a POST request to the /v5/workflow_runs endpoint, along with your workflow UID and a list of declared "inputs": {"input1", "input2"}. May also be sent as a bare top-level object instead of nested under input.
var data = {
  "workflow": "VymBYa7gMjW6JQ2njM",
  "inputs": {
    "video_url": "https://cdn.bannerbear.com/sample_videos/clip.mp4",
    "title_text": "New Arrival"
  }
}
fetch('https://api.bannerbear.com/v5/workflow_runs', {
  method: 'POST',
  body: JSON.stringify(data),
  headers: {
    'Content-Type' : 'application/json',
    'Authorization' : `Bearer ${API_KEY}`
  }
})
Note: Workflows can be created via the API as well. See Create a Workflow for more.

